How To Install RabbitMQ on Debian 12

In this tutorial, we will show you how to install RabbitMQ on Debian 12. RabbitMQ, a widely used open-source message-broker software, has gained significant popularity due to its reliability, scalability, and versatility in handling messaging queues. It plays a crucial role in distributed systems, enabling efficient communication between applications and services.
This article assumes you have at least basic knowledge of Linux, know how to use the shell, and most importantly, you host your site on your own VPS. The installation is quite simple and assumes you are running in the root account, if not you may need to add ‘sudo‘ to the commands to get root privileges. I will show you the step-by-step installation of the RabbitMQ on Debian 12 (Bookworm).
Prerequisites
Before proceeding with the installation of RabbitMQ on Debian 12, ensure you meet the following requirements:
- A server running one of the following operating systems: Debian 12 (Bookworm).
- It’s recommended that you use a fresh OS install to prevent any potential issues.
- SSH access to the server (or just open Terminal if you’re on a desktop).
- An active internet connection. You’ll need an internet connection to download the necessary packages and dependencies.
- A user account with sudo privileges to execute administrative commands.
Install RabbitMQ on Debian 12 Bookworm
Step 1. Before diving into the installation process, ensure that your Debian 12 system meets the necessary requirements. Update your system packages to their latest versions by running:
sudo apt update
sudo apt upgrade
Next, install the required dependencies, including socat and logrotate:
sudo apt install socat logrotate
Step 2. Installing Erlang.
RabbitMQ relies on Erlang, a programming language and runtime environment. To install Erlang, add the Erlang apt repository to your system:
wget -O- https://packages.erlang-solutions.com/debian/erlang_solutions.asc | sudo apt-key add -
echo "deb https://packages.erlang-solutions.com/debian $(lsb_release -cs) contrib" | sudo tee /etc/apt/sources.list.d/erlang.list
Then, update the apt package index and install the latest supported Erlang version:
sudo apt update
sudo apt install erlang
Step 3. Installing RabbitMQ on Debian 12.
With the prerequisites in place, you can now proceed to install the RabbitMQ server. Start by adding the RabbitMQ apt repository to your system. Import the RabbitMQ signing key:
wget -O- https://github.com/rabbitmq/signing-keys/releases/download/3.0/rabbitmq-release-signing-key.asc | sudo apt-key add -
Add the RabbitMQ apt repository to your sources list:
echo "deb https://dl.bintray.com/rabbitmq-erlang/debian $(lsb_release -cs) main" | sudo tee /etc/apt/sources.list.d/bintray.rabbitmq.list
Update the apt package index once again:
sudo apt update
Now, install the rabbitmq-server package:
sudo apt install rabbitmq-server
After the installation completes, start the RabbitMQ service and enable it to start automatically on system boot:
sudo systemctl start rabbitmq-server
sudo systemctl enable rabbitmq-server
To verify that RabbitMQ is running correctly, check the service status:
sudo systemctl status rabbitmq-server
You can also confirm that RabbitMQ is listening on the default port (5672) using the following command:
ss -antpl | grep 5672
Step 4. Configure RabbitMQ.
RabbitMQ’s configuration file is located at /etc/rabbitmq/rabbitmq.conf. This file allows you to customize various settings, such as listeners, TLS configuration, resource limits, and more.
To configure listeners, you can specify the IP address and port on which RabbitMQ should listen. For example:
listeners.tcp.default = 5672
If you want to enable secure connections using TLS, you need to configure the appropriate SSL options and provide the necessary certificate and key files.
Adjusting resource limits, such as the maximum number of open file descriptors and the maximum number of processes, can be done through the configuration file as well.
Additionally, you can set memory and disk space limits to prevent RabbitMQ from consuming excessive resources. For example:
vm_memory_high_watermark.relative = 0.7
disk_free_limit.relative = 1.0
Make sure to restart the RabbitMQ service after making any changes to the configuration file:
sudo systemctl restart rabbitmq-server
RabbitMQ logs can be viewed by accessing the log files located in the /var/log/rabbitmq/ directory.
To enable plugins, use the rabbitmq-plugins command followed by the plugin name. For example:
sudo rabbitmq-plugins enable rabbitmq_management
Step 5. Create Admin User.
Creating an admin user is essential for managing RabbitMQ through the management web UI and performing administrative tasks. To add a new admin user, use the rabbitmqctl command:
sudo rabbitmqctl add_user admin password
Replace “admin” with your desired username and “password” with a strong password. Next, tag the user as an administrator:
sudo rabbitmqctl set_user_tags admin administrator
Finally, set the appropriate permissions for the admin user:
sudo rabbitmqctl set_permissions -p / admin ".*" ".*" ".*"
This grants the admin user full permissions to all virtual hosts and resources.
Step 6. Enable RabbitMQ Management Web UI.
The RabbitMQ Management Web UI provides a user-friendly interface for monitoring and managing RabbitMQ. To enable the rabbitmq_management plugin, run:
sudo rabbitmq-plugins enable rabbitmq_management
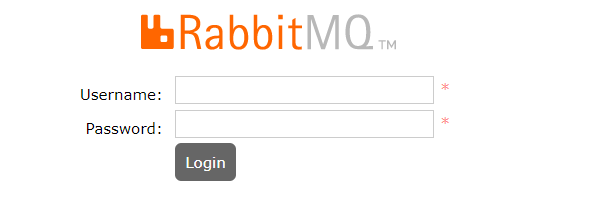
Once enabled, you can access the management UI by navigating to http://your-server-ip:15672/ in your web browser. Log in using the admin user credentials you created earlier.

Congratulations! You have successfully installed RabbitMQ. Thanks for using this tutorial to install the latest version of the RabbitMQ on Debian 12 Bookworm. For additional help or useful information, we recommend you check the official RabbitMQ website.