How To Install RabbitMQ on Ubuntu 24.04 LTS

RabbitMQ, a powerful open-source message broker, plays a crucial role in building robust and scalable distributed systems. Its ability to handle high volumes of messages and facilitate communication between various components makes it an essential tool for developers and system administrators alike. In this comprehensive guide, we will walk you through the step-by-step process of installing RabbitMQ on Ubuntu 24.04, enabling you to leverage its capabilities in your projects.
Prerequisites
Before diving into the installation process, ensure that you have the following prerequisites in place:
- A freshly provisioned Ubuntu 24.04 server.
- A non-root user account with sudo privileges for executing administrative tasks.
- Basic familiarity with the command-line interface.
Step 1: Update the System
To begin, it’s crucial to update your Ubuntu system to the latest stable release. This ensures that you have access to the most recent security patches, bug fixes, and software versions. Open your terminal and execute the following commands:
sudo apt update
sudo apt upgrade -y
The apt update command refreshes the package lists, while apt upgrade -y installs the available updates without prompting for confirmation.
Step 2: Install Erlang
RabbitMQ is built on top of the Erlang programming language, making it a necessary dependency. To install Erlang, use the following command:
sudo apt install -y erlangThis command installs Erlang and its associated libraries. Once the installation is complete, you can verify the Erlang version by running:
erl -versionStep 3: Install RabbitMQ Server
With Erlang installed, you can now proceed to install the RabbitMQ server. First, add the RabbitMQ APT repository to your system to ensure you have access to the latest version. Execute the following commands:
curl -fsSL https://github.com/rabbitmq/signing-keys/releases/download/2.0/rabbitmq-release-signing-key.asc | sudo apt-key add -
sudo apt-add-repository "deb https://dl.bintray.com/rabbitmq-erlang/debian $(lsb_release -sc) erlang"
sudo apt-add-repository "deb https://dl.bintray.com/rabbitmq/debian $(lsb_release -sc) main"
Next, update the package lists and install the RabbitMQ server:
sudo apt update
sudo apt install rabbitmq-server -y
After the installation is completed, check the status of the RabbitMQ service:
sudo systemctl status rabbitmq-serverIf the service is running correctly, you should see an active (running) status.
Step 4: Enable and Start RabbitMQ Service
To ensure that the RabbitMQ service starts automatically on system boot, enable it using the following command:
sudo systemctl enable rabbitmq-serverIf the RabbitMQ service is not already running, start it with:
sudo systemctl start rabbitmq-serverStep 5: Enable RabbitMQ Management Console
The RabbitMQ Management Console provides a user-friendly web interface for monitoring and managing your RabbitMQ server. To enable the management plugin, run:
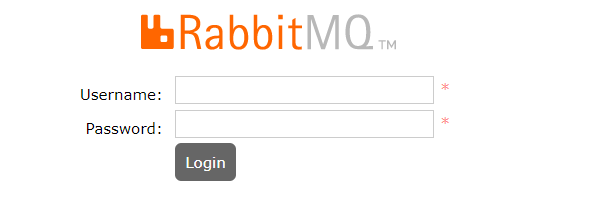
sudo rabbitmq-plugins enable rabbitmq_managementOnce enabled, you can access the management console by opening a web browser and navigating to http://your_server_ip:15672. Use the default credentials (guest/guest) to log in.

Step 6: Configure RabbitMQ User and Permissions
For security reasons, it’s recommended to create a dedicated administrative user with the necessary permissions. Follow these steps to set up a new user:
sudo rabbitmqctl add_user admin StrongPassword
sudo rabbitmqctl set_user_tags admin administrator
sudo rabbitmqctl set_permissions -p / admin ".*" ".*" ".*"
Replace admin with your desired username and StrongPassword with a secure password. The last command grants the user full permissions on the default virtual host.
Step 7: Secure RabbitMQ with SSL
To enhance the security of your RabbitMQ installation, it’s crucial to configure SSL encryption. This ensures that all communication between clients and the RabbitMQ server is encrypted. Follow these steps to enable SSL:
- Generate a private key and a self-signed SSL certificate:
sudo mkdir /etc/rabbitmq/ssl
sudo openssl req -x509 -newkey rsa:4096 -keyout /etc/rabbitmq/ssl/key.pem -out /etc/rabbitmq/ssl/cert.pem -days 365 -nodes- Configure RabbitMQ to use SSL by editing the configuration file:
sudo nano /etc/rabbitmq/rabbitmq.confAdd the following lines to the file:
listeners.ssl.default = 5671
ssl_options.cacertfile = /etc/rabbitmq/ssl/cert.pem
ssl_options.certfile   = /etc/rabbitmq/ssl/cert.pem
ssl_options.keyfile    = /etc/rabbitmq/ssl/key.pem
ssl_options.verify     = verify_peer
ssl_options.fail_if_no_peer_cert = false- Restart the RabbitMQ service to apply the changes:
sudo systemctl restart rabbitmq-serverStep 8: Troubleshooting Common Issues
If you encounter any issues during the installation or configuration process, here are a few troubleshooting tips:
- RabbitMQ service fails to start: Check the RabbitMQ logs located in
/var/log/rabbitmq/for any error messages. Ensure that Erlang is installed correctly and that there are no port conflicts. - Authentication issues: Double-check the username and password you configured for the RabbitMQ user. Ensure that the user has the necessary permissions to access the desired virtual host.
- SSL connection problems: Verify that the SSL certificate and key files are correctly configured in the RabbitMQ configuration file. Check the file permissions and ensure that the RabbitMQ user has read access to the certificate and key files.
Congratulations! You have successfully installed RabbitMQ. Thanks for using this tutorial for installing the RabbitMQ on Ubuntu 24.04 LTS system. For additional help or useful information, we recommend you check the official RabbitMQ website.