How To Install RawTherapee on AlmaLinux 9

RawTherapee is a powerful, open-source photo editing software that has become increasingly popular among photographers using Linux. With its extensive set of tools and features, RawTherapee offers a comprehensive solution for processing and enhancing raw images. AlmaLinux 9, a community-driven, free, and open-source operating system, is an excellent choice for running RawTherapee. In this article, we will guide you through the process of installing RawTherapee on AlmaLinux 9, providing step-by-step instructions, troubleshooting tips, and additional resources to help you get started with this impressive photo editing software.
Understanding RawTherapee
RawTherapee is a cross-platform raw image processing program that focuses on providing a powerful and flexible workflow for photographers. It supports a wide range of raw formats from various camera manufacturers, making it a versatile choice for professionals and enthusiasts alike. Some of the key features of RawTherapee include advanced color management, detailed exposure and color adjustments, noise reduction, and lens correction tools. Compared to other photo editing software like Adobe Lightroom or Darktable, RawTherapee stands out for its extensive customization options and non-destructive editing capabilities.
Prerequisites
Before installing RawTherapee on AlmaLinux 9, ensure that your system meets the following requirements:
- A 64-bit AlmaLinux 9 installation
- At least 4 GB of RAM (8 GB or more recommended)
- Sufficient disk space for the software and your raw images
- A user account with sudo privileges
It is crucial to update your AlmaLinux 9 system before proceeding with the installation to ensure that you have the latest security patches and compatible libraries.
Step-by-Step Installation Guide
Step 1: Updating AlmaLinux 9
Open a terminal and run the following commands to update your AlmaLinux 9 system:
sudo dnf update
sudo dnf upgrade
These commands will ensure that your system packages are up to date, minimizing the risk of compatibility issues during the RawTherapee installation.
Step 2: Installing Required Dependencies
RawTherapee relies on several dependencies to function properly. Install these dependencies by running the following command:
sudo dnf install gtk3 libcanberra-gtk3 libiptcdata liblcms2 libwebp fftw-libs lensfunThis command will install the necessary libraries and packages required by RawTherapee, such as GTK3 for the user interface, libcanberra for audio support, and lensfun for lens correction data.
Step 3: Downloading RawTherapee
You can download the latest version of RawTherapee from the official website or use the AppImage format for a more convenient installation. Visit the RawTherapee download page and download the AppImage file for the latest stable release.
Step 4: Installing RawTherapee Using AppImage
AppImage is a format that allows you to run applications without the need for installation or root privileges. To install RawTherapee using the AppImage, follow these steps:
- Open a terminal and navigate to the directory where you downloaded the RawTherapee AppImage file.
- Make the AppImage file executable by running the following command:
chmod +x RawTherapee-*-x86_64.AppImage- Run the AppImage by executing the following command:
./RawTherapee-*-x86_64.AppImageRawTherapee will now launch, and you can start using it to edit your raw images.
Step 5: Alternative Installation via Compilation
If you prefer to compile RawTherapee from source, follow these steps:
- Install the necessary build dependencies:
sudo dnf install git cmake gcc-c++ gtkmm30-devel libcanberra-devel libiptcdata-devel lcms2-devel libwebp-devel fftw-devel lensfun-devel- Clone the RawTherapee repository:
git clone https://github.com/Beep6581/RawTherapee.git- Navigate to the cloned directory and create a build folder:
cd RawTherapee
mkdir build
cd build- Run CMake to configure the build:
cmake ..- Compile RawTherapee:
make -j$(nproc)- Install the compiled binary:
sudo make installCompiling from source allows you to have the latest development version of RawTherapee, but it may be less stable than the official releases. It also requires more time and technical knowledge compared to using the AppImage.
Post-Installation Steps
After installing RawTherapee on AlmaLinux 9, you can launch the application from the command line by typing rawtherapee or by searching for it in your application launcher. Upon first launch, RawTherapee will guide you through a basic configuration wizard, where you can set your preferences for the user interface, color management, and default processing settings.
If you encounter any issues during the installation or while running RawTherapee, consult the official documentation and community forums for troubleshooting tips and solutions. Common problems may include missing dependencies, incompatible libraries, or outdated graphics drivers.
Using RawTherapee
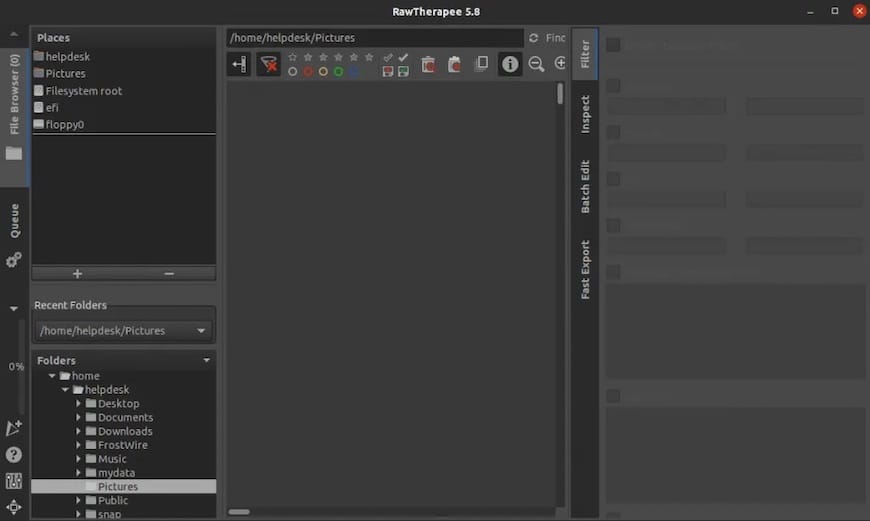
RawTherapee’s user interface may seem daunting at first, but it is well-organized and highly customizable. The main window is divided into several sections, including the file browser, the preview area, and the editing panels. To get started, import your raw images into RawTherapee’s file browser, and then select an image to begin editing.

Some of the key tools and features to explore in RawTherapee include:
- Exposure and color adjustments
- Noise reduction and sharpening
- Lens correction and perspective control
- Color management and ICC profile support
- Batch processing and non-destructive editing
As a beginner, start by experimenting with the basic exposure and color settings, and gradually work your way up to more advanced techniques. RawTherapee’s extensive documentation and online tutorials are excellent resources for learning how to make the most of this powerful software.
Congratulations! You have successfully installed RawTherapee. Thanks for using this tutorial for installing the RawTherapee on your AlmaLinux 9 system. For additional help or useful information, we recommend you check the official RawTherapee website.