How To Install ReactJS on CentOS Stream 10

ReactJS has become an indispensable tool for modern web development, offering a powerful and flexible framework for building dynamic user interfaces. In this comprehensive guide, we’ll walk you through the process of installing ReactJS on CentOS Stream 10, providing you with the knowledge and tools necessary to kickstart your React development journey on this robust Linux distribution.
ReactJS, developed and maintained by Facebook, has revolutionized the way developers create interactive and efficient user interfaces. Its component-based architecture and virtual DOM implementation have made it a go-to choice for building scalable and high-performance web applications. CentOS Stream 10, the latest version of the community-driven enterprise operating system, provides a stable and secure environment for hosting React applications.
In this tutorial, we’ll cover everything from setting up the necessary prerequisites to creating and running your first React application on CentOS Stream 10. Whether you’re a seasoned developer or just starting with React, this guide will equip you with the knowledge to get up and running quickly.
Prerequisites
Before we dive into the installation process, let’s ensure your system meets the necessary requirements and is properly configured for React development.
System Requirements
- CentOS Stream 10 installed and updated
- Root or sudo privileges
- Terminal access
- Minimum 2GB RAM (4GB recommended for optimal performance)
- At least 5GB of free disk space
Base System Setup
First, let’s update your CentOS Stream 10 system and install the necessary development tools:
sudo dnf update -y
sudo dnf groupinstall "Development Tools" -y
sudo dnf install wget -y
These commands will ensure your system is up-to-date and has the required tools for compiling and installing software packages.
Installing Node.js and npm
ReactJS relies on Node.js and npm (Node Package Manager) for its development environment. Let’s install these essential components on your CentOS Stream 10 system.
Node.js Installation
We’ll use the NodeSource repository to install Node.js, as it provides the latest stable version:
curl -sL https://rpm.nodesource.com/setup_20.x | sudo bash -
sudo dnf install -y nodejs
After the installation is complete, verify the Node.js version:
node --version
npm Configuration
npm is automatically installed with Node.js. Verify its installation and version:
npm --version
To ensure npm runs smoothly, configure it to use a different directory for global packages:
mkdir ~/.npm-global
npm config set prefix '~/.npm-global'
echo 'export PATH=~/.npm-global/bin:$PATH' >> ~/.bashrc
source ~/.bashrc
This configuration prevents permission issues when installing global packages.
Installing Create React App
Create React App is a comfortable environment for learning React and the best way to start building a new single-page application in React. Let’s install it globally on your system.
Global Installation
npm install -g create-react-app
Verify the installation:
create-react-app --version
If you encounter any issues during installation, try clearing the npm cache and retrying:
npm cache clean --force
npm install -g create-react-app
Creating Your First React Application
Now that we have all the necessary tools installed, let’s create and run your first React application on CentOS Stream 10.
Project Setup
Choose a directory where you want to create your React project and run the following command:
create-react-app my-react-app
This command will create a new directory called “my-react-app” with a basic React project structure. Once the creation process is complete, navigate to your project directory:
cd my-react-app
Development Environment
To start the development server and see your React application in action, run:
npm start
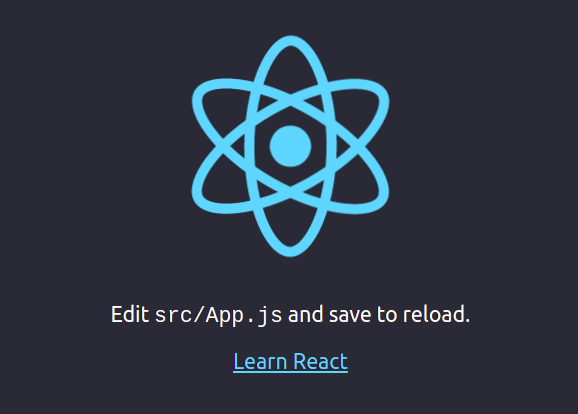
This command will start the development server and automatically open your default web browser to http://localhost:3000, where you’ll see the default React application running.
If you’re running CentOS Stream 10 on a remote server without a graphical interface, you’ll need to configure port forwarding to access the development server from your local machine. Use SSH with port forwarding:
ssh -L 3000:localhost:3000 username@your_server_ip
Then, you can access the React application by opening http://localhost:3000 in your local browser.

Production Deployment
When you’re ready to deploy your React application to production, you’ll need to create an optimized build and set up a web server to serve your static files.
Building for Production
To create a production-ready build of your React application, run:
npm run build
This command will create a build directory with optimized and minified files ready for deployment.
Deployment Options
For serving your React application on CentOS Stream 10, we recommend using Nginx as a reverse proxy. Here’s how to set it up:
sudo dnf install nginx -y
- Configure Nginx to serve your React application:
sudo nano /etc/nginx/conf.d/react-app.conf
Add the following configuration:
server {
    listen 80;
    server_name your_domain.com;
    root /path/to/your/react-app/build;
    index index.html;

    location / {
        try_files $uri $uri/ /index.html;
    }
}
- Test the Nginx configuration and restart the service:
sudo nginx -t
sudo systemctl restart nginx
Your React application should now be accessible through your domain or server IP address.
Troubleshooting Guide
Even with careful installation, you might encounter some issues. Here are solutions to common problems:
Permission Problems
If you encounter permission errors when installing packages globally, use the following command:
sudo npm install -g package_name --unsafe-perm=true --allow-root
Port Conflicts
If port 3000 is already in use, you can specify a different port:
PORT=3001 npm start
Dependencies Issues
If you face dependency-related errors, try clearing the npm cache and reinstalling:
npm cache clean --force
rm -rf node_modules
npm install
Best Practices and Optimization
To ensure your React development on CentOS Stream 10 is smooth and efficient, consider these best practices:
Development Workflow
- Use version control (e.g., Git) to manage your project’s codebase
- Implement a consistent code style using tools like ESLint and Prettier
- Utilize React Developer Tools browser extension for debugging
Performance Optimization
- Implement code splitting to reduce initial load time
- Use React.lazy() for component-level code splitting
- Optimize images and assets for faster loading
Congratulations! You have successfully installed React. Thanks for using this tutorial for installing ReactJS on CentOS Stream 10 system. For additional help or useful information, we recommend you check the ReactJS website.