How To Install Ruby on Rails on Linux Mint 22

In this tutorial, we will show you how to install Ruby on Rails on Linux Mint 22. Ruby on Rails (RoR) stands out as a powerful framework. It simplifies web development. RoR encourages rapid application development, or RAD. Its convention-over-configuration philosophy reduces the need for extensive setup. Linux Mint 22 provides a robust platform for RoR development. A properly set-up development environment is crucial. It is essential for efficient coding and deployment.
This guide walks you through a complete RoR installation on Linux Mint 22. Follow these instructions to get your development environment ready. You will be prepared to build web applications.
Prerequisites
Before starting the Ruby on Rails installation, make sure you have these prerequisites:
- A working installation of Linux Mint 22.
- Basic familiarity with the Linux terminal.
- Sudo privileges.
These are important for a smooth installation process. Sudo privileges allow you to install software. Terminal knowledge helps you execute commands. Having Linux Mint 22 ensures compatibility.
Why Choose Linux Mint for Ruby on Rails Development?
Linux Mint is an excellent choice for Ruby on Rails development. It offers several advantages.
- Stability and ease of use: Linux Mint is known for its stability. Its user-friendly interface simplifies development.
- Strong community support: A large and active community provides assistance. You’ll find solutions to common problems quickly.
- Pre-installed tools and utilities: Linux Mint comes with pre-installed tools. These utilities are useful for software development.
- Customization options: It allows extensive customization. You can tailor the environment to your needs.
Compared to other distributions like Ubuntu, Linux Mint offers a balance. It’s user-friendly. It is also powerful enough for complex projects.
Step-by-Step Installation Guide
Let’s begin with the step-by-step installation of Ruby on Rails on Linux Mint 22.
Updating the System
Updating your system is a good practice. This ensures you have the latest packages. Outdated packages can cause compatibility issues. Run the following commands in the terminal:
sudo apt update
sudo apt upgrade
The sudo apt update command refreshes the package repositories. The sudo apt upgrade command upgrades installed packages. This ensures you have the newest versions.
Installing Dependencies
To compile Ruby, certain dependencies are necessary. These include build tools and libraries. Install these dependencies using the following command:
sudo apt install build-essential rustc libssl-dev libyaml-dev zlib1g-dev libgmp-devLet’s break down what each package does:
build-essential: Provides essential tools for compiling software.rustc: The Rust compiler, necessary for some Ruby gems.libssl-dev: SSL development libraries for secure connections.libyaml-dev: YAML parsing libraries.zlib1g-dev: Compression and decompression libraries.libgmp-dev: Libraries for arbitrary-precision arithmetic.
These dependencies ensure Ruby compiles without issues. Neglecting this step can lead to errors.
Installing a Ruby Version Manager
A Ruby version manager simplifies Ruby version management. It allows you to switch between different Ruby versions. This is essential for projects with specific requirements. We recommend Mise, a versatile version manager.
curl https://mise.run | shNext, add Mise to your shell configuration:
echo 'eval "$(~/.local/bin/mise activate)"' >> ~/.bashrc
source ~/.bashrc
The first command downloads and installs Mise. The second adds it to your shell. The source ~/.bashrc command applies the changes.
Mise helps manage Ruby versions. It avoids conflicts between projects.
Installing Ruby
With Mise installed, you can now install Ruby. Choose a specific version for compatibility.
mise use --global ruby@3This command installs Ruby version 3. The --global flag sets it as the default. To verify the installation, use:
ruby --versionThis displays the installed Ruby version. If you encounter issues, ensure all dependencies are correctly installed.
Configuring RubyGems
RubyGems is a package manager for Ruby libraries. It’s essential for installing Rails and other dependencies. Update RubyGems to the latest version:
gem update --systemThis ensures you have the latest features and security updates. Check the RubyGems version with:
gem -vKeeping RubyGems updated prevents compatibility issues. It also ensures you get the newest packages.
Installing Node.js
Node.js is necessary for asset compilation in Rails. It handles JavaScript and CSS assets. Install Node.js using:
curl -fsSL https://deb.nodesource.com/setup_lts.x | sudo -E bash -
sudo apt-get install -y nodejs
Verify the installation:
node -vThis displays the installed Node.js version. Node.js is crucial for modern web development. It enables efficient asset management.
Installing Rails
Now, install Rails using RubyGems. Specify a version for stability:
gem install rails -v 7.0.4This installs Rails version 7.0.4. Verify the installation:
rails --versionIf the rails command is not found, add Ruby’s bin directory to your PATH. This ensures the system finds the Rails executable.
Setting up a New Rails Application
Create a new Rails application to test your installation. Use the following command:
rails new myapp
cd myapp
This creates a new application named “myapp”. Navigate into the application directory. Start the Rails server:
rails serverOr, use the shorthand:
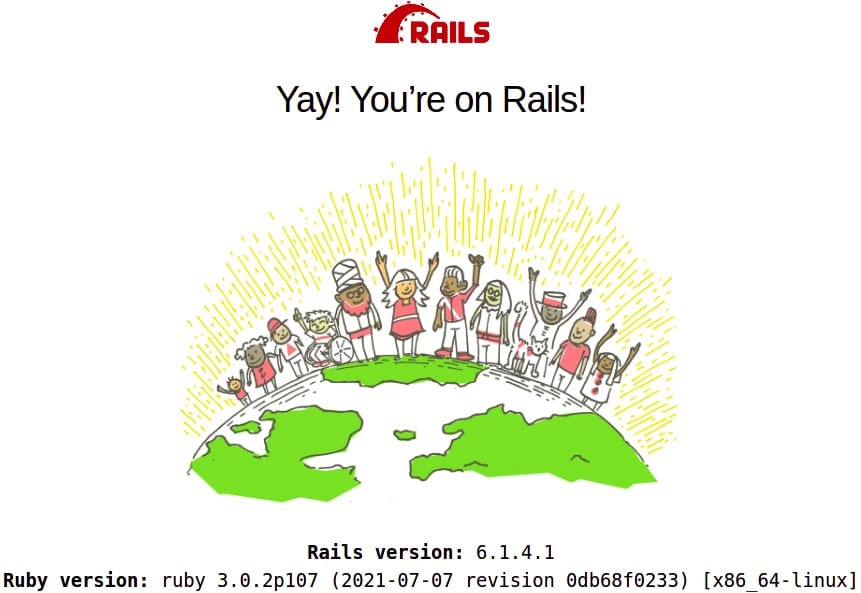
rails sAccess the application in your web browser at http://localhost:3000. You should see the Rails welcome page. This confirms a successful installation.

The basic structure of a Rails application includes:
app/: Contains the application’s models, views, and controllers.config/: Configuration files, includingdatabase.yml.db/: Database schema and migrations.public/: Static files like images and JavaScript.Gemfile: Lists the application’s gem dependencies.
Configuration and Optimization
After installation, configure and optimize your Rails environment. These steps ensure smooth operation.
Database Setup
Configure a database for your Rails application. PostgreSQL and MySQL are popular choices. Edit the database.yml file in the config/ directory. Specify your database settings.
Example configuration for PostgreSQL:
default: &default
  adapter: postgresql
  encoding: unicode
  pool: 5
  username: your_username
  password: your_password
  host: localhost


 development:
  <<: *default
  database: myapp_development


 test:
  <<: *default
  database: myapp_test


 production:
  <<: *default
  database: myapp_production
Adjust the username, password, and database names accordingly. Run database migrations to set up the schema. This prepares the database for your application.
Asset Pipeline
The asset pipeline manages JavaScript, CSS, and image assets. It compiles and minifies these assets for production. Precompile assets before deploying:
rails assets:precompileThis improves performance by reducing load times. The asset pipeline is an essential part of Rails development. It optimizes asset delivery.
Troubleshooting Common Issues
During installation, you might encounter issues. Here are some common problems and solutions:
- Missing dependencies: Ensure all dependencies are installed. Use
apt installto install missing packages. - Incorrect Ruby or Rails versions: Use Mise to manage Ruby versions. Use
gem install rails -vto specify Rails versions. - Database connection errors: Check your
database.ymlfile. Verify the database server is running. - Gems not installing correctly: Update RubyGems. Ensure you have the necessary development tools.
Consult error messages and online resources. These resources can provide specific solutions. Troubleshooting is a key skill. It is essential for Rails development.
Congratulations! You have successfully installed Ruby on Rails. Thanks for using this tutorial to install the latest version of Ruby on Rails on the Linux Mint 22 system. For additional help or useful information, we recommend you check the official Ruby on Rails website.