How To Install Samba on Debian 12

In this tutorial, we will show you how to install Samba on Debian 12. Samba, an open-source implementation of the SMB/CIFS protocol, provides a robust solution for integrating Linux systems with Windows networks. Whether you’re a system administrator, developer, or simply need to set up a centralized file server, Samba offers a powerful and versatile platform for cross-platform file and printer sharing.
This article assumes you have at least basic knowledge of Linux, know how to use the shell, and most importantly, you host your site on your own VPS. The installation is quite simple and assumes you are running in the root account, if not you may need to add ‘sudo‘ to the commands to get root privileges. I will show you the step-by-step installation of the Samba on Debian 12 (Bookworm).
Prerequisites
Before proceeding with the installation of Samba on Debian 12, ensure you meet the following requirements:
- A server running one of the following operating systems: Debian 12 (Bookworm).
- It’s recommended that you use a fresh OS install to prevent any potential issues.
- SSH access to the server (or just open Terminal if you’re on a desktop).
- An active internet connection. You’ll need an internet connection to download the necessary packages and dependencies.
- A user account with sudo privileges to execute administrative commands.
Install Samba on Debian 12
Step 1. Before diving into the installation process, ensure that your Debian 12 system meets the necessary requirements. Update your system packages to their latest versions by running:
sudo apt update
sudo apt upgrade
Step 2. Installing Samba on Debian 12.
Install the Samba package by executing:
sudo apt install samba
During the installation process, you may be prompted to configure certain settings or provide input. Follow the on-screen instructions carefully, or accept the default values if you’re unsure.
After the installation is complete, verify that the Samba services are running by checking their status:
sudo systemctl status smbd
sudo systemctl status nmbd
If the services are not running, you can start them manually using the following commands:
sudo systemctl start smbd
sudo systemctl start nmbd
Step 3. Configuring Samba.
The main configuration file for Samba is /etc/samba/smb.conf. This file contains various settings and parameters that control the behavior of the Samba server, including global settings, share definitions, security options, and more.
Here are some common sections and parameters you may need to configure:
Global Settings
The [global] section in the smb.conf file defines settings that apply to the entire Samba server. Some important parameters include:
workgroup: Specifies the workgroup or domain name for the Samba server.server string: A descriptive string that identifies the Samba server.security: Determines the security mode for Samba (e.g.,user,share,server,domain).log file: Specifies the location of the Samba log file.
Share Definitions
Share definitions are enclosed in square brackets [] and define the directories or printers that will be shared over the network. For example:
[ShareName]
path = /path/to/share
read only = no
browsable = yes
valid users = @group
path: The local directory path to be shared.read only: Determines whether the share is read-only or read-write.browsable: Controls whether the share is visible in network browsing.valid users: Specifies the users or groups allowed to access the share.
After making changes to the smb.conf file, restart the Samba services for the changes to take effect:
sudo systemctl restart smbd
sudo systemctl restart nmbd
Step 4. Creating a Shared Folder.
One of the primary use cases for Samba is creating shared folders that can be accessed by Windows clients. Here’s how you can set up a new shared folder:
sudo mkdir /path/to/share
Set the appropriate permissions and ownership for the shared directory:
sudo chown -R username:groupname /path/to/share
sudo chmod -R 0755 /path/to/share
Replace username and groupname with the desired user and group that should have access to the shared folder.
Next, open the smb.conf file for editing
sudo nano /etc/samba/smb.conf
-
- Add a new share definition section at the end of the file:
[ShareName]
path = /path/to/share
read only = no
browsable = yes
valid users = @groupname
Replace ShareName with a descriptive name for your shared folder, and adjust the other parameters as needed.
Save the changes and exit the text editor, then restart the Samba services:
sudo systemctl restart smbd
sudo systemctl restart nmbd
Step 5. Accessing Shared Folders.
With Samba installed and configured, you can access shared folders from both Linux and Windows clients.
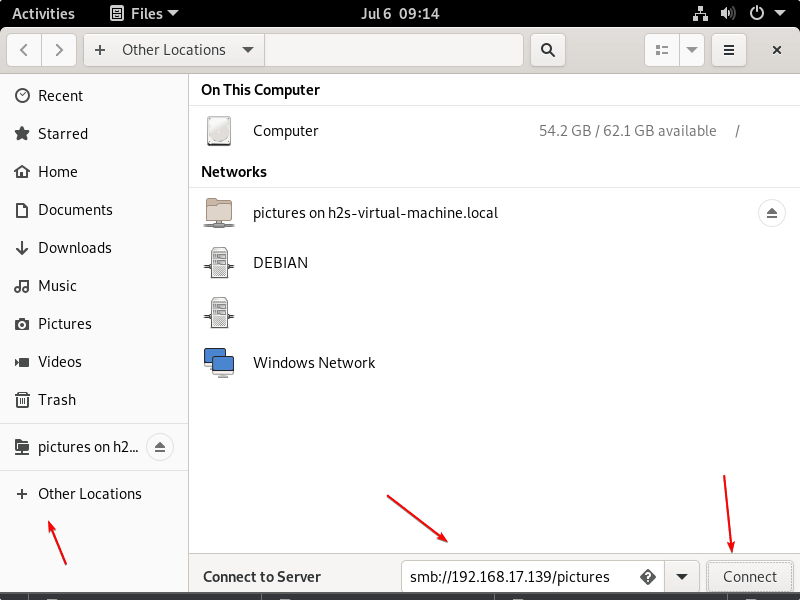
- Accessing from Linux Clients
To access a Samba share from a Linux client, you can use the smbclient command or mount the share directly.
Using smbclient:
smbclient //server/share -U username
Replace server with the hostname or IP address of the Samba server, share with the name of the shared folder, and username with a valid Samba user account.
Mounting a Samba share:
sudo mount -t cifs //server/share /path/to/mount -o username=username
Replace server, share, username, and /path/to/mount with the appropriate values for your setup.

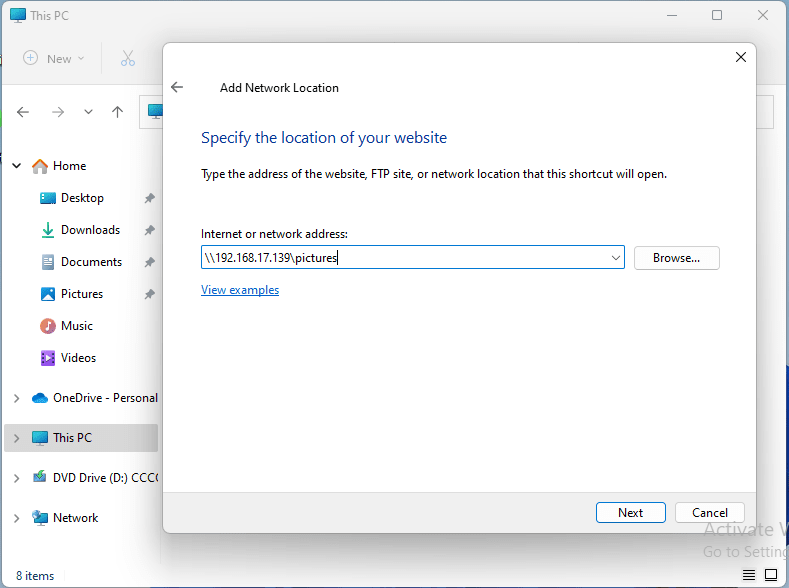
- Accessing from Windows Clients
On Windows systems, you can access Samba shares through File Explorer or by mapping a network drive.
-
- Open the File Explorer and navigate to the “Network” section.
- Look for the Samba server or workgroup name, and double-click to expand it.
- You should see the shared folders listed. Double-click on the desired share to access it.
Alternatively, you can map a network drive by following these steps:
-
- Open the File Explorer and right-click on “This PC” (or “Computer” in older versions of Windows).
- Select “Map network drive…”
- In the “Folder” field, enter the path to the Samba share in the format
\\server\share. - Check the “Reconnect at sign-in” option if you want the drive to be mapped automatically on subsequent logins.
- Click “Finish” to complete the mapping process.

Congratulations! You have successfully installed Samba. Thanks for using this tutorial to install the latest version of the Samba on Debian 12 Bookworm. For additional help or useful information, we recommend you check the official Samba website.