How To Install Showfoto on Ubuntu 24.04 LTS

In the world of digital photography and image editing, having a reliable and efficient tool at your disposal is crucial. For Ubuntu users, Showfoto emerges as an excellent choice for managing and editing digital images. This comprehensive guide will walk you through the process of installing Showfoto on Ubuntu 24.04 LTS, ensuring you have this powerful image editor at your fingertips.
Understanding Showfoto
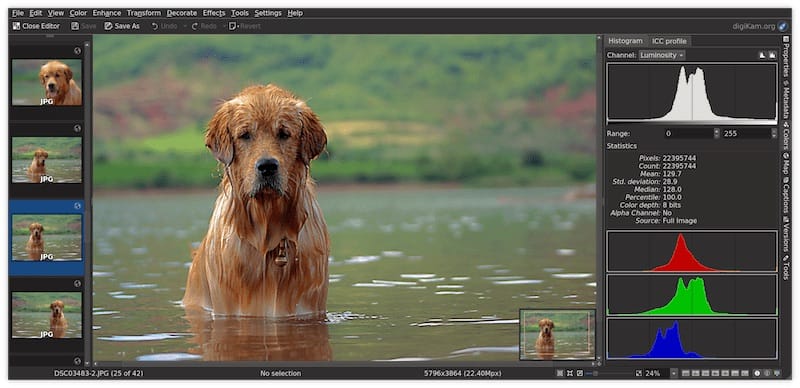
Showfoto is a standalone image editor that comes from the digiKam project, a renowned open-source photo management application. It offers a wide array of features for photo enthusiasts and professionals alike. With Showfoto, you can perform various image editing tasks, including transformations, filtering, applying effects, and editing metadata.
One of the key advantages of Showfoto is its compatibility with numerous image formats. Whether you’re working with JPEG, PNG, TIFF, or other popular formats, Showfoto has got you covered. Its standalone nature means you can use it independently, but it also integrates seamlessly with digiKam for a more comprehensive photo management experience.
For Ubuntu users, Showfoto presents several compelling benefits:
- Open-source and free: Aligning perfectly with the Ubuntu philosophy
- Lightweight: Efficient performance without hogging system resources
- User-friendly interface: Easy to navigate, even for beginners
- Powerful editing capabilities: From basic adjustments to advanced filters
Prerequisites
Before we dive into the installation process, let’s ensure your system is ready. Here are the prerequisites for installing Showfoto on Ubuntu 24.04 LTS:
- A system running Ubuntu 24.04 LTS
- At least 2GB of RAM (4GB recommended for smoother performance)
- Approximately 100MB of free disk space
- An active internet connection for downloading packages
- Administrative (sudo) privileges on your system
It’s crucial to ensure your system packages are up-to-date before proceeding with the installation. This helps avoid potential conflicts and ensures you’re working with the latest compatible versions of all dependencies.
Step-by-Step Installation Guide
Now that we’ve covered the basics, let’s walk through the process of installing Showfoto on your Ubuntu 24.04 LTS system. Follow these steps carefully to ensure a smooth installation.
1. Updating System Packages
Before installing any new software, it’s always a good practice to update your system’s package list and upgrade existing packages. This ensures you have the latest versions and helps prevent potential conflicts.
Open your terminal and run the following command:
sudo apt update && sudo apt upgrade -yThis command updates the package list and upgrades all installed packages to their latest versions. The “-y” flag automatically answers “yes” to any prompts, streamlining the process.
2. Installing Showfoto
Showfoto is available in the default Ubuntu repositories, making the installation process straightforward. To install Showfoto, use the following command:
sudo apt install showfoto -yThis command tells the package manager to install Showfoto and automatically resolve any dependencies. The installation process may take a few minutes, depending on your internet speed and system performance.
3. Verifying the Installation
After the installation completes, it’s a good idea to verify that Showfoto was installed correctly. You can do this by checking the installed version. Run the following command:
showfoto --versionThis command should display the version number of Showfoto installed on your system. If you see a version number, congratulations! Showfoto is successfully installed on your Ubuntu 24.04 LTS system.
4. Launching Showfoto
Now that Showfoto is installed, you have multiple ways to launch the application:
Method 1: Using the Terminal
Simply type the following command in your terminal:
showfotoMethod 2: Using the Graphical Interface
You can also launch Showfoto from your desktop environment:
- Click on the Activities overview in the top-left corner of your screen
- Click on the Show Applications grid icon
- Search for “Showfoto” in the application search bar
- Click on the Showfoto icon to launch the application

Troubleshooting Common Issues
While the installation process for Showfoto is generally smooth, you might encounter some issues. Here are some common problems and their solutions:
1. Package Dependency Issues
If you encounter dependency issues during installation, try the following:
sudo apt --fix-broken install
sudo apt update
sudo apt install showfoto
2. Permission Denied Errors
If you see “Permission denied” errors, ensure you’re using sudo for commands that require administrative privileges:
sudo apt install showfoto3. Showfoto Not Found After Installation
If Showfoto doesn’t appear in your applications menu after installation, try updating the application database:
sudo update-desktop-databaseAdvanced Configuration and Usage Tips
Once you have Showfoto up and running, consider these tips to enhance your experience:
- Customize keyboard shortcuts: Go to Settings > Configure Shortcuts to set up custom shortcuts for frequently used actions.
- Optimize performance: In Settings > Configure Showfoto, adjust the “Maximum Cache Size” based on your system’s RAM for smoother operation.
- Explore plugins: Showfoto supports various plugins. Check Settings > Configure Showfoto > Plugins to discover and enable additional functionalities.
- Set up color management: For accurate color representation, configure your color settings in Settings > Configure Showfoto > Color Management.
Congratulations! You have successfully installed Showfoto. Thanks for using this tutorial for installing the Showfoto image editor on Ubuntu 24.04 LTS system. For additional help or useful information, we recommend you check the official Showfoto website.