How To Install Splunk on Debian 12

Splunk stands as one of the most powerful tools for analyzing and monitoring machine data, providing valuable insights across IT operations, security, and compliance frameworks. Installing Splunk on Debian 12, the latest stable release of this robust Linux distribution, creates a reliable foundation for your data analytics platform. This comprehensive guide walks you through the entire installation process, from preparation to advanced configuration, ensuring you can harness the full power of Splunk’s capabilities.
Understanding Splunk and Its Requirements
Splunk is a sophisticated Security Information and Event Management (SIEM) platform designed to search, monitor, and analyze machine-generated data through a web-style interface. Its core function revolves around making sense of unstructured data generated by various systems including computers, network devices, security appliances, and more.
What Sets Splunk Apart
Splunk excels at collecting massive volumes of machine data and transforming it into actionable insights. Unlike traditional analytics tools, Splunk can process both structured and unstructured data in real-time, allowing organizations to identify patterns, detect anomalies, and respond to security threats promptly.
Available Versions
- Splunk Free: Limited functionality but perfect for small-scale applications and learning
- Splunk Enterprise: Complete feature set for comprehensive data analysis
- Splunk Cloud: Hosted solution with similar capabilities to Enterprise
System Requirements for Debian 12
Before proceeding with installation, ensure your system meets these minimum requirements:
- CPU: 12 physical CPU cores or 24 vCPU at 2GHz or greater per core (for production environments)
- RAM: Minimum 12GB (recommended for production use)
- Disk Space: At least 15GB for the installation, plus additional space for indexed data
- Architecture: 64-bit system
- User Privileges: Root or sudo access for installation
For learning purposes or non-production environments, you can use systems with fewer resources, though performance may be affected.
Preparing Your Debian 12 System
Proper preparation of your Debian 12 system is essential for a smooth Splunk installation process.
Update System Packages
First, ensure your Debian system is fully updated:
sudo apt update
sudo apt upgrade -y
This updates the package lists and upgrades all installed packages to their latest versions, preventing potential conflicts.
Install Required Dependencies
Install necessary dependencies for Splunk:
sudo apt install wget curl net-tools
These packages facilitate downloading the Splunk installer and managing network connections.
Set Up User Permissions
For security purposes, consider creating a dedicated user for running Splunk:
sudo useradd -m -s /bin/bash splunk
sudo passwd splunk
This creates a separate user account that can be used to run the Splunk service, enhancing security by following the principle of least privilege.
Verify Disk Space
Check your available disk space before proceeding:
df -h
Ensure you have sufficient space available for both the installation and future data indexing.
Downloading Splunk
Obtaining the correct Splunk package for Debian 12 is a crucial step in the installation process.
Creating a Splunk Account
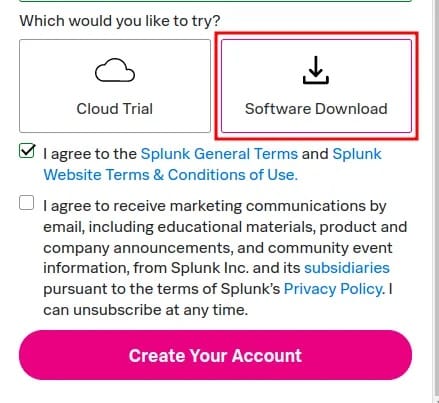
Navigate to the Splunk website (splunk.com) and create a free account if you don’t already have one. This account is required to download the software and access documentation.
Finding the Correct Package
After logging in:
- Go to the Products section
- Select “Free Trials & Downloads”
- Choose “Splunk Enterprise”
- Select “Linux” as the platform
- Choose “Debian” as the package type (.deb)
- Select the appropriate version for your 64-bit system

Download Methods
You can download Splunk using either:
Browser Download
Download directly through your web browser, then transfer the file to your Debian server if necessary.
Command Line Download
Use wget to download directly to your Debian server:
wget -O splunk-latest-linux-x86_64.deb "https://download.splunk.com/products/splunk/releases/[version]/linux/splunk-[version]-linux-2.6-amd64.deb"
Replace [version] with the current version number (e.g., 9.0.3).
Verify Download Integrity
Verify the integrity of the downloaded file:
sha256sum splunk-latest-linux-x86_64.deb
Compare this hash with the one provided on the Splunk download page to ensure file integrity.
Installation Methods for Debian 12
Splunk offers multiple installation methods for Debian systems. The most common approach uses the Debian package manager.
Using dpkg Command
The standard installation method uses the dpkg command:
- Navigate to the directory containing the downloaded file:
cd /path/to/download - Install the package:
sudo dpkg -i splunk-*-amd64.deb
If you encounter permission errors, adjust file permissions:
chmod 644 splunk-*-amd64.deb
This installs Splunk to the default location /opt/splunk.
Installation Status Verification
After installation, verify its status:
sudo dpkg --status splunk
This shows detailed information about the installed Splunk package.
To list all installed packages including Splunk:
sudo dpkg --list | grep splunk
Alternative Installation Using Tar Files
If you need to install Splunk in a non-default location, the tar installation method offers more flexibility:
- Download the tar version instead of the deb package
- Extract the tar file to your preferred location:
tar -xzf splunk-*.tgz -C /your/custom/path/ - Set proper ownership:
sudo chown -R splunk:splunk /your/custom/path/splunk
This method is particularly useful when you need to install to a non-standard location or when using a symbolic link for /opt/splunk.
Post-Installation Setup
After installing Splunk, several additional steps are necessary to properly configure and start the service.
Enabling Boot Start Functionality
Configure Splunk to start automatically when your system boots:
sudo /opt/splunk/bin/splunk enable boot-start
When prompted, press ‘q’ to exit the license agreement view, then ‘y’ to accept the terms.
Creating Admin User
During the boot-start configuration, you’ll be prompted to create an administrator account:
- Enter a username (default is “admin”)
- Create a strong password
- Confirm the password
This account will be used for initial login to the Splunk web interface.
Starting the Splunk Service
Start the Splunk service manually after installation:
sudo systemctl start splunk
Enable it to start automatically on system boot:
sudo /lib/systemd/systemd-sysv-install enable splunk
Verifying Service Status
Check if Splunk is running properly:
sudo systemctl status splunk
The output should show “active (running)” if Splunk started successfully.
Configuring the Splunk Environment
Proper configuration of the Splunk environment ensures optimal performance and reliability.
Understanding Directory Structure
The Splunk installation creates several important directories:
/opt/splunk/bin: Contains executable files/opt/splunk/etc: Configuration files/opt/splunk/var: Runtime data and logs/opt/splunk/share: Supporting files and documentation
Setting Environment Variables
Add Splunk to your system PATH for easier command access:
echo 'export PATH=$PATH:/opt/splunk/bin' | sudo tee -a /etc/profile.d/splunk.sh
sudo chmod +x /etc/profile.d/splunk.sh
source /etc/profile.d/splunk.sh
Shell Considerations for Debian
Debian’s default shell (dash) can cause issues with Splunk. Consider changing to bash:
sudo dpkg-reconfigure dash
Select “No” when asked if you want to use dash as the default system shell.
This helps avoid zombie processes that can occur when Splunk runs under the dash shell.
System Resource Configuration
Splunk requires specific system resources to function optimally. Create or modify the systemd service file:
sudo nano /etc/systemd/system/Splunkd.service
Add these resource limits:
[Service]
LimitNOFILE=64000
LimitNPROC=16000
LimitDATA=8000000000
LimitFSIZE=infinity
TasksMax=16000
Reload systemd to apply these changes:
sudo systemctl daemon-reload
These settings ensure Splunk has sufficient resources for proper operation.
Securing Your Splunk Installation
Security should be a top priority when deploying any data analysis platform like Splunk.
Changing Default Ports
Splunk uses port 8000 for web access by default. To change this:
- Edit the web configuration:
sudo nano /opt/splunk/etc/system/local/web.conf - Add or modify these lines:
[settings]
httpport = 8080
Replace 8080 with your preferred port.
Setting up SSL/TLS
Implement SSL for secure communications:
- Generate certificates:
sudo /opt/splunk/bin/splunk createssl server-cert -d /opt/splunk/etc/auth - Configure
web.conffor SSL:[settings] enableSplunkWebSSL = true privKeyPath = etc/auth/privkey.pem serverCert = etc/auth/server.pem
Creating a Dedicated Splunk User
If you haven’t created a dedicated user earlier, do it now:
sudo useradd -r -m -d /opt/splunk splunk
sudo chown -R splunk:splunk /opt/splunk
Update the service configuration to run as this user:
sudo nano /etc/systemd/system/Splunkd.service
Add:
[Service]
User=splunk
Group=splunk
Firewall Configuration
Configure your firewall to allow Splunk web interface access:
sudo ufw allow 8000/tcp
sudo ufw status
If UFW is not installed:
sudo apt install ufw
sudo ufw enable
sudo ufw allow 8000/tcp
This opens port 8000 (or your custom port) for web access.
Accessing the Splunk Web Interface
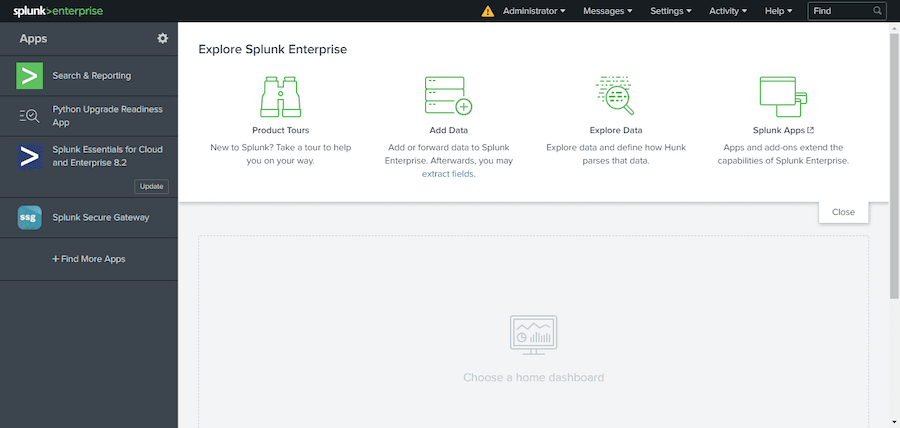
After installation and configuration, accessing the web interface allows you to start using Splunk’s features.
Opening the Web Interface
Access the Splunk web interface through your browser:
- For local access:
http://localhost:8000 - For remote access:
http://your-server-ip:8000
Replace 8000 with your custom port if you changed it.
First-time Login
- Enter your admin username and password created during setup
- If using default credentials, you’ll be prompted to change them:
- Default username: admin
- Default password: changeme

Browser Compatibility
For optimal performance, use current versions of supported browsers:
- Google Chrome
- Mozilla Firefox
- Microsoft Edge
Avoid older browsers, which may have security vulnerabilities.
Troubleshooting Connection Issues
If you cannot access the web interface:
- Verify Splunk is running:
sudo systemctl status splunk - Check firewall settings:
sudo ufw status - Test connectivity:
curl http://localhost:8000
Installing Splunk Apps and Add-ons
Splunk’s functionality can be extended through its ecosystem of apps and add-ons.
Navigating the App Ecosystem
From the Splunk web interface:
- Click on the gear icon (⚙️)
- Select “Manage Apps”
- Click “Browse More Apps”
This takes you to Splunkbase, the official app repository.
Essential Apps for Beginners
Consider these useful starter apps:
- Splunk App for Infrastructure
- Splunk Security Essentials
- Dashboard Examples
- Machine Learning Toolkit
Installation Methods
Via Web Interface
- Download the app from Splunkbase
- In Splunk Web, go to “Manage Apps”
- Click “Install app from file”
- Select the downloaded file and follow prompts
Via Command Line
sudo /opt/splunk/bin/splunk install app /path/to/app.tar.gz
Managing App Dependencies
Some apps require additional components. Check the app’s documentation for requirements and install them before the app itself.
Data Onboarding and Initial Configuration
Getting data into Splunk is the next crucial step after installation.
Setting Up Data Inputs
Configure data inputs through:
- Web interface: Go to “Settings” > “Data Inputs”
- Command line:
sudo /opt/splunk/bin/splunk add monitor /var/log/syslog -index main
Configuring Forwarders
For distributed environments, configure forwarders:
sudo /opt/splunk/bin/splunk add forward-server <receiver-hostname>:9997
Creating Indexes
Create custom indexes for different data types:
- Navigate to “Settings” > “Indexes”
- Click “New Index”
- Enter index name and configure retention settings
Basic Data Monitoring Setup
Monitor your system logs:
sudo /opt/splunk/bin/splunk add monitor /var/log/ -index system
Splunk Maintenance and Management
Regular maintenance ensures optimal performance and reliability of your Splunk installation.
Backup Strategies
Implement regular backups of your Splunk configuration:
sudo tar -czf splunk-backup-$(date +%Y%m%d).tar.gz /opt/splunk/etc
Updating Splunk
To update Splunk:
- Download the newer version
- Stop Splunk:
sudo systemctl stop splunk - Install the new package:
sudo dpkg -i splunk-new-version.deb - Start Splunk:
sudo systemctl start splunk
Log Rotation
Configure log rotation to manage Splunk’s internal logs:
sudo nano /etc/logrotate.d/splunk
Add:
/opt/splunk/var/log/splunk/*.log {
  weekly
  rotate 4
  compress
  missingok
  notifempty
}
Health Check Procedures
Regularly check system health:
sudo /opt/splunk/bin/splunk diag
This creates a diagnostic file to help identify any issues.
Troubleshooting Common Issues
Even with careful installation and configuration, issues can arise with Splunk deployments.
Installation Failures
If installation fails:
- Check system requirements
- Verify package integrity
- Ensure sufficient disk space
- Examine logs at
/var/log/dpkg.log
Service Not Starting
When Splunk won’t start:
sudo journalctl -u splunk
Common causes include:
- Permission problems
- Port conflicts
- Corrupt configuration files
Web Interface Not Accessible
If you can’t access the web interface:
- Verify the service is running
- Check firewall settings
- Ensure network connectivity
- Review web server logs at
/opt/splunk/var/log/splunk/web_service.log
Permission Problems
Fix permission issues:
sudo chown -R splunk:splunk /opt/splunk
sudo chmod -R 755 /opt/splunk/bin
Congratulations! You have successfully installed Splunk. Thanks for using this tutorial for installing Splunk security platform on Debian 12 “Bookworm” system. For additional help or useful information, we recommend you check the official Splunk website.