How To Install sysPass Password Manager on Ubuntu 24.04 LTS

In today’s digital landscape, managing passwords securely is crucial for protecting sensitive information. sysPass, an open-source password management solution, offers a robust and user-friendly platform for individuals and organizations to store and manage their credentials safely. This comprehensive guide will walk you through the process of installing sysPass Password Manager on Ubuntu 24.04 LTS, ensuring that you have a reliable system for password management.
sysPass stands out as an excellent choice for Ubuntu users due to its compatibility with the LAMP stack, customizable features, and strong security measures. By following this tutorial, you’ll be able to set up a self-hosted password management system that gives you full control over your data while benefiting from the latest improvements in Ubuntu 24.04 LTS.
Prerequisites
Before diving into the installation process, ensure that you have the following prerequisites in place:
- A server running Ubuntu 24.04 LTS with root or sudo access
- A minimum of 1GB RAM and 10GB storage space
- A registered domain name pointing to your server’s IP address
- Basic familiarity with Linux command-line operations
Additionally, you’ll need to have the following software components ready:
- Apache web server
- MySQL or MariaDB database server
- PHP 7.4 or later (PHP 8.x is recommended for optimal performance)
- Git for cloning the sysPass repository
Preparing the Ubuntu 24.04 LTS Server
Start by updating your Ubuntu system to ensure you have the latest packages and security patches:
sudo apt update
sudo apt upgrade -y
Next, install some essential packages that will be required throughout the installation process:
sudo apt install software-properties-common apt-transport-https ca-certificates curl -yIt’s also a good practice to configure the firewall to allow incoming connections on ports 80 (HTTP) and 443 (HTTPS). If you’re using UFW (Uncomplicated Firewall), you can enable these ports with the following commands:
sudo ufw allow 80/tcp
sudo ufw allow 443/tcp
sudo ufw enable
Installing LAMP Stack
sysPass requires a LAMP (Linux, Apache, MySQL, PHP) stack to function. Let’s install each component:
Apache Web Server
Install Apache with the following command:
sudo apt install apache2 -yAfter installation, start and enable Apache to run on system boot:
sudo systemctl start apache2
sudo systemctl enable apache2
MySQL/MariaDB Database
Install MariaDB, which is a drop-in replacement for MySQL:
sudo apt install mariadb-server -ySecure your MariaDB installation by running the security script:
sudo mysql_secure_installationFollow the prompts to set a root password and remove insecure default settings.
PHP and Required Modules
Install PHP and the necessary modules for sysPass:
sudo apt install php php-cli php-fpm php-json php-common php-mysql php-zip php-gd php-mbstring php-curl php-xml php-pear php-bcmath -yAfter installation, restart Apache to apply the changes:
sudo systemctl restart apache2Configuring the Database for sysPass
Now, let’s set up a database and user for sysPass:
sudo mysql -u root -pOnce logged in to the MySQL prompt, create a new database and user:
CREATE DATABASE syspass_db;
CREATE USER 'syspass_user'@'localhost' IDENTIFIED BY 'your_strong_password';
GRANT ALL PRIVILEGES ON syspass_db.* TO 'syspass_user'@'localhost';
FLUSH PRIVILEGES;
EXIT;
Replace ‘your_strong_password’ with a secure password of your choice.
Downloading and Installing sysPass
With the LAMP stack in place, we can now proceed to install sysPass:
Cloning sysPass Repository
Use Git to clone the sysPass repository:
sudo git clone https://github.com/nuxsmin/sysPass.git /var/www/html/syspassSetting Proper Permissions
Adjust the ownership and permissions of the sysPass directory:
sudo chown -R www-data:www-data /var/www/html/syspass
sudo chmod 750 /var/www/html/syspass/app/{config,backup}
Installing Composer
sysPass uses Composer to manage PHP dependencies. Install Composer with these commands:
curl -sS https://getcomposer.org/installer | php
sudo mv composer.phar /usr/local/bin/composer
sudo chmod +x /usr/local/bin/composer
Installing PHP Dependencies
Navigate to the sysPass directory and install the required PHP packages:
cd /var/www/html/syspass
sudo -u www-data composer install --no-dev
Configuring Apache for sysPass
Create a new Apache virtual host configuration for sysPass:
sudo nano /etc/apache2/sites-available/syspass.confAdd the following content, replacing ‘your_domain.com’ with your actual domain name:
<VirtualHost *:80>
    ServerName your_domain.com
    ServerAdmin webmaster@your_domain.com
    DocumentRoot /var/www/html/syspass

    <Directory /var/www/html/syspass>
        Options FollowSymlinks
        AllowOverride All
        Require all granted
    </Directory>

    ErrorLog ${APACHE_LOG_DIR}/syspass_error.log
    CustomLog ${APACHE_LOG_DIR}/syspass_access.log combined
</VirtualHost>
Enable the new virtual host and disable the default one:
sudo a2ensite syspass.conf
sudo a2dissite 000-default.conf
sudo systemctl restart apache2
Securing sysPass with SSL/TLS
To ensure secure communication between users and the sysPass server, let’s set up SSL/TLS encryption using Let’s Encrypt:
Installing Certbot
sudo apt install certbot python3-certbot-apache -yObtaining and Configuring Let’s Encrypt SSL Certificate
Run Certbot to obtain and configure the SSL certificate:
sudo certbot --apache -d your_domain.comFollow the prompts to complete the certificate installation and configuration.
Enforcing HTTPS
Edit the Apache configuration file to enforce HTTPS:
sudo nano /etc/apache2/sites-available/syspass-le-ssl.confAdd the following lines inside the <VirtualHost *:443> block:
Header always set Strict-Transport-Security "max-age=31536000; includeSubDomains"
Header always set X-Frame-Options DENY
Header always set X-Content-Type-Options nosniff
Restart Apache to apply the changes:
sudo systemctl restart apache2Completing sysPass Installation
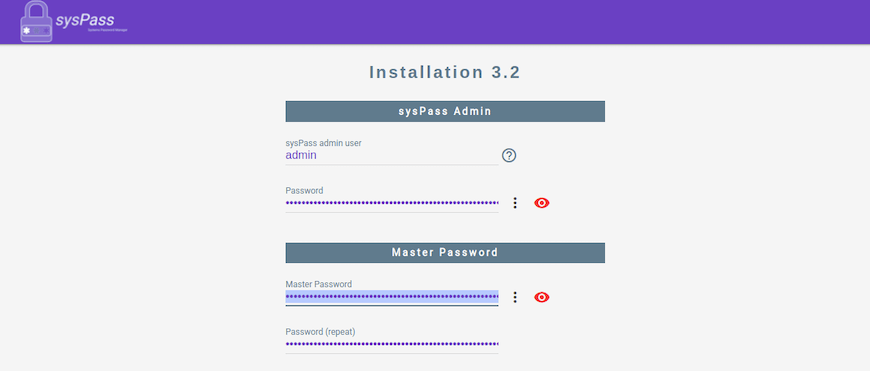
With all components in place, you can now complete the sysPass installation through the web interface:
- Open your web browser and navigate to
https://your_domain.com - You’ll be redirected to the sysPass installation page
- Follow the on-screen instructions to configure the initial settings:
- Enter the database details (database name, username, and password)
- Create an admin account
- Set the master password (used for encrypting sensitive data)
- Complete the installation process by clicking “Install”

Post-Installation Configuration
After successfully installing sysPass, take some time to customize the settings to fit your needs:
Customizing sysPass Settings
- Log in to the admin panel
- Navigate to “Configuration” > “General”
- Adjust settings such as session timeout, password complexity requirements, and two-factor authentication options
Setting Up User Accounts and Groups
- Create user accounts for your team members
- Set up groups to manage access permissions efficiently
- Assign appropriate roles and permissions to users and groups
Configuring Backup Options
Implement a robust backup strategy to protect your password data:
- Navigate to “Maintenance” > “Backup”
- Configure automatic backups to run at regular intervals
- Choose a secure location to store your backups, preferably off-site or in encrypted cloud storage
Troubleshooting Common Issues
If you encounter any problems during or after the installation, consider these common issues and their solutions:
Database Connection Errors
- Double-check your database credentials in the sysPass configuration
- Ensure that the MySQL/MariaDB service is running:
sudo systemctl status mysql - Verify that the sysPass database user has the correct permissions
Permission Problems
- Ensure that the web server has the necessary permissions to read and write to the sysPass directory
- Check Apache error logs for any permission-related issues:
sudo tail -f /var/log/apache2/error.log
PHP Configuration Issues
- Verify that all required PHP modules are installed and enabled
- Check PHP version compatibility with sysPass requirements
- Review PHP configuration settings in
php.inifor any conflicts
Congratulations! You have successfully installed sysPass. Thanks for using this tutorial for installing sysPass Password Manager on Ubuntu 24.04 LTS Jammy Jellyfish system. For additional help or useful information, we recommend you check the sysPass website.