How To Install Teampass on Ubuntu 24.04 LTS

In this tutorial, we will show you how to install Teampass Password Manager on Ubuntu 24.04 LTS. Managing passwords securely is crucial in any modern IT environment. With the increasing number of services and users requiring unique credentials, a robust password manager is essential. TeamPass is an open-source, web-based solution designed for collaborative password management within teams or organizations. In this guide, you’ll learn how to install and configure the latest version of TeamPass on Ubuntu 24.04 LTS, ensuring a secure and efficient setup.
Prerequisites
Before you begin the installation process, ensure that your system meets the following requirements:
System Requirements
- Operating System: Ubuntu 24.04 LTS (Server or Desktop)
- CPU: Minimum 1 GHz (2 GHz recommended)
- RAM: At least 1 GB (2 GB or more recommended)
- Disk Space: Minimum 10 GB of free space
Software Requirements
- Web Server: Apache or NGINX (this guide uses Apache)
- Database Server: MySQL or MariaDB
- Scripting Language: PHP version 8.2 or higher with necessary extensions
User Privileges and Network Configuration
- You need root or sudo user privileges to install software and configure services.
- A static IP address or a domain name is recommended for accessing the TeamPass web interface.
Step 1: Update and Prepare Your System
The first step in installing TeamPass is to ensure your system is up-to-date. Run the following commands to update your package list and upgrade all installed packages:
sudo apt update && sudo apt upgrade -yThis command ensures that your system has the latest security patches and software versions installed. Additionally, install some essential utilities like Git, Curl, and Wget that will be needed during the installation process:
sudo apt install git curl wget -yIf necessary, set your server’s timezone to ensure logs are accurate:
sudo timedatectl set-timezone <your-timezone>Step 2: Install Apache Web Server
The next step is to install the Apache web server. Apache is widely used for hosting web applications like TeamPass due to its stability and flexibility.
sudo apt install apache2 -yOnce installed, enable and start the Apache service so that it runs automatically when your server boots up:
sudo systemctl enable apache2 && sudo systemctl start apache2You’ll also need to configure your firewall to allow HTTP and HTTPS traffic through Apache:
sudo ufw allow 'Apache Full'This ensures that your web server can be accessed from external networks.
Step 3: Install MySQL/MariaDB Database Server
The database server is essential for storing password data securely. You can use either MySQL or MariaDB; in this guide, we’ll use MySQL.
sudo apt install mysql-server -yAfter installation, run the following command to secure your MySQL installation by setting a root password and removing unnecessary defaults:
sudo mysql_secure_installationYou will be prompted with several security-related questions—answer them according to your security needs.
Create a Database for TeamPass
Create a dedicated database and user for TeamPass by logging into MySQL as root:
sudo mysql -u root -pThen execute the following SQL commands to create the database and user:
CREATE DATABASE teampass;
GRANT ALL PRIVILEGES ON teampass.* TO 'teampassuser'@'localhost' IDENTIFIED BY 'yourpassword';
FLUSH PRIVILEGES;
EXIT;
Step 4: Install PHP and Required Extensions
TeamPass requires PHP to function as it is a web-based application built using PHP scripts. You’ll also need several PHP extensions for full functionality.
sudo apt install php libapache2-mod-php php-mysql php-mbstring php-curl php-json php-gd php-intl php-bcmath php-xml php-zip -y
You can verify that PHP was installed correctly by checking its version:
php -vTune PHP Settings for Optimal Performance
Edit the PHP configuration file (/etc/php/8.2/apache2/php.ini) to adjust settings such as memory limits and file upload sizes if necessary.
sudo nano /etc/php/8.2/apache2/php.ini You might want to increase parameters like memory_limit or max_execution_time depending on your server’s resources.
Step 5: Download and Configure TeamPass
Download TeamPass Files from GitHub
The latest version of TeamPass can be downloaded directly from its official GitHub repository using Git:
cd /var/www/html/
sudo git clone https://github.com/nilsteampassnet/TeamPass.git teampass/
Set Permissions for Security
You need to set correct ownership and permissions for the TeamPass directory so that Apache can access it securely:
sudo chown -R www-data:www-data /var/www/html/teampass/
sudo chmod -R 755 /var/www/html/teampass/
Create an Apache Virtual Host Configuration for TeamPass
Create a new virtual host configuration file for TeamPass in Apache’s sites-available directory:
sudo nano /etc/apache2/sites-available/teampass.conf Add the following configuration block inside the file:
<VirtualHost *:80>
    ServerAdmin admin@yourdomain.com
    DocumentRoot /var/www/html/teampass/
    ServerName yourdomain.com

    <Directory /var/www/html/teampass/>
        Options Indexes FollowSymLinks MultiViews
        AllowOverride All
        Require all granted
    </Directory>

    ErrorLog ${APACHE_LOG_DIR}/error.log
    CustomLog ${APACHE_LOG_DIR}/access.log combined
</VirtualHost>
This configuration tells Apache where to find the TeamPass files and how to handle requests.
Enable Virtual Host Configuration and Restart Apache
You’ll need to enable this new virtual host configuration and restart Apache for changes to take effect:
sudo a2ensite teampass.conf
sudo systemctl restart apache2
Step 6: Configure SSL with Let’s Encrypt (Optional but Recommended)
If you plan on accessing your password manager over the internet, securing it with SSL encryption is highly recommended.
Install Certbot for Automatic SSL Certificates with Let’s Encrypt
sudo apt install certbot python3-certbot-apache -y Obtain an SSL Certificate Using Certbot
You can now request an SSL certificate from Let’s Encrypt by running this command (replace “yourdomain.com” with your actual domain):
sudo certbot --apache -d yourdomain.com This will automatically configure SSL for your site if successful.
Step 7: Access the TeamPass Web Installer via Browser
Navigating to Your Domain or IP Address
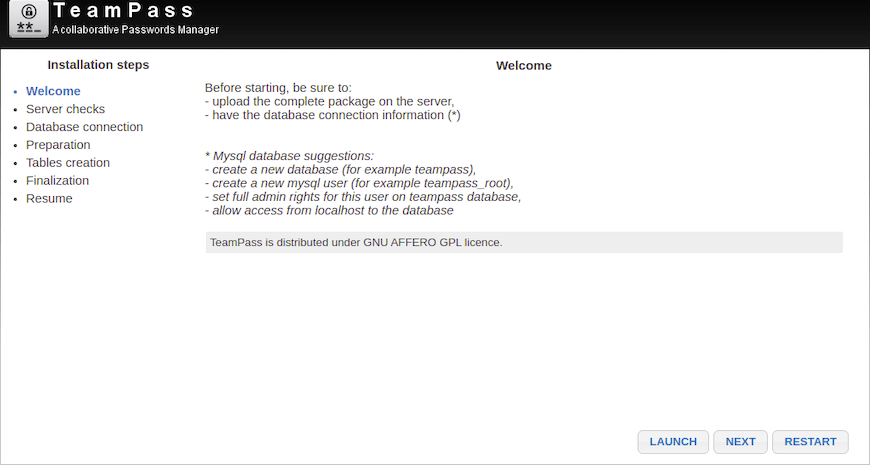
You’re now ready to complete the installation through a browser-based interface. Open a browser window and navigate to either http://yourdomain.com or https://yourdomain.com depending on whether you’ve configured SSL.

Congratulations! You have successfully installed Teampass. Thanks for using this tutorial for installing Teampass Password Manager on Ubuntu 24.04 LTS system. For additional help or useful information, we recommend you check the official Teampass website.