How To Install TeamViewer on CentOS Stream 10

TeamViewer has become an essential tool for system administrators and IT professionals who need to provide remote support or access systems from different locations. CentOS Stream 10, being a cutting-edge Linux distribution, offers a robust platform for TeamViewer installation. This comprehensive guide will walk you through various methods to install TeamViewer on CentOS Stream 10, configure it properly, troubleshoot common issues, and implement security best practices.
What is TeamViewer?
TeamViewer is a powerful cross-platform remote access and support software that enables users to connect to computers and other devices remotely. It provides a secure way to control systems, transfer files, and collaborate with team members regardless of their geographical location.
TeamViewer offers two main versions: the full client and the host version. The full client provides complete functionality including remote control, meetings, and file transfers, while the host version is designed primarily for unattended access to servers and workstations.
One of the key advantages of TeamViewer is its ability to establish connections without requiring complex firewall configurations. It uses a combination of UDP and TCP connections, with approximately 70% of connections established directly between devices after the initial handshake through TeamViewer’s master servers. For situations where direct connections aren’t possible, TeamViewer routes connections through its highly redundant router network using TCP or HTTP tunneling.
TeamViewer employs robust security measures, including RSA 4096-bit key exchange and AES 256-bit session encryption, making it suitable for professional and enterprise environments. This level of security is comparable to HTTPS/TLS protocols and is considered highly secure by current standards.
Prerequisites for Installing TeamViewer on CentOS Stream 10
Before installing TeamViewer on your CentOS Stream 10 system, several prerequisites must be met to ensure a smooth installation process:
System Requirements:
- CentOS Stream 10 (64-bit) with up-to-date system packages
- Root access or sudo privileges to install packages
- Stable internet connection for downloading installation files
- Minimum of 2GB RAM and 200MB free disk space
- Graphical environment (X Window System) for the TeamViewer interface
Pre-installation Checks:
- Verify your CentOS Stream version by running:
cat /etc/centos-release - Update your system to ensure all packages are current:
sudo dnf update -y - Install the EPEL repository, which is required for TeamViewer dependencies:
sudo dnf install epel-release -y
Having these prerequisites in place will help prevent common installation issues and ensure TeamViewer functions correctly on your CentOS Stream 10 system.
Method 1: Installing TeamViewer Using RPM Package
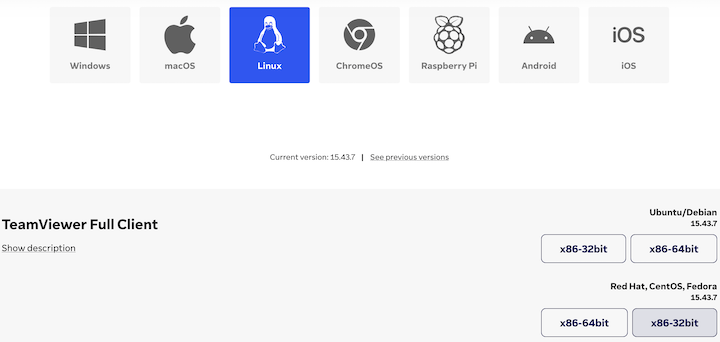
Installing TeamViewer using the RPM package is the most straightforward method for CentOS Stream 10. This method involves downloading the TeamViewer RPM package and installing it using the dnf package manager.
Step 1: Download the TeamViewer RPM Package
First, ensure you have wget installed to download the TeamViewer package:
sudo dnf install wget -yNext, download the latest TeamViewer RPM package for 64-bit systems:

wget https://download.teamviewer.com/download/linux/teamviewer.x86_64.rpmIf you prefer the TeamViewer Host version for unattended access, use:
wget https://download.teamviewer.com/download/linux/teamviewer-host.x86_64.rpmStep 2: Import TeamViewer’s GPG Key
Import TeamViewer’s GPG key to verify the package authenticity:
sudo rpm --import https://dl.tvcdn.de/download/linux/signature/TeamViewer2017.ascThis step helps ensure that the package you’re installing comes from a trusted source and hasn’t been tampered with.
Step 3: Install TeamViewer
Install the downloaded TeamViewer package using dnf:
sudo dnf install ./teamviewer.x86_64.rpm -yFor the TeamViewer Host version:
sudo dnf install ./teamviewer-host.x86_64.rpm -yDuring installation, dnf will automatically resolve and install all necessary dependencies. You might be prompted to accept package installation or GPG key verification – press ‘y’ to proceed.
Step 4: Verify Installation
After installation completes, verify that TeamViewer installed correctly:
teamviewer --versionIf the command returns TeamViewer’s version number, the installation was successful.
Method 2: Installing TeamViewer via Command Line
For system administrators who prefer a more automated approach, installing TeamViewer via command line offers greater control and is suitable for scripting.
Step 1: Install Required Repositories
First, ensure the EPEL repository is installed:
sudo dnf install epel-release -yStep 2: Update Repository Index
Update your system’s repository index:
sudo dnf update -yStep 3: Download TeamViewer Package
Download the TeamViewer package directly:
wget https://download.teamviewer.com/download/linux/teamviewer.x86_64.rpmStep 4: Install TeamViewer with Dependencies
Install TeamViewer and its dependencies in a single command:
sudo dnf install ./teamviewer.x86_64.rpm --enablerepo=epel -yThe --enablerepo=epel flag ensures that packages from the EPEL repository are used to resolve dependencies.
Step 5: Start TeamViewer Service
Enable and start the TeamViewer daemon service:
sudo systemctl enable teamviewerd
sudo systemctl start teamviewerd
This ensures that TeamViewer starts automatically after system reboots.
Step 6: Verify Service Status
Check if the TeamViewer service is running correctly:
sudo systemctl status teamviewerdThe output should show “active (running)” if the service started successfully.
Method 3: Configuring TeamViewer for Mass Deployment
For enterprise environments where TeamViewer needs to be deployed across multiple CentOS Stream 10 systems, a mass deployment approach is more efficient.
Step 1: Create Deployment Script
Create a bash script for deployment:
#!/bin/bash

# Install EPEL repository
dnf install epel-release -y

# Update system
dnf update -y

# Download TeamViewer
wget https://download.teamviewer.com/download/linux/teamviewer-host.x86_64.rpm

# Install TeamViewer
dnf install ./teamviewer-host.x86_64.rpm --enablerepo=epel -y

# Enable service
systemctl enable teamviewerd
systemctl start teamviewerd

# Set custom alias (optional)
teamviewer --alias="$(hostname)-CentOS10"
Save this script as deploy-teamviewer.sh and make it executable:
chmod +x deploy-teamviewer.shStep 2: Account Assignment for Centralized Management
For centralized management, you can assign the TeamViewer installation to your TeamViewer account:
teamviewer assignment --id YOUR_ASSIGNMENT_IDReplace YOUR_ASSIGNMENT_ID with your actual TeamViewer assignment ID.
Step 3: Additional Deployment Parameters
You can add custom configuration parameters to your deployment script:
# Apply custom module configuration
teamviewer setup --configure CUSTOMCONFIGID=YOUR_CUSTOM_CONFIG_ID

# Set device alias
teamviewer setup --device-alias=%HOSTNAME%
These parameters help customize the TeamViewer installation for your specific organizational needs and make device identification easier in your management console.
Launching TeamViewer for the First Time
After installing TeamViewer on your CentOS Stream 10 system, the next step is to launch and configure it properly.
Using Command Line:
Start TeamViewer from the command line:
teamviewerThis command launches the TeamViewer graphical interface.

Using Desktop Environment:
Alternatively, you can launch TeamViewer from your desktop environment’s application menu:
- Open the Applications menu
- Look for TeamViewer in the Internet or Networking category
- Click on the TeamViewer icon to launch it
First-Time Configuration:
When launching TeamViewer for the first time, you’ll be prompted to:
- Accept the End User License Agreement (EULA)
- Choose between personal or commercial use
- Create or log in to your TeamViewer account (optional but recommended)
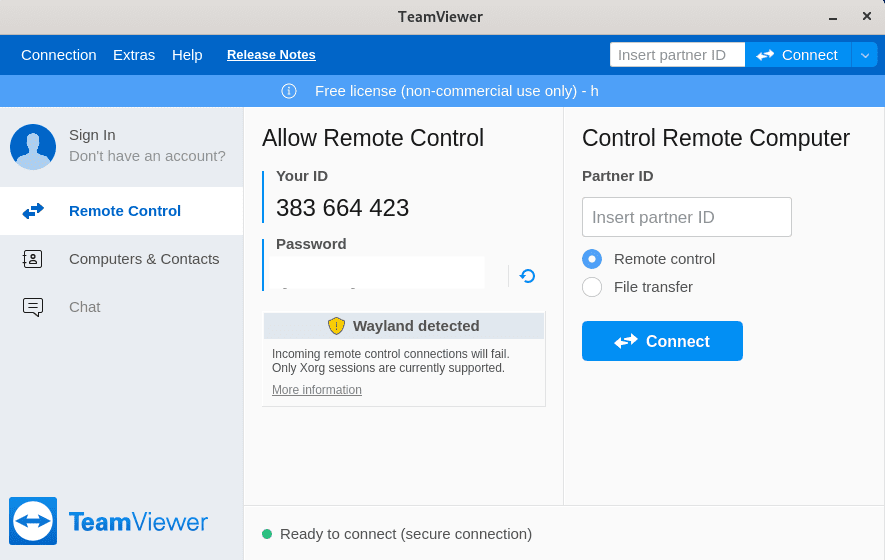
Once launched, TeamViewer displays your unique ID and password. These credentials are necessary for remote connections to your system.
Setting Up Automatic Start:
To configure TeamViewer to start automatically when your system boots:
sudo systemctl enable teamviewerdThis command ensures the TeamViewer daemon starts at boot time, making your system available for remote connections without manual intervention.
Configuring TeamViewer Settings
Proper configuration of TeamViewer ensures optimal security and usability on your CentOS Stream 10 system.
Accessing Configuration Options:
Open TeamViewer’s settings by clicking on “Extras” > “Options” in the TeamViewer interface, or run:
teamviewer optionsSetting Up a Permanent Password:
For servers requiring unattended access, set up a permanent password:
- Go to the “Security” tab in TeamViewer options
- Enable “Personal password (for unattended access)”
- Enter a strong password
- Click “OK” to save
Alternatively, set a password via command line:
teamviewer passwd YOUR_PASSWORDThis creates a permanent password for unattended access to your system.
Remote Control Settings:
Configure how remote sessions behave:
- Navigate to the “Remote Control” tab
- Adjust quality settings based on your network bandwidth
- Configure screen resolution options
- Set preferences for remote input control
Advanced Settings:
For enhanced security and performance:
- Go to “Advanced” settings
- Configure incoming and outgoing LAN connections
- Set up wake-on-LAN functionality if needed
- Configure logging options for auditing purposes
Command Line Configuration:
Many settings can be configured via command line:
# Check current settings
teamviewer info

# Configure automatic start with system
teamviewer setup --start-with-system=yes

# Enable easy access
teamviewer setup --grant-easy-access=yes
These configuration options help tailor TeamViewer to your specific needs while maintaining security.
Troubleshooting Common Installation Issues
Even with careful installation, issues can arise with TeamViewer on CentOS Stream 10. Here are solutions to common problems:
TeamViewer Daemon Not Running:
If you encounter “The TeamViewer daemon is not running” error:
sudo teamviewer --daemon restartThis specific restart command often resolves daemon issues that simple stop/start sequences cannot fix.
Missing Dependencies:
If installation fails due to missing dependencies:
sudo dnf install qt5-qtwebkit qt5-qtquickcontrols qt5-qtdeclarative --enablerepo=epel
sudo dnf install ./teamviewer.x86_64.rpm --enablerepo=epel
These commands install specific Qt dependencies that TeamViewer requires.
Black Screen Issues:
If you see a black screen during remote sessions:
- Check your graphics drivers
- Try launching TeamViewer with hardware acceleration disabled:
teamviewer --no-gpu
Connection Problems:
For connection issues:
- Verify your internet connection
- Check firewall settings:
sudo firewall-cmd --list-all - Allow TeamViewer through the firewall if necessary:
sudo firewall-cmd --permanent --add-service=teamviewer
sudo firewall-cmd --reload
Authentication Failures:
If TeamViewer fails to authenticate:
- Restart the TeamViewer service
sudo systemctl restart teamviewerd - Clear TeamViewer settings and try again:
sudo teamviewer setup --cleanup
These troubleshooting steps address the most common issues users encounter when installing or using TeamViewer on CentOS Stream 10.
Updating TeamViewer on CentOS Stream 10
Keeping TeamViewer updated is crucial for security and access to the latest features.
Checking Current Version:
Determine your current TeamViewer version:
teamviewer --versionUsing Package Manager:
Update TeamViewer using dnf:
sudo dnf update teamviewerIf TeamViewer was added to your system repositories during installation, this command will update it along with other system packages.
Manual Update:
For manual updates:
- Download the latest TeamViewer package:
wget https://download.teamviewer.com/download/linux/teamviewer.x86_64.rpm - Install the newer version over the existing one:
sudo dnf install ./teamviewer.x86_64.rpm
The package manager will automatically handle the upgrade process.
Post-Update Verification:
After updating, verify the new version and restart the service:
teamviewer --version
sudo systemctl restart teamviewerd
Regular updates ensure you have the latest security patches and features available for TeamViewer on your CentOS Stream 10 system.
Removing TeamViewer from CentOS Stream 10
If you need to uninstall TeamViewer from your CentOS Stream 10 system:
Basic Removal:
Remove the TeamViewer package:
sudo dnf remove teamviewerThis command removes the main TeamViewer package but may leave configuration files intact.
Complete Removal:
For a thorough removal including configuration files:
sudo dnf remove teamviewer
sudo rm -rf /opt/teamviewer
sudo rm -rf ~/.config/teamviewer
sudo rm -rf ~/.local/share/teamviewer*
These commands remove TeamViewer and its associated files from your system.
Verification:
Verify TeamViewer has been completely removed:
rpm -qa | grep teamviewer
ls -la /opt/teamviewer
If these commands return no results, TeamViewer has been successfully removed from your system.
Security Considerations
Security is paramount when using remote access software like TeamViewer on your CentOS Stream 10 system.
Strong Authentication:
- Enable two-factor authentication for your TeamViewer account
- Use complex, unique passwords for TeamViewer access
- Consider using a password manager to generate and store strong passwords
Connection Security:
TeamViewer employs robust encryption for all connections:
- RSA 4096-bit public/private key exchange
- AES 256-bit session encoding
- Perfect forward secrecy for key agreements
These security measures ensure that all connections are encrypted end-to-end, preventing unauthorized access to your sessions.
Access Control:
Limit who can access your system:
- Configure a whitelist of allowed TeamViewer IDs
- Use the Trusted Devices feature to control which devices can connect
- Set up access control in TeamViewer Management Console for larger deployments
Session Settings:
Enhance security during sessions:
- Disable “Easy Access” when not needed
- Configure TeamViewer to require confirmation before allowing connections
- Set sessions to automatically end after a period of inactivity
Monitoring:
Regularly monitor TeamViewer access:
- Check connection logs in TeamViewer interface
- Monitor system logs for suspicious activity:
journalctl -u teamviewerd
Implementing these security measures helps protect your CentOS Stream 10 system from unauthorized access while using TeamViewer.
Congratulations! You have successfully installed TeamViewer. Thanks for using this tutorial for installing the TeamViewer remote desktop software on your CentOS Stream 10 system. For additional or useful information, we recommend you check the official TeamViewer website.