How To Install Vtiger CRM on Ubuntu 24.04 LTS

In this tutorial, we will show you how to install Vtiger CRM on Ubuntu 24.04 LTS. Vtiger CRM is a powerful open-source customer relationship management system that helps businesses streamline their sales, marketing, and support processes. In this comprehensive guide, we’ll walk you through the step-by-step process of installing Vtiger CRM on Ubuntu 24.04 LTS. Whether you’re a small business owner or an IT professional, this tutorial will equip you with the knowledge to set up a robust CRM solution on your Ubuntu server.
Prerequisites
Before we dive into the installation process, ensure you have the following:
- A server running Ubuntu 24.04 LTS
- Root or sudo privileges
- A domain name pointing to your server’s IP address
- Basic familiarity with Linux command-line operations
Step 1: Update Your System
Begin by updating your Ubuntu system to ensure you have the latest packages and security updates:
sudo apt update
sudo apt upgrade -y
Step 2: Install LAMP Stack
Vtiger CRM requires a LAMP (Linux, Apache, MySQL, PHP) stack. Let’s install each component:
Install Apache Web Server
sudo apt install apache2 -y
sudo systemctl enable apache2
sudo systemctl start apache2
Install MySQL Database Server
sudo apt install mysql-server -y
sudo systemctl enable mysql
sudo systemctl start mysql
Secure MySQL Installation
Run the MySQL secure installation script to set a root password and remove insecure default settings:
sudo mysql_secure_installation
Install PHP and Required Modules
sudo apt install php libapache2-mod-php php-mysql php-curl php-gd php-mbstring php-xml php-zip php-soap php-imap -y
Step 3: Configure PHP for Vtiger CRM
Vtiger CRM requires specific PHP settings. Edit the php.ini file:
sudo nano /etc/php/8.2/apache2/php.ini
Modify the following values:
memory_limit = 256M
upload_max_filesize = 100M
post_max_size = 100M
max_execution_time = 300
max_input_time = 300
display_errors = Off
Save the file and exit the editor.
Step 4: Create a MySQL Database for Vtiger CRM
Log in to MySQL as root:
sudo mysql -u root -p
Create a new database and user for Vtiger CRM:
CREATE DATABASE vtigercrm;
CREATE USER 'vtigeruser'@'localhost' IDENTIFIED BY 'your_strong_password';
GRANT ALL PRIVILEGES ON vtigercrm.* TO 'vtigeruser'@'localhost';
FLUSH PRIVILEGES;
EXIT;
Step 5: Download and Extract Vtiger CRM
Navigate to the /tmp directory and download the latest version of Vtiger CRM:
cd /tmp
wget https://sourceforge.net/projects/vtigercrm/files/latest/download -O vtigercrm.tar.gz
tar -xzvf vtigercrm.tar.gz
sudo mv vtigercrm /var/www/html/
Step 6: Set Proper Permissions
Ensure that the web server has the necessary permissions to access Vtiger CRM files:
sudo chown -R www-data:www-data /var/www/html/vtigercrm
sudo chmod -R 755 /var/www/html/vtigercrm
Step 7: Configure Apache Virtual Host
Create a new Apache virtual host configuration file for Vtiger CRM:
sudo nano /etc/apache2/sites-available/vtigercrm.conf
Add the following configuration, replacing yourdomain.com with your actual domain name:
<VirtualHost *:80>
    ServerAdmin webmaster@yourdomain.com
    ServerName yourdomain.com
    DocumentRoot /var/www/html/vtigercrm

    <Directory /var/www/html/vtigercrm>
        Options FollowSymLinks
        AllowOverride All
        Require all granted
    </Directory>

    ErrorLog ${APACHE_LOG_DIR}/vtigercrm_error.log
    CustomLog ${APACHE_LOG_DIR}/vtigercrm_access.log combined
</VirtualHost>
Save the file and exit the editor.
Step 8: Enable the Virtual Host and Apache Modules
sudo a2ensite vtigercrm.conf
sudo a2enmod rewrite
sudo systemctl restart apache2
Step 9: Install and Configure SSL Certificate
For enhanced security, it’s advisable to use HTTPS. You can obtain a free SSL certificate using Let’s Encrypt:
sudo apt install certbot python3-certbot-apache -y
sudo certbot --apache -d yourdomain.com
Follow the prompts to complete the SSL certificate installation.
Step 10: Complete Vtiger CRM Installation via Web Interface
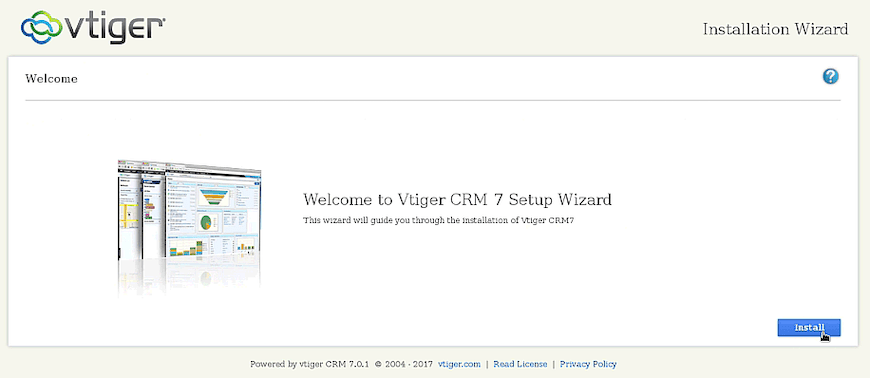
Open your web browser and navigate to http://yourdomain.com (or https://yourdomain.com if you’ve set up SSL). You’ll be greeted by the Vtiger CRM installation wizard.
- Click “Install” to begin the process.
- Accept the license agreement.
- Verify that all system requirements are met.
- Enter the database information (database name, username, and password) you created earlier.
- Set up your admin account credentials.
- Choose your industry and select the modules you want to use.
- Complete the installation process.

Post-Installation Steps
Configure Cron Jobs
Vtiger CRM requires cron jobs for various automated tasks. Set up a cron job by running:
sudo crontab -e
Add the following line:
*/15 * * * * php /var/www/html/vtigercrm/cron/vtigercron.php
Optimize Performance
To enhance Vtiger CRM’s performance, consider implementing the following:
- Enable PHP OPcache for faster PHP execution
- Set up a Redis cache for improved database performance
- Configure Apache or Nginx caching for static assets
Troubleshooting Tips
If you encounter issues during or after installation, try these troubleshooting steps:
- Check Apache error logs:
sudo tail -f /var/log/apache2/error.log - Verify PHP configuration:
php -i | grep php.ini - Ensure proper file permissions:
sudo chown -R www-data:www-data /var/www/html/vtigercrm - Clear browser cache and cookies
Keeping Vtiger CRM Updated
Regularly updating Vtiger CRM is crucial for security and performance. To update:
- Backup your database and files
- Download the latest version from the official Vtiger website
- Follow the upgrade instructions provided in the release notes
Congratulations! You have successfully installed Vtiger CRM. Thanks for using this tutorial for installing the Vtiger CRM on the Ubuntu 24.04 LTS system. For additional help or useful information, we recommend you check the official Vtiger website.