In this tutorial, we will show you how to install Webmin on AlmaLinux 8. For those of you who didn’t know, Webmin is a free and open-source control panel for administering Unix/Linux servers that is very similar to cPanel and provides an easy way to manage Linux systems through a web browser. Webmin web interface is used to set up user and disk management, Apache, DNS, PHP, MySQL, check CPU usage, system info, network config, and more.
This article assumes you have at least basic knowledge of Linux, know how to use the shell, and most importantly, you host your site on your own VPS. The installation is quite simple and assumes you are running in the root account, if not you may need to add ‘sudo‘ to the commands to get root privileges. I will show you the step-by-step installation of the Webmin control panel for system administration on AlmaLinux 8. You can follow the same instructions for Rocky Linux.
Prerequisites
- A server running one of the following operating systems: AlmaLinux 8 or Rocky Linux 8.
- It’s recommended that you use a fresh OS install to prevent any potential issues.
- SSH access to the server (or just open Terminal if you’re on a desktop).
- A
non-root sudo useror access to theroot user. We recommend acting as anon-root sudo user, however, as you can harm your system if you’re not careful when acting as the root.
Install Webmin on AlmaLinux 8
Step 1. First, let’s start by ensuring your system is up-to-date.
sudo dnf update
sudo dnf install epel-release
Step 2. Installing Apache.
Apache webserver installed. Check out our article on how to install LAMP on AlmaLinux 8.
Step 3. Installing Webmin on AlmaLinux 8.
Now we download the latest version of the Webmin from the official page:
wget https://www.webmin.com/download/webmin-current.tar.gz
tar xvf webmin-current.tar.gz
Output:
webmin-1.979 webmin-current.tar.gz
Next, create a Webmin directory in the path you want to install, e.g /usr/local/.
sudo mkdir -p /usr/local/webmin
After that, run the script, passing the just created directory as an argument:
sudo ./webmin-1.979/setup.sh /usr/local/webmin/
During installation, the script may prompt you to customize some configuration options:
Config file directory [/etc/webmin]:
Log file directory [/var/webmin]:
Full path to perl (default /usr/bin/perl):
Web server port (default 10000):
Login name (default admin): webminadmin
Login password: mypassword
Password again: mypassword
Use SSL (y/n): y
Start Webmin at boot time (y/n): y
The output of successful installation:
...
Webmin has been installed and started successfully. Use your web browser to go to
 https://your-server-ip-address:10000/
and login with the name and password you entered previously.
...
Step 4. Configure Firewall.
If your machine is behind a firewall, the Webmin server port may be blocked. Thus, you need to adjust firewall settings to allow a Webmin port.
sudo firewall-cmd --add-port=10000/tcp --permanent
sudo firewall-cmd --reload
Step 5. Accessing Webmin Web Interface.
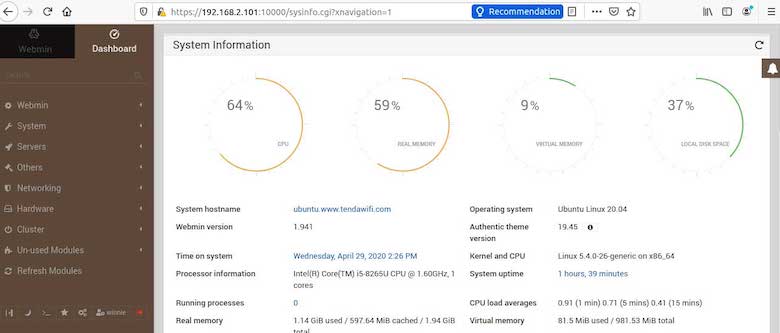
Once successfully installed, now open your web browser and type the URL https://your-server-ip-address:10000. Because it’s running in HTTPS mode and using a self-signed TLS certificate, you will be told by the browser that the connection is not secure. You will be redirected to the following page:

Congratulations! You have successfully installed Webmin. Thanks for using this tutorial for installing the Webmin control panel on your AlmaLinux 8 system. For additional help or useful information, we recommend you check the official Webmin website.