In this tutorial, we will show you how to install Webuzo on Ubuntu 18.04 LTS. For those of you who didn’t know, Webuzo is a LAMP stack that is specially designed for the cloud. The goal is to provide solution providers with the ability to easily launch, manage, and maintain a number of popular application and development stacks for their customers. Webuzo is one of the products from Softaculuous, their primary software is a script deployment system that has hundreds of auto-installer scripts widely used in the Web Hosting industry.
Benefits of Using Webuzo
- Simplified Administration: User-friendly interface makes website and application management accessible to users of all technical levels
- Time Efficiency: One-click installations and automated updates reduce time spent on repetitive tasks
- Cost-Effective: Subscription starts from $2.88 compared to cPanel’s $16.88, making it a budget-friendly alternative
- Customization: High level of control and customization options for tailoring to specific needs
- Technical Support: Dedicated support team for assistance with issues and inquiries
- Billing System Integration: Supports automation with popular billing systems like WHMCS and Blesta
This article assumes you have at least basic knowledge of Linux, know how to use the shell, and most importantly, you host your site on your own VPS. The installation is quite simple and assumes you are running in the root account, if not you may need to add ‘sudo‘ to the commands to get root privileges. I will show you through the step-by-step installation Webuzo Control Panel on an Ubuntu 18.04 (Bionic Beaver) server.
Prerequisites
- A server running one of the following operating systems: Ubuntu server.
- It’s recommended that you use a fresh OS install to prevent any potential issues.
- SSH access to the server (or just open Terminal if you’re on a desktop).
- A
non-root sudo useror access to theroot user. We recommend acting as anon-root sudo user, however, as you can harm your system if you’re not careful when acting as the root.
Install Webuzo on Ubuntu 18.04 LTS Bionic Beaver
Step 1. Update your system packages.
First, make sure that all your system packages are up-to-date by running the following apt commands in the terminal.
sudo apt update
sudo apt upgrade
Step 2. Installing Webuzo on Ubuntu 18.04.
Webuzo can be installed in a number of ways an automated install script. Install Webuzo using the following command:
wget http://files.webuzo.com/install.sh
To make the installation script executable, type the following command:
chmod 0755 install.sh
Next, run the installation script, type the following command:
./install.sh
Step 3. Accessing Webuzo.
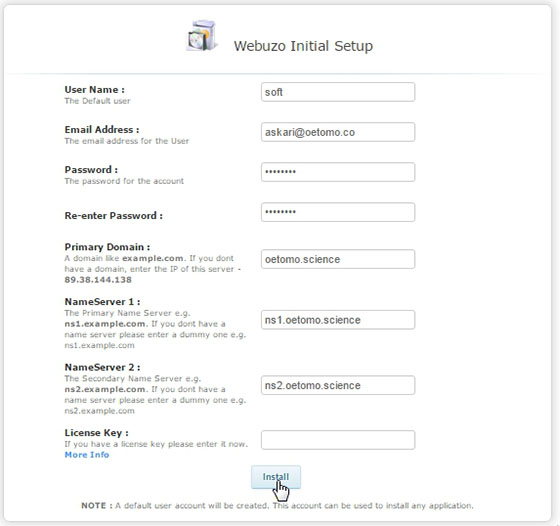
Webuzo will be available on HTTP port 80 by default. Open your favorite browser and navigate to http://your-domain.com:2004 or http://your-server-ip:2004 and complete the required steps to finish the installation. If you are using a firewall, please open port 80 to enable access to the control panel.
-
For more information about Webuzo license pricing, please visit the pricing page.

Congratulations! You have successfully installed Webuzo. Thanks for using this tutorial for installing Webuzo Control Panel on Ubuntu 18.04 LTS Bionic Beaver system. For additional help or useful information, we recommend you to check the official Webuzo website.