How To Install WonderCMS on Ubuntu 24.04 LTS

WonderCMS is a lightweight, open-source content management system that offers a simple and user-friendly way to create and manage websites. With its minimalistic approach and focus on ease of use, WonderCMS has gained popularity among developers and website owners alike. In this comprehensive guide, we will walk you through the step-by-step process of installing WonderCMS on Ubuntu 24.04 LTS, enabling you to harness its power and build impressive websites effortlessly.
Prerequisites
Before diving into the installation process, ensure that your system meets the following requirements:
- Ubuntu 24.04 LTS operating system
- Non-root user with
sudoprivileges
Additionally, you will need the following software and tools:
- PHP (version 8.0 or greater) with required extensions:
curl,mbstring,zip - Web server options: Apache or Nginx
Step-by-Step Installation Guide
1. Update the System
Before proceeding with the installation, it’s crucial to ensure that your Ubuntu system is up to date. Open a terminal and run the following commands to update and upgrade the system packages:
sudo apt update && sudo apt upgrade -yThis command will fetch the latest package information and upgrade any outdated packages to their latest versions, providing a stable and secure foundation for the WonderCMS installation.
2. Install a Web Server
WonderCMS requires a web server to serve its files and handle incoming requests. You have the option to choose between Apache and Nginx. Let’s explore both options:
Option A: Apache
To install Apache, run the following command in the terminal:
sudo apt install apache2 -yOnce the installation is complete, you need to enable the mod_rewrite module and restart Apache for the changes to take effect:
sudo a2enmod rewrite
sudo systemctl restart apache2
Option B: Nginx
If you prefer using Nginx as your web server, you can install it by running the following command:
sudo apt install nginx -yAfter the installation, start and enable the Nginx service to ensure it runs automatically on system boot:
sudo systemctl start nginx
sudo systemctl enable nginx
3. Install PHP and Extensions
WonderCMS is built using PHP, so you need to install PHP and the necessary extensions. Run the following command to install PHP and the required extensions:
sudo apt install php php-curl php-mbstring php-zip php-fpm -yOnce the installation is complete, you can verify the PHP version by running:
php -vMake sure the installed PHP version is 8.0 or higher to ensure compatibility with WonderCMS.
4. Configure the Web Server
With the web server and PHP installed, it’s time to configure the web server to serve WonderCMS properly.
Apache Configuration
To configure Apache for WonderCMS, create a new configuration file by running:
sudo nano /etc/apache2/sites-available/wondercms.confAdd the following configuration settings to the file:
<VirtualHost *:80>
    ServerName your_domain.com
    ServerAdmin webmaster@your_domain.com
    DocumentRoot /var/www/wondercms

    <Directory /var/www/wondercms>
        Options Indexes FollowSymLinks MultiViews
        AllowOverride All
        Require all granted
    </Directory>

    ErrorLog ${APACHE_LOG_DIR}/error.log
    CustomLog ${APACHE_LOG_DIR}/access.log combined
</VirtualHost>
Replace your_domain.com with your actual domain name or server IP address. Save the file and exit the editor.
Enable the new configuration by running:
sudo a2ensite wondercms.confFinally, reload Apache for the changes to take effect:
sudo systemctl reload apache2Nginx Configuration
If you’re using Nginx, create a new configuration file for WonderCMS:
sudo nano /etc/nginx/sites-available/wondercms.confAdd the following server block configuration:
server {
    listen 80;
    server_name your_domain.com;
    root /var/www/wondercms;
    index index.php;

    location / {
        try_files $uri $uri/ /index.php?$query_string;
    }

    location ~ \.php$ {
        include snippets/fastcgi-php.conf;
        fastcgi_pass unix:/var/run/php/php8.0-fpm.sock;
    }
}
Replace your_domain.com with your domain name or server IP address. Save the file and exit the editor.
Enable the configuration by creating a symbolic link:
sudo ln -s /etc/nginx/sites-available/wondercms.conf /etc/nginx/sites-enabled/Test the Nginx configuration for any syntax errors:
sudo nginx -tIf no errors are found, reload Nginx:
sudo systemctl reload nginx5. Download and Install WonderCMS
With the web server configured, you can now download and install WonderCMS. Navigate to the web root directory:
cd /var/www/Download the latest version of WonderCMS using the following command:
wget https://github.com/WonderCMS/wondercms/releases/download/3.4.3/wondercms-343.zipUnzip the downloaded package and remove the zip file:
unzip wondercms-343.zipSet the appropriate permissions for the web server to access the WonderCMS files:
sudo chown -R www-data:www-data /var/www/wondercms
sudo chmod -R 755 /var/www/wondercms
6. Finalize Installation
With WonderCMS files in place and permissions set, you can now access WonderCMS through a web browser. Open your preferred browser and enter your server’s IP address or domain name.
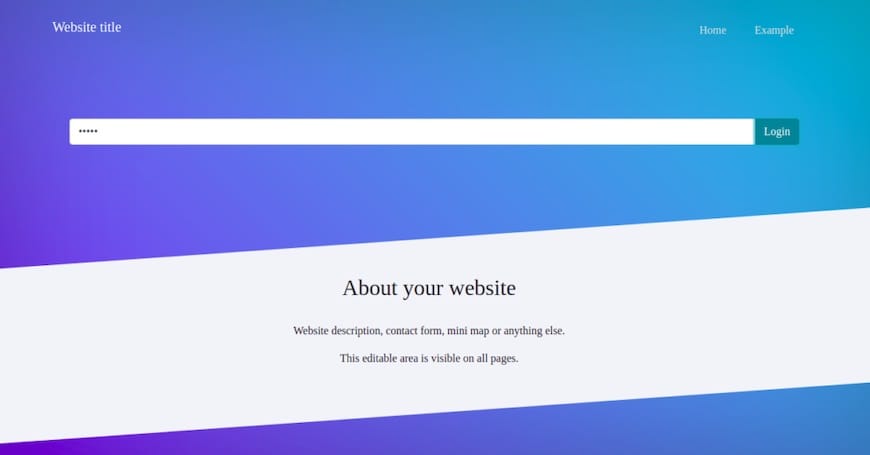
You will be greeted with the WonderCMS setup page. Follow the on-screen instructions to complete the initial setup, including setting an admin password and configuring basic site settings.
Post-Installation Configuration
After completing the installation, it’s essential to change the default password for security purposes. Log in to the WonderCMS dashboard using the default credentials and navigate to the settings page. Update the password to a strong and unique one to protect your website from unauthorized access.

WonderCMS provides a user-friendly dashboard where you can configure various aspects of your website, such as site title, description, theme, and plugins. Take some time to explore the available options and customize your site according to your preferences.
Troubleshooting Common Issues
If you encounter any issues during the installation process or while accessing WonderCMS, here are a few troubleshooting tips:
- Ensure that you have followed all the installation steps correctly and have the necessary prerequisites installed.
- Double-check the file permissions and ownership of the WonderCMS files to ensure the web server can access them properly.
- Verify that the PHP extensions mentioned in the prerequisites are installed and enabled.
- Check the web server logs (Apache or Nginx) for any error messages that may provide insights into the issue.
- Consult the WonderCMS documentation and community forums for additional troubleshooting guidance and support.
Congratulations! You have successfully installed WonderCMS. Thanks for using this tutorial for installing WonderCMS on Ubuntu 24.04 LTS system. For additional help or useful information, we recommend you check the WonderCMS website.