How To Install WordPress on Ubuntu 24.04 LTS

In this tutorial, we will show you how to install WordPress on Ubuntu 24.04 LTS. WordPress is the world’s most popular content management system (CMS), powering over 40% of all websites on the internet. Its flexibility, ease of use, and vast ecosystem of themes and plugins make it an ideal choice for bloggers, businesses, and developers alike.
This article assumes you have at least basic knowledge of Linux, know how to use the shell, and most importantly, you host your site on your own VPS. The installation is quite simple and assumes you are running in the root account, if not you may need to add ‘sudo‘ to the commands to get root privileges. I will show you the step-by-step installation of WordPress on Ubuntu 24.04 (Noble Numbat). You can follow the same instructions for Ubuntu 22.04 and any other Debian-based distribution like Linux Mint, Elementary OS, Pop!_OS, and more as well.
Prerequisites
- A server running one of the following operating systems: Ubuntu and any other Debian-based distribution like Linux Mint.
- It’s recommended that you use a fresh OS install to prevent any potential issues.
- SSH access to the server (or just open Terminal if you’re on a desktop).
- A domain name pointed to your server’s IP address (optional but recommended).
- An active internet connection. You’ll need an internet connection to download the necessary packages and dependencies.
- Basic familiarity with the Linux command line.
- An Ubuntu 24.04 system with root access or a user with sudo privileges.
Install WordPress on Ubuntu 24.04 LTS
Step 1. Updating the Package Repository.
Before installing WordPress, it is essential to update and upgrade your Ubuntu system to ensure you have the latest packages and security patches. Open a terminal and run the following commands:
sudo apt update
sudo apt upgrade
These commands will refresh the package list and upgrade any outdated packages to their latest versions.
Step 2. Installing the LAMP Stack.
WordPress requires a web server, a database, and PHP to function. We’ll use the LAMP stack, which stands for Linux, Apache, MySQL, and PHP. Let’s install each component:
- Install Apache Web Server
Apache is one of the most popular web servers. Install it with the following command:
sudo apt install apache
After installation, start and enable Apache to run on boot:
sudo systemctl start apache2
sudo systemctl enable apache2
- Install MySQL Database Server
Next, let’s install MySQL to manage our database:
sudo apt install mysql-server
After installation, secure your MySQL installation:
sudo mysql_secure_installation
Follow the prompts to set a root password and remove insecure default settings.
- Install PHP and Required Extensions
Now, let’s install PHP and the necessary extensions for WordPress:
sudo apt install php libapache2-mod-php php-mysql php-curl php-gd php-mbstring php-xml php-xmlrpc php-soap php-intl php-zip -y
Verify your PHP installation by creating a test file:
echo "<?php phpinfo(); ?>" | sudo tee /var/www/html/phpinfo.php
Visit http://your_server_ip/phpinfo.php in your browser to see PHP information. Remember to remove this file after testing for security reasons:
Step 3. Create a MySQL Database for WordPress.
Log into MySQL as the root user:
sudo mysql -u root -p
Create a new database and user for WordPress:
CREATE DATABASE wordpress;
CREATE USER 'wordpressuser'@'localhost' IDENTIFIED BY 'your_strong_password';
GRANT ALL PRIVILEGES ON wordpress.* TO 'wordpressuser'@'localhost';
FLUSH PRIVILEGES;
EXIT;
Step 4. Download and Configure WordPress.
Now, let’s download and set up WordPress:
cd /tmp
wget https://wordpress.org/latest.tar.gz
tar xzvf latest.tar.gz
sudo mv wordpress /var/www/html/
sudo chown -R www-data:www-data /var/www/html/wordpress
sudo chmod -R 755 /var/www/html/wordpress
Create a WordPress configuration file:
sudo cp /var/www/html/wordpress/wp-config-sample.php /var/www/html/wordpress/wp-config.php
Edit the configuration file with your database details:
sudo nano /var/www/html/wordpress/wp-config.php
Find the following lines and update them with your database information:
define('DB_NAME', 'wordpress');
define('DB_USER', 'wordpressuser');
define('DB_PASSWORD', 'your_strong_password');
define('DB_HOST', 'localhost');
While in the configuration file, it’s a good idea to add unique authentication keys. You can generate these using the WordPress secret key generator. Replace the existing authentication key section with the generated keys.
Step 5. Configure Apache for WordPress.
Create a new Apache configuration file for WordPress:
sudo nano /etc/apache2/sites-available/wordpress.conf
Add the following configuration, replacing your_domain.com with your actual domain name:
<VirtualHost *:80>
ServerAdmin webmaster@localhost
ServerName your_domain.com
ServerAlias www.your_domain.com
DocumentRoot /var/www/html/wordpress
ErrorLog ${APACHE_LOG_DIR}/error.log
CustomLog ${APACHE_LOG_DIR}/access.log combined

<Directory /var/www/html/wordpress/>
AllowOverride All
</Directory>
</VirtualHost>
Enable the new site and disable the default Apache site:
sudo a2ensite wordpress.conf
sudo a2dissite 000-default.conf
Enable the rewrite module and restart Apache:
sudo a2enmod rewrite
sudo systemctl restart apache2
Step 6. Complete WordPress Installation.
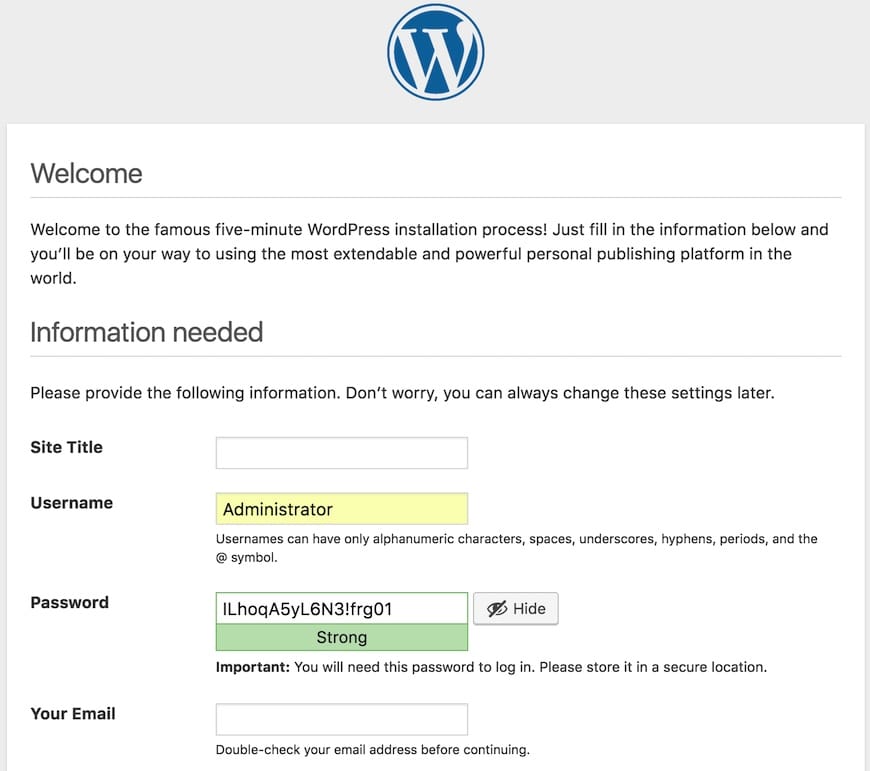
Open your web browser and navigate to your domain name or server IP address. You should see the WordPress installation page. Follow the on-screen instructions to complete the installation, including setting up your site title, admin username, and password.

Step 7. Secure Your WordPress Installation.
Now that WordPress is installed, it’s crucial to take some additional steps to secure your site:
-
- Change the default login URL:
Install a plugin like “WPS Hide Login” to change the default wp-admin login URL.
-
- Install security plugins:
Consider installing security plugins like Wordfence or Sucuri Security to enhance your site’s protection against threats.
-
- Enable SSL/HTTPS:
Secure your site with an SSL certificate. You can obtain a free certificate from Let’s Encrypt:
sudo apt install certbot python3-certbot-apache
sudo certbot --apache -d example.com -d www.example.com
-
- Regular updates:
Keep WordPress core, themes, and plugins up-to-date to patch security vulnerabilities.
-
- Set up automatic backups:
Use plugins like UpdraftPlus or BackWPup to schedule regular backups of your site and database.
Congratulations! You have successfully installed WordPress. Thanks for using this tutorial for installing WordPress on the Ubuntu 24.04 LTS system. For additional help or useful information, we recommend you check the WordPress website.