How To Install XFCE Desktop on Fedora 40

In this tutorial, we will show you how to install XFCE Desktop on Fedora 40. Fedora 40, the latest release of the popular Linux distribution, offers a stable and feature-rich operating system for users. While Fedora comes with the default GNOME desktop environment, some users may prefer a lightweight and customizable alternative. XFCE is a fast, user-friendly desktop environment that provides a balance between simplicity and functionality.
This comprehensive guide will walk you through the process of installing XFCE on Fedora 40, from initial system preparation to advanced configuration. Whether you’re a Linux novice or a seasoned pro, you’ll find valuable insights and step-by-step instructions to help you set up XFCE quickly and efficiently.
Prerequisites
Before we dive into the installation process, ensure that you have the following prerequisites in place:
- A server running one of the following operating systems: Fedora 40.
- It’s recommended that you use a fresh OS install to prevent any potential issues.
- You will need access to the terminal to execute commands. Fedora provides the Terminal application for this purpose. It can be found in your Applications menu.
- A computer with a minimum of 1 GB RAM and a dual-core processor.
- A stable internet connection to download the necessary packages.
- A non-root sudo user or access to the root user. We recommend acting as a non-root sudo user, however, as you can harm your system if you’re not careful when acting as the root.
Install XFCE Desktop on Fedora 40
Step 1. Update the System.
To begin, open a terminal and update your system packages to ensure you have the latest versions available. Run the following command:
sudo dnf clean all
sudo dnf update
This command will refresh the package repositories and upgrade any outdated packages to their latest versions. Once the update process is complete, you can proceed with the installation of XFCE.
Step 2. Installing XFCE Desktop Environment.
With your system fully updated, you’re ready to install XFCE. Fedora uses the DNF package manager, which makes installing software groups like desktop environments straightforward. To install XFCE, run the following command:
sudo dnf groupinstall "Xfce Desktop"
This command instructs the DNF package manager to install the “Xfce Desktop” package group, which includes all the necessary components for a fully functional XFCE desktop environment. DNF will resolve any dependencies and download the required packages.
Once the installation is complete, you can verify that XFCE has been successfully installed by checking the installed packages with the following command:
dnf grouplist -v "Xfce Desktop"
Step 3. Configure XFCE as Default Desktop.
Now that XFCE is installed, you have the option to set it as your default desktop environment. This step ensures that XFCE starts automatically when you boot your system.
First, set the system to boot into the graphical target (GUI mode) by default:
sudo systemctl set-default graphical.target
Next, edit the .xinitrc file in your home directory to start XFCE when you log in. Open the file with a text editor:
nano ~/.xinitrc
Add the following line at the end of the file:
exec /usr/bin/xfce4-session
With these configurations in place, XFCE will be the default desktop environment when you log in to your Fedora 40 system.
Step 4. Switching Between Desktop Environments.
If you have multiple desktop environments installed on your Fedora 40 system, you can easily switch between them using one of the following methods:
- Login Manager:
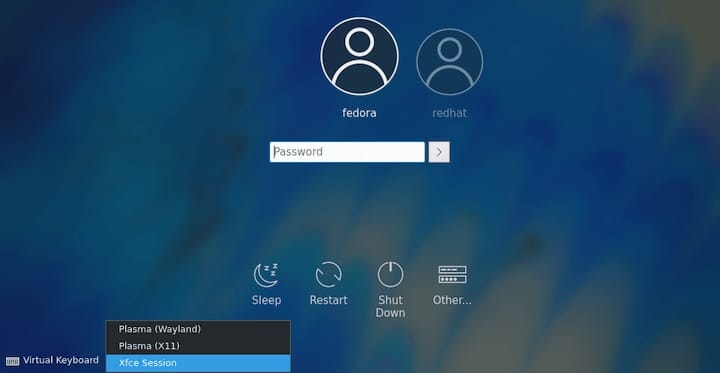
- When you reach the login screen, click on the session menu (usually represented by a gear icon or a dropdown menu).
- Select “XFCE” from the list of available desktop environments.
- Log in with your credentials, and you will be directed to the XFCE desktop.
- Switchdesk Tool:
- Install the
switchdeskandswitchdesk-guipackages by running the following command:
- Install the
sudo dnf install switchdesk switchdesk-gui
-
- Open a terminal and run the following command to switch to XFCE:
switchdesk xfce

Congratulations! You have successfully installed XFCE. Thanks for using this tutorial for installing the XFCE desktop environment on Fedora 40 system. For additional help or useful information, we recommend you check the official XFCE website.