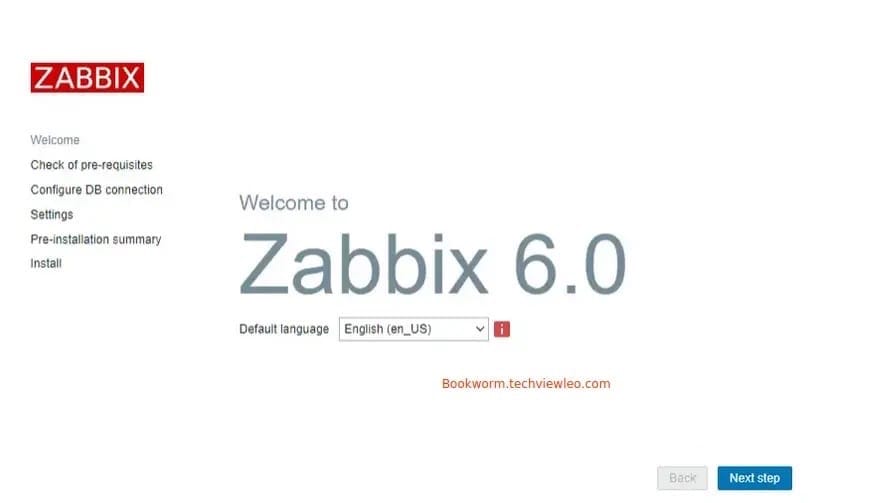
How To Install Zabbix on Fedora 39

In this tutorial, we will show you how to install Zabbix on Fedora 39. Zabbix is a powerful open-source monitoring solution designed to keep track of IT infrastructure components such as networks, servers, virtual machines, and cloud services. With its comprehensive feature set, including real-time monitoring, alerting, visualization, and reporting capabilities, Zabbix has become a popular choice among system administrators and IT professionals.
This article assumes you have at least basic knowledge of Linux, know how to use the shell, and most importantly, you host your site on your own VPS. The installation is quite simple and assumes you are running in the root account, if not you may need to add ‘sudo‘ to the commands to get root privileges. I will show you the step-by-step installation of the Zabbix monitoring tool on a Fedora 39.
Prerequisites
Before diving into the installation process, let’s ensure that you have everything you need:
- A server running one of the following operating systems: Fedora 39.
- It’s recommended that you use a fresh OS install to prevent any potential issues.
- You will need access to the terminal to execute commands. Fedora 39 provides the Terminal application for this purpose. It can be found in your Applications menu.
- A network connection or internet access to download the Zabbix package.
- A
non-root sudo useror access to theroot user. We recommend acting as anon-root sudo user, however, as you can harm your system if you’re not careful when acting as the root.
Install Zabbix on Fedora 39
Step 1. Before installing any new software, it’s always a good practice to ensure that your system repositories are up-to-date. Open a terminal and run the following command:
sudo dnf clean all
sudo dnf update
Step 2. Installing LAMP.
Zabbix relies on a LAMP (Linux, Apache, MySQL/MariaDB, PHP) stack to function properly. Let’s start by installing these components:
sudo dnf install httpd mariadb-server mariadb php php-mysqlnd php-gd php-xml php-bcmath
Once the installation is complete, we need to configure the MySQL/MariaDB database. First, start the service and enable it to run at system boot:
sudo systemctl start mariadb
sudo systemctl enable mariadb
Next, run the MySQL/MariaDB secure installation script to set up a root password and configure additional security settings:
sudo mysql_secure_installation
After completing the secure installation, create a dedicated database and user for Zabbix:
sudo mysql -u root -p
CREATE DATABASE zabbix CHARACTER SET utf8mb4 COLLATE utf8mb4_bin;
CREATE USER 'zabbix'@'localhost' IDENTIFIED BY 'your_strong_password';
GRANT ALL PRIVILEGES ON zabbix.* TO 'zabbix'@'localhost';
FLUSH PRIVILEGES;
EXIT;
Step 3. Install Zabbix on Fedora 39.
To ensure you have access to the latest Zabbix packages, you’ll need to add the official Zabbix repository to your system’s package sources:
sudo rpm -Uvh https://repo.zabbix.com/zabbix/6.5/rhel/9/x86_64/zabbix-release-6.5-1.el9.noarch.rpm
This command will import the Zabbix GPG key and set up the necessary repository configuration.
With the repository in place, you can now install the Zabbix server, frontend, and agent packages:
sudo dnf install zabbix-server-mysql zabbix-web-mysql zabbix-agent
During the installation process, you’ll be prompted to enter the database password you set earlier. Once the installation is complete, import the initial schema and data into the Zabbix database:
sudo zcat /usr/share/doc/zabbix-server-mysql*/create.sql.gz | sudo mysql -u zabbix -p zabbix
Step 4. Configure Zabbix Server.
The Zabbix server configuration file, zabbix_server.conf, is located at /etc/zabbix/zabbix_server.conf. Open this file in your preferred text editor and modify the following parameters:
DBHost=localhost
DBName=zabbix
DBUser=zabbix
DBPassword=your_strong_password
Replace your_strong_password with the password you set for the Zabbix database user.
After making the necessary changes, start the Zabbix server and enable it to run at system boot:
sudo systemctl restart zabbix-server
sudo systemctl enable zabbix-server
Don’t forget to open the necessary ports in your firewall to allow incoming connections to the Zabbix server:
sudo firewall-cmd --add-port=10051/tcp --permanent
sudo firewall-cmd --reload
Step 5. Configure Apache for Zabbix Frontend.
To access the Zabbix web interface, we need to configure an Apache virtual host. Create a new configuration file in the /etc/httpd/conf.d/ directory:
sudo nano /etc/httpd/conf.d/zabbix.conf
Add the following content to the file, replacing your_server_name with your server’s hostname or IP address:
<VirtualHost *:80>
    ServerName your_server_name
    DocumentRoot "/usr/share/zabbix"
    <Directory "/usr/share/zabbix">
        Options FollowSymLinks
        AllowOverride None
        Require all granted
    </Directory>
</VirtualHost>
Save the file and exit the text editor. Then, restart the Apache service:
sudo systemctl restart httpd
Step 6. Access Zabbix Frontend.
With the Zabbix frontend configured, you can now access the web interface by navigating to http://your_server_name/zabbix or http://your_server_ip/zabbix in your web browser.

During the initial setup, you’ll be prompted to provide the following login credentials:
- Username:
Admin - Password:
zabbix
After logging in, you’ll be greeted by the Zabbix dashboard, where you can start monitoring your IT infrastructure.
Step 7. Configure Zabbix Agent.
The Zabbix agent is responsible for collecting data from the monitored systems and sending it to the Zabbix server. To configure the agent, open the /etc/zabbix/zabbix_agentd.conf file in a text editor and locate the following lines:
Server=127.0.0.1
ServerActive=127.0.0.1
Replace 127.0.0.1 with the IP address or hostname of your Zabbix server. If you’re running the agent on the same machine as the server, you can leave these values as is.
After making the necessary changes, start the Zabbix agent and enable it to run at system boot:
sudo systemctl restart zabbix-agent
sudo systemctl enable zabbix-agent
Congratulations! You have successfully installed Zabbix. Thanks for using this tutorial for installing the Zabbix open-source monitoring software on your Fedora 39 system. For additional or useful information, we recommend you check the official Zabbix website.