How To Install Zabbix on Ubuntu 24.04 LTS

In today’s digital landscape, monitoring the performance and health of your IT infrastructure is crucial. Zabbix, an open-source monitoring solution, provides comprehensive tools for tracking servers, applications, and network devices. This guide will walk you through the process of installing Zabbix on Ubuntu 24.04 LTS, ensuring you have a robust monitoring system in place.
Prerequisites
Before diving into the installation process, ensure that your system meets the following prerequisites:
- System Specifications: A minimum of 2 GB of RAM and 2 CPU cores is recommended for a basic setup.
- Software Dependencies: You will need Apache, PHP, and MariaDB installed on your server.
- Root Access: Ensure you have root or sudo access to perform installation tasks.
- Stable Internet Connection: A reliable internet connection is necessary for downloading packages and updates.
Step 1: Update Your System
Keeping your system updated is essential for security and performance. Begin by updating your package list and upgrading existing packages. Open your terminal and run the following command:
sudo apt update && sudo apt -y upgradeThis command ensures that all installed packages are up-to-date, which is crucial before installing new software.
Step 2: Install Required Dependencies
Zabbix requires several software components to function correctly. Follow these steps to install the necessary dependencies:
-
- Install Apache: This web server will host the Zabbix frontend. Execute the command:
sudo apt install apache2-
- Install PHP: Zabbix relies on PHP for its frontend functionalities. Install PHP along with required modules using:
sudo apt install php php-{snmp,cgi,mbstring,common,net-socket,gd,xml-util,mysql,bcmath,imap}-
- Install MariaDB: This database server will store Zabbix data. Install it with the following command:
sudo apt install mariadb-serverAfter installing MariaDB, it’s important to secure your installation. Run the following command to set a root password and remove unnecessary privileges:
sudo mysql_secure_installationThis process will guide you through securing your MariaDB installation by setting a root password and removing anonymous users.
Step 3: Add Zabbix Repository
Zabbix provides an official APT repository that simplifies the installation process. To add this repository, follow these steps:
-
- Download the Zabbix APT repository package:
wget https://repo.zabbix.com/zabbix/7.0/ubuntu/pool/main/z/zabbix-release/zabbix-release_7.0-1+ubuntu24.04_all.deb-
- Add the repository to your system:
sudo dpkg -i zabbix-release_7.0-1+ubuntu24.04_all.debThis step ensures that you can easily install Zabbix and receive updates directly from the official repository.
Step 4: Install Zabbix Server
With the repository added, you can now install the Zabbix server along with its frontend and agent components. Execute the following command:
sudo apt install zabbix-server-mysql zabbix-frontend-php zabbix-agentThis command installs all necessary packages for running Zabbix on your Ubuntu server.
Step 5: Configure Zabbix Server
The next step involves configuring the Zabbix server to connect to the MariaDB database you set up earlier. Here’s how to do it:
-
- Create a Database for Zabbix:
sudo mysql -u root -pThis command opens the MariaDB shell. Then run the following SQL commands to create a database and user for Zabbix:
CREATE DATABASE zabbix CHARACTER SET utf8mb4 COLLATE utf8mb4_bin;
CREATE USER 'zabbix'@'localhost' IDENTIFIED BY 'password';
GRANT ALL PRIVILEGES ON zabbix.* TO 'zabbix'@'localhost';
FLUSH PRIVILEGES;
EXIT;
-
- Edit Configuration File:
Edit the Zabbix server configuration file located at /etc/zabbix/zabbix_server.conf to include your database details.
sudo nano /etc/zabbix/zabbix_server.confAdd or modify these lines accordingly:
DBName=zabbix
DBUser=zabbix
DBPassword=password
This configuration tells Zabbix where to find its database.
Step 6: Install Zabbix Frontend
The frontend allows users to interact with Zabbix through a web interface. Follow these steps to configure it properly:
-
- Enable Necessary PHP Extensions:
Zabbix requires specific PHP extensions for optimal functionality. Ensure they are enabled by editing your PHP configuration file (usually located at /etc/php/7.x/apache2/php.ini) and adjusting settings as needed.
-
- Create Apache Configuration File for Zabbix:
Create a new configuration file for Zabbix in Apache’s sites-available directory:
sudo nano /etc/apache2/sites-available/zabbix.confAdd the following configuration settings:
<VirtualHost *:80>
     ServerName your_domain_or_IP
     DocumentRoot /usr/share/zabbix

     ErrorLog ${APACHE_LOG_DIR}/zabbix_error.log
     CustomLog ${APACHE_LOG_DIR}/zabbix_access.log combined

     <Directory "/usr/share/zabbix">
         Options FollowSymLinks
         AllowOverride All
         Require all granted
     </Directory>
</VirtualHost>
-
- Enable the New Site and Restart Apache:
Your new site configuration needs to be enabled with this command:
sudo a2ensite zabbix.confFinally, restart Apache to apply changes:
sudo systemctl restart apache2Step 7: Verify Installation
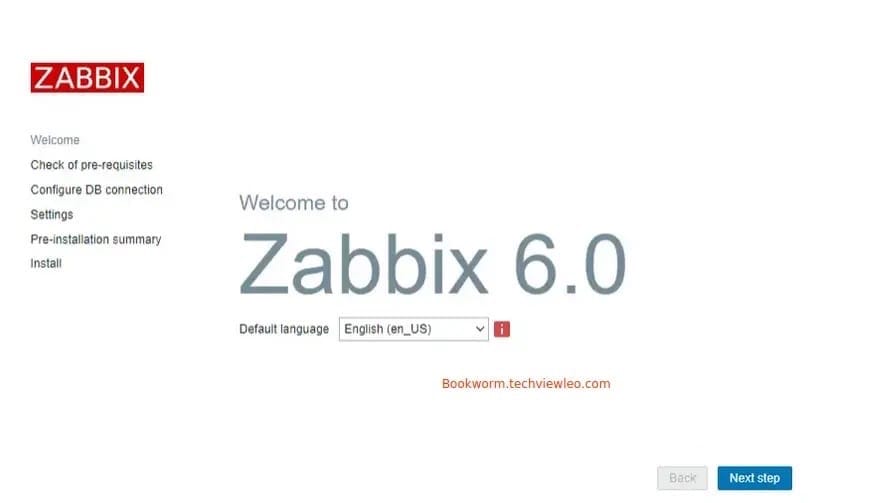
Your installation should now be complete! To verify that everything is working correctly, open a web browser and navigate to your server’s IP address or domain name followed by /zabbix (e.g., http://your_domain_or_IP/zabbix). You should see the Zabbix installation wizard.

This wizard will guide you through final configurations such as connecting to your database and setting up initial admin credentials.
Step 8: Installing Zabbix Agent
The Zabbix agent is essential for monitoring remote servers or devices. To install it, run this command on each monitored host (including your Zabbix server if desired):
sudo apt install zabbix-agentYou must then configure the agent by editing its configuration file located at /etc/zabbix/zabbbx_agentd.conf. Set up parameters like Server and Hostname appropriately:
# Change this line:
Server=your_zabbix_server_IP

# And set Hostname:
Hostname=your_monitoring_host_name
Step 9: Final Configuration and Testing
Your final steps involve ensuring that communication between agents and servers is functioning correctly. First, adjust firewall settings if necessary to allow traffic on port 10050 (the default port used by Zabbix agents):
sudo ufw allow 10050/tcpYou can test connectivity using telnet or curl commands from your server to each agent host to ensure they are reachable.
Troubleshooting Tips
If you encounter issues during installation or operation of Zabbix, consider these troubleshooting tips:
- If you cannot access the web interface, check Apache error logs located at
/var/log/apache2/error.logfor clues. - If there are issues connecting to the database, ensure that MariaDB is running and that credentials in zbx_server.conf are correct.
- If agents are not reporting back data, verify that they are configured correctly with appropriate server IP addresses.
- You can also check service statuses using
systemctlcommands like:sudo systemctl status zabbix-server sudo systemctl status zabbix-agent
Congratulations! You have successfully installed Zabbix. Thanks for using this tutorial for installing the Zabbix monitoring tool on Ubuntu 24.04 LTS system. For additional help or useful information, we recommend you check the Zabbix website.