In this tutorial, we will show you how to install Apache on Ubuntu 14.04. For those of you who didn’t know, Apache is an HTTP web server, the most popular in use. It serves web pages when they’re requested by web browsers. When you type an URL on your web server and press Enter, the pages you see on screen are most likely served by an Apache webserver.
This article assumes you have at least basic knowledge of Linux, know how to use the shell, and most importantly, you host your site on your own VPS. The installation is quite simple. I will show you the step-by-step installation of Apache on the Ubuntu 14.04 server.
Prerequisites
- A server running one of the following operating systems: Ubuntu 14.04, and any other Debian-based distribution like Linux Mint.
- It’s recommended that you use a fresh OS install to prevent any potential issues.
- SSH access to the server (or just open Terminal if you’re on a desktop).
- A
non-root sudo useror access to theroot user. We recommend acting as anon-root sudo user, however, as you can harm your system if you’re not careful when acting as the root.
Install Apache on Ubuntu 14.04
Step 1. First of all, make sure that all packages are up to date.
apt-get update
apt-get upgrade
Step 2. Installing Apache web server on Ubuntu 14.04.
We will be installing Apache with apt-get, which is the default package manager for ubuntu:
apt-get install apache2 apache2-utils
Start Apache and add it to automatically start on your system start-up using:
service apache2 start
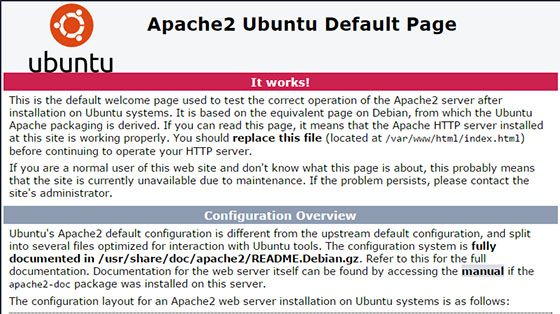
You can verify that Apache is really running by opening your favorite web browser and entering the URL http://your-server's-address, if it is installed, then you will see this:

Configure Apache (Single Host)
We will now configure Apache by opening the main configuration file and editing ServerName and ServerAdmin lines accordingly:
nano /etc/apache2/sites-available/000-default.conf
<VirtualHost *:80>
        # The ServerName directive sets the request scheme, hostname and port that
        # the server uses to identify itself. This is used when creating
        # redirection URLs. In the context of virtual hosts, the ServerName
        # specifies what hostname must appear in the request's Host: header to
        # match this virtual host. For the default virtual host (this file) this
        # value is not decisive as it is used as a last resort host regardless.
        # However, you must set it for any further virtual host explicitly.
        #ServerName www.example.com
        ServerAdmin webmaster@localhost
        DocumentRoot /var/www/html
        # Available loglevels: trace8, ..., trace1, debug, info, notice, warn,
        # error, crit, alert, emerg.
        # It is also possible to configure the loglevel for particular
        # modules, e.g.
        #LogLevel info ssl:warn
        ErrorLog ${APACHE_LOG_DIR}/error.log
        CustomLog ${APACHE_LOG_DIR}/access.log combined
        # For most configuration files from conf-available/, which are
        # enabled or disabled at a global level, it is possible to
        # include a line for only one particular virtual host. For example the
        # following line enables the CGI configuration for this host only
        # after it has been globally disabled with "a2disconf".
        #Include conf-available/serve-cgi-bin.conf
</VirtualHost>
Now, we can restart Apache so that the changes take place:
service apache2 restart
Now you can create/upload your web content to the HTML directory of Apache. (Remember to replace the existing index.html file with your index.html which is your home page).
Configure Apache (Multi-Host)
If you would like to host multiple websites, proceed by opening the main configuration file, copying the existing Virtual Host entry, and pasting it underneath it. Then edit the ServerName, ServerAdmin, and DocumentRoot lines accordingly.
nano /etc/apache2/sites-available/000-default.conf
Alternatively, you can just copy the following entries and edit them accordingly:
    <VirtualHost *:80>
    ServerAdmin youremail@address.com
    DocumentRoot /var/www/site1
    ServerName site1.com
    ServerAlias www.site1.com
    ErrorLog ${APACHE_LOG_DIR}/error.log
    CustomLog ${APACHE_LOG_DIR}/access.log combined
    </VirtualHost>
    <VirtualHost *:80>
    ServerAdmin youremail@address.com
    DocumentRoot /var/www/site2
    ServerName site2.com
    ServerAlias www.site2.com
    ErrorLog ${APACHE_LOG_DIR}/error.log
    CustomLog ${APACHE_LOG_DIR}/access.log combined
    </VirtualHost>
We must now make directories for the sites that were just configured, site1 and site2.
mkdir -p /var/www/site1
mkdir -p /var/www/site2
Now, we can restart Apache so that the changes take place:
service apache2 restart
Congratulations! You have successfully installed Apache. Thanks for using this tutorial for installing the Apache web server in Ubuntu 14.04 system. For additional help or useful information, we recommend you check the official Apache website.