How To Install balenaEtcher on Ubuntu 24.04 LTS

In this tutorial, we will show you how to install balenaEtcher on Ubuntu 24.04 LTS. balenaEtcher is a free and open-source utility designed to simplify the process of writing disk images to removable media, such as USB drives and SD cards. Developed by Balena, a company specializing in IoT device deployment and management, balenaEtcher has gained popularity among Linux, Windows, and macOS users for its ease of use and reliability. The application supports a wide range of image formats, including ISO, IMG, ZIP, and more, making it a versatile tool for various use cases, such as creating bootable Linux live USBs, flashing Raspberry Pi OS images to SD cards, or preparing installation media for other operating systems. balenaEtcher’s streamlined interface and built-in safety features, like drive validation and write protection, ensure a smooth and secure flashing experience, even for novice users. With its cross-platform compatibility and active development community, balenaEtcher has become a go-to choice for many users seeking a dependable and efficient disk imaging solution.
This article assumes you have at least basic knowledge of Linux, know how to use the shell, and most importantly, you host your site on your own VPS. The installation is quite simple and assumes you are running in the root account, if not you may need to add ‘sudo‘ to the commands to get root privileges. I will show you the step-by-step installation of the balenaEtcher on Ubuntu 24.04 (Noble Numbat). You can follow the same instructions for Ubuntu 22.04 and any other Debian-based distribution like Linux Mint, Elementary OS, Pop!_OS, and more as well.
Prerequisites
- A server running one of the following operating systems: Ubuntu and any other Debian-based distribution like Linux Mint.
- It’s recommended that you use a fresh OS install to prevent any potential issues.
- SSH access to the server (or just open Terminal if you’re on a desktop).
- An active internet connection. You’ll need an internet connection to download the necessary packages and dependencies.
- An Ubuntu 24.04 system with root access or a user with sudo privileges.
Install balenaEtcher on Ubuntu 24.04 LTS Noble Numbat
Step 1. Updating the Package Repository.
To ensure a smooth installation process and maintain system stability, it is crucial to update your Ubuntu system to the latest available packages. Open a terminal and execute the following commands:
sudo apt update
sudo apt upgrade
The apt update command refreshes the package list, while apt upgrade installs the available updates. This step helps resolve any dependency issues and provides access to the latest security patches and bug fixes.
Step 2. Installing Dependencies.
Open a terminal window and run the following command to install the necessary libraries and tools:
sudo apt install libfuse2
This command will install the FUSE (Filesystem in Userspace) library, which is required by balenaEtcher to function properly
Step 3. Installing balenaEtcher on Ubuntu 24.04.
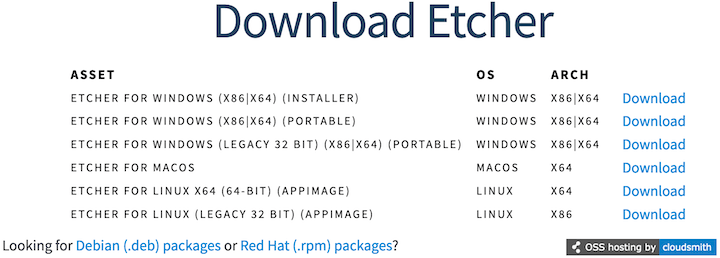
First, open your web browser and navigate to the official balenaEtcher website.

Alternatively, you can use the following command in your terminal to download the AppImage directly:
wget https://github.com/balena-io/etcher/releases/download/v1.18.11/balenaEtcher-1.18.11-x64.AppImage
Make the AppImage file executable by running the following command:
chmod +x balenaEtcher-1.18.11-x64.AppImage
Step 4. Launching balenaEtcher.
Open a terminal, navigate to the directory where you stored the AppImage file, and run the command:
./balenaEtcher-1.18.11-x64.AppImage
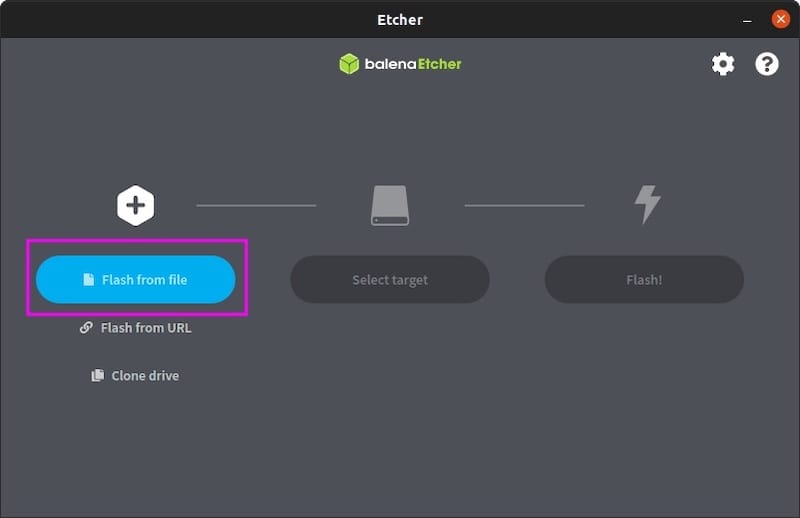
Once balenaEtcher is launched, you should see its main interface with options to select an image file, target drive, and flash the image.

Congratulations! You have successfully installed balenaEtcher. Thanks for using this tutorial for installing the balenaEtcher on the Ubuntu 24.04 LTS system. For additional help or useful information, we recommend you check the balenaEtcher website.