
Managing a fleet of Ubuntu servers over SSH sessions gets old fast, especially when you’re juggling disk usage checks, systemd unit failures, and network interface configs across a dozen boxes at 2 AM. That’s the exact itch Cockpit scratches. If you’ve just spun up Ubuntu 26.04 LTS “Resolute Raccoon” on a fresh VPS or bare-metal box and you’re wondering how to get a proper web-based management console running on it, you’re in the right place.
Cockpit isn’t new — it’s been kicking around in enterprise Linux circles for years, largely thanks to Red Hat’s backing — but its relevance has only grown as infrastructure teams shrink and expectations for “do more with less” tooling rise. On Ubuntu 26.04, which shipped on April 23, 2026 with kernel 7.0, GNOME 50, and a Wayland-only desktop stack, Cockpit remains one of the few tools that gives you a genuinely useful graphical layer over your terminal-first server without turning your box into a bloated GUI mess.
This guide walks through the actual installation process on Ubuntu 26.04 LTS, not a copy-paste of instructions written for 20.04 five years ago. Ubuntu 26.04 brings some under-the-hood changes — including a shift toward Rust-based system utilities and sudo-rs replacing traditional sudo in parts of the stack — that are worth understanding before you start layering management tools on top. We’ll cover the install itself, the plugins worth adding, firewall and TLS considerations, common failure modes, and the kind of production-grade hardening you’d actually want on a server exposed to real traffic.
By the end, you’ll have a working Cockpit instance, know why each step matters, and have a troubleshooting reference for when things inevitably go sideways during a maintenance window.
What Is Cockpit and Why It Still Matters in 2026
Cockpit is a lightweight, browser-based server administration interface originally developed by Red Hat. It exposes system metrics, service management, storage, networking, user accounts, and terminal access through a single web dashboard, and it does this without running a persistent background daemon chewing up resources. Instead, it relies on systemd socket activation — the cockpit.socket unit listens on port 9090, and the actual cockpit.service only spins up when someone connects.
That architectural choice matters more than it sounds. On a memory-constrained VPS with 1GB of RAM, running yet another always-on daemon is a real cost. Cockpit’s on-demand model means it sits idle at effectively zero overhead until you actually need it, then wakes up, authenticates against your existing PAM/system accounts, and gets out of the way when you close the tab.
For sysadmins managing mixed environments — a few bare-metal boxes, some KVM guests, maybe a couple of containerized workloads — Cockpit’s plugin ecosystem extends it well beyond basic system monitoring. There are modules for Podman containers, virtual machine management, storage (LVM, RAID, filesystems), NetworkManager configuration, and even PCP-based performance metrics. It’s not trying to replace Ansible or a full observability stack like Grafana. It’s filling the gap for quick, ad-hoc administration when SSH-only access feels clunky or when you need to hand a junior engineer a safer interface than raw root shell access.
Prerequisites Before You Install
Before touching apt, confirm a few things on your Ubuntu 26.04 instance. Skipping this step is how you end up debugging a “why can’t I reach port 9090” problem an hour later that had nothing to do with Cockpit itself.
- A running Ubuntu 26.04 LTS system with sudo or root access, either via SSH or local console.
- An updated package index — Ubuntu 26.04’s repositories move fast in the first months after release, so stale metadata causes more install failures than people expect.
- At least 512MB of free RAM (Cockpit itself is light, but don’t starve the box).
- Network access to port 9090, whether that’s a cloud security group, a local firewall, or both.
- Awareness that Ubuntu 26.04 introduces sudo-rs as a memory-safe drop-in for parts of the traditional sudo toolchain, which shouldn’t break your install commands but is worth knowing about if you hit unexpected permission prompts.
Run this first, always:
sudo apt update && sudo apt upgrade -yIt’s tempting to skip the upgrade step on a freshly provisioned server, but on a brand-new LTS release, package churn in the first few months post-launch is real. Skipping this has bitten more than one admin with dependency conflicts during a Cockpit plugin install.
Step-by-Step: Installing Cockpit on Ubuntu 26.04 LTS
Step 1: Update Package Metadata
sudo apt updateThis refreshes the local package cache against the Ubuntu 26.04 repositories. Cockpit ships as a standard package in Ubuntu’s universe repository, so there’s no need to add a PPA or third-party source on modern Ubuntu releases — that workaround belonged to the 16.04-era days when Cockpit wasn’t mainlined yet. If you’re following a decade-old blog post that tells you to add ppa:cockpit-project/cockpit, ignore it. It’s unnecessary now and can actually introduce version conflicts with the distro-packaged build.
Step 2: Install the Base Cockpit Package
sudo apt install -y cockpitThis pulls in the core Cockpit package along with its baseline dependencies — the web server component, the bridge process, and the systemd socket unit. On most Ubuntu 26.04 minimal installs, this completes in under a minute depending on your mirror speed.
Step 3: Install Useful Plugins (Optional but Recommended)
The base package gives you system overview, logs, storage basics, and terminal access. For most production use cases, you’ll want more. Here’s a practical set that covers 90% of real admin work:
sudo apt install -y cockpit-machines cockpit-podman cockpit-storaged cockpit-networkmanager cockpit-packagekit cockpit-sosreportHere’s what each one actually buys you:
- cockpit-machines: KVM/libvirt virtual machine management — handy if the box is a hypervisor host.
- cockpit-podman: Container lifecycle management for Podman, useful if you’re running containerized services without Docker.
- cockpit-storaged: LVM, RAID, and filesystem management through a GUI, which saves a lot of
lsblkandmdadmguesswork for less experienced team members. - cockpit-networkmanager: Network interface and bonding configuration — genuinely useful when you’re troubleshooting a bonded NIC setup remotely and don’t want to risk locking yourself out via a bad netplan edit.
- cockpit-packagekit: Software update management from the dashboard.
- cockpit-sosreport: One-click diagnostic report generation, which is a lifesaver when escalating an issue to a vendor or support team.
Don’t install every plugin blindly. Each one adds a bit of surface area and a few extra dependencies. On a minimal, security-hardened production box, install only what you’ll actually use.
Step 4: Enable and Start the Cockpit Socket
sudo systemctl enable --now cockpit.socketThis single command enables the socket unit at boot and starts it immediately. Note that you’re enabling the socket, not the service directly — that’s intentional and is what gives Cockpit its on-demand activation behavior. Starting cockpit.service manually works too, but it defeats the purpose of socket activation and leaves the process running persistently.
Step 5: Verify It’s Listening
sudo systemctl status cockpit.socket
ss -tlnp | grep 9090
You should see the socket in an active/listening state and a process bound to port 9090. If ss shows nothing, don’t panic yet — check the troubleshooting section below before assuming the install failed.
Step 6: Open the Firewall
If you’re running UFW, which most Ubuntu Server installs have enabled by default:
sudo ufw allow 9090/tcp
sudo ufw reload
If you’re on a cloud provider — AWS, DigitalOcean, Hetzner, whatever — remember that UFW rules only cover the host firewall. You also need to open port 9090 in the cloud security group or network ACL, or you’ll be staring at a connection timeout wondering why “everything looks fine on the server side.” This is genuinely one of the most common support-ticket-worthy mistakes: admins fix the local firewall, forget the cloud-level one, and burn twenty minutes chasing a ghost.
Step 7: Access the Cockpit Web Console
Open a browser and navigate to:
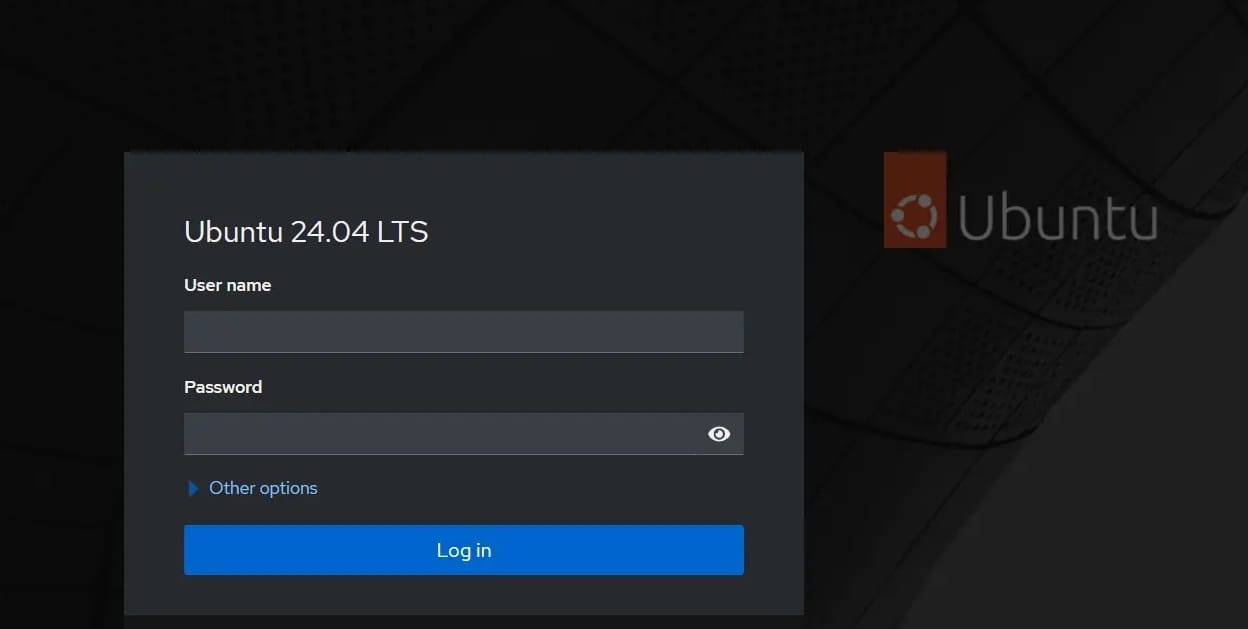
https://your-server-ip:9090You’ll hit a certificate warning on first load — Cockpit generates a self-signed TLS certificate automatically, and browsers correctly flag that as untrusted. For internal admin access, accepting the warning is standard practice. For anything exposed beyond a trusted internal network, that self-signed cert should be your first target for improvement, not something you just click past indefinitely.
Log in with any system account that has a password set. For full administrative capability inside the dashboard, log in as a user with sudo privileges, then use the “Turn on administrative access” toggle in the top corner of the Cockpit interface to escalate for privileged operations like service restarts or storage changes.
Real-World Configuration Considerations
Running Cockpit Behind a Reverse Proxy
If you’re already running Nginx on the box for other services — which, given the audience here, is probably the case — you might not want port 9090 exposed directly. A common pattern is proxying Cockpit through Nginx on a subdomain like console.yourdomain.com, terminating TLS with a proper Let’s Encrypt certificate instead of Cockpit’s self-signed one.
server {
    listen 443 ssl;
    server_name console.yourdomain.com;

    ssl_certificate /etc/letsencrypt/live/console.yourdomain.com/fullchain.pem;
    ssl_certificate_key /etc/letsencrypt/live/console.yourdomain.com/privkey.pem;

    location / {
        proxy_pass https://127.0.0.1:9090;
        proxy_set_header Host $host;
        proxy_set_header X-Forwarded-Proto https;
        proxy_set_header X-Forwarded-For $proxy_add_x_forwarded_for;
        proxy_ssl_verify off;

        proxy_http_version 1.1;
        proxy_set_header Upgrade $http_upgrade;
        proxy_set_header Connection "upgrade";
    }
}
That last block matters more than it looks — Cockpit relies heavily on WebSockets for its live terminal and log streaming features, so the Upgrade/Connection headers aren’t optional. Skip them and the dashboard loads fine but the terminal tab just hangs.
Restricting Access by IP
If Cockpit only needs to be reachable from your office or VPN, don’t leave port 9090 open to the entire internet. Combine UFW rules with source restriction:
sudo ufw allow from 203.0.113.0/24 to any port 9090 proto tcpThis one change eliminates the vast majority of opportunistic scanning traffic that hits any exposed admin panel within hours of going live. Cockpit authentication is solid, but reducing exposed attack surface is still cheaper and more effective than relying on auth alone.
Session Timeout and Idle Behavior
By default, Cockpit sessions can stay authenticated longer than some security policies allow. You can tune the idle timeout in /etc/cockpit/cockpit.conf:
[Session]
IdleTimeout=15
This forces re-authentication after 15 minutes of inactivity — a small but meaningful hardening step for shared admin workstations or bastion-style jump boxes where multiple people might use the same browser session.
Troubleshooting Common Cockpit Issues on Ubuntu 26.04
Cockpit Installed but Port 9090 Isn’t Listening
Run sudo systemctl status cockpit.socket first. If it shows inactive, start it manually with sudo systemctl start cockpit.socket and check journalctl -u cockpit.socket -n 50 for errors. Nine times out of ten this is either a masked unit (check with systemctl is-enabled cockpit.socket) or a conflicting service already bound to port 9090 — check with sudo lsof -i :9090 before assuming Cockpit itself is broken.
Browser Shows “Connection Refused” Despite Socket Active
This is almost always a firewall issue, not a Cockpit issue. Double-check both the host-level firewall (UFW/nftables) and, if applicable, any cloud security group. Also verify you’re not being blocked by an intermediate proxy or corporate network filter — some organizations block non-standard high ports outright.
Login Fails Even With Correct Password
Check whether the account has a locked or expired password with sudo passwd -S username. Cockpit authenticates against PAM, so any account-level restriction — expired password, locked account, disabled shell — will manifest as a login failure inside the web UI even though the credentials are technically correct.
“Administrative Access” Toggle Doesn’t Appear
This usually means the logged-in user isn’t in the sudo group, or polkit rules aren’t correctly recognizing group membership. Verify with groups username and confirm sudo is present. On Ubuntu 26.04’s transitional sudo-rs environment, also confirm /etc/sudoers.d/ entries haven’t been affected by the migration if you’re running a system upgraded from an earlier release rather than a fresh install.
High CPU Usage After Enabling Multiple Plugins
Some plugins, particularly cockpit-pcp for detailed performance metrics, poll system stats more aggressively than the base dashboard. On resource-constrained VPS instances, this can show up as a small but persistent CPU tick. If you don’t actively need historical performance graphing, skip that plugin rather than installing everything “just in case.”
Performance, Security, and Optimization Tips
Cockpit itself is lightweight by design, but how you deploy it around your infrastructure affects your overall server posture more than the tool itself.
- Limit exposed plugins to what’s operationally necessary — every additional module is additional attack surface and additional background polling, however small.
- Replace the self-signed certificate with a real one if Cockpit is accessible from outside a trusted LAN or VPN; browser trust warnings train users to click through security prompts, which is a bad habit to reinforce.
- Pair Cockpit with fail2ban to rate-limit repeated failed login attempts against the web interface, since Cockpit doesn’t include built-in brute-force protection out of the box.
- Audit disk I/O impact if running cockpit-sosreport regularly on production systems — diagnostic report generation can spike I/O briefly, so schedule it during low-traffic windows.
- Use Cockpit’s network module cautiously on remote systems — a misapplied bonding or bridge config can sever your only remote access path; always keep an out-of-band console (IPMI, cloud console) available as a fallback before making network changes through the GUI.
- Monitor cockpit.socket alongside your other systemd units in whatever monitoring stack you already run (Prometheus node_exporter, Zabbix, etc.) rather than treating it as a black box.
None of this is exotic advice, but it’s the kind of thing that separates a Cockpit deployment that quietly does its job for years from one that becomes a forgotten, unpatched entry point during a security audit.

