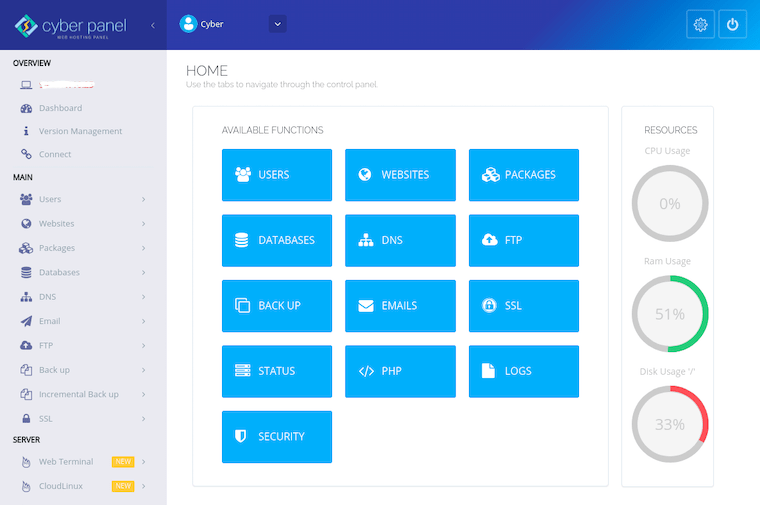
In this tutorial, we will show you how to install CyberPanel on CentOS 8. For those of you who didn’t know, CyberPanel is one of the first control panels on the market that is both open sources and uses an OpenLiteSpeed web server which also packs Email, DNS, and FTP servers. It has two versions free and enterprise versions. The free version uses Open Lite Speed while the enterprise version uses the Lite Speed Web server.
This article assumes you have at least basic knowledge of Linux, know how to use the shell, and most importantly, you host your site on your own VPS. The installation is quite simple and assumes you are running in the root account, if not you may need to add ‘sudo‘ to the commands to get root privileges. I will show you the step-by-step installation of the CyberPanel on CentOS 8.
Prerequisites
- A server running one of the following operating systems: CentOS 8, and any other RHEL-based distribution.
- It’s recommended that you use a fresh OS install to prevent any potential issues.
- SSH access to the server (or just open Terminal if you’re on a desktop).
- A
non-root sudo useror access to theroot user. We recommend acting as anon-root sudo user, however, as you can harm your system if you’re not careful when acting as the root.
Install CyberPanel on CentOS 8
Step 1. First, let’s start by ensuring your system is up-to-date.
sudo dnf clean all
sudo dnf update
Step 2. Installing CyberPanel on CentOS 8.
Now we download the theCyberPanel installation script from the official website:
wget https://cyberpanel.net/install.sh
Once the script is downloaded, we can start installing and configuring CyberPanel by using the following command:
chmod 755 install.sh
sh install.sh
During the installation, you will be prompted with several questions, as shown below:
Detecting Centos 8...

Initializing...

Valid IP detected...

Checking server...

Checking OS...

Detecting CentOS 8.X...

Checking virtualization type...

Checking root privileges...

You are runing as root...

		CyberPanel Installer v2.06

  1. Install CyberPanel.

  2. Addons and Miscellaneous

  3. Exit.

  Please enter the number[1-3]: 1
Choose option 1 to start:
CyberPanel Installer v2.06

  RAM check : 119/1989MB (5.98%)

  Disk check : 2/80GB (3%) (Minimal 10GB free space)

  1. Install CyberPanel with OpenLiteSpeed.

  2. Install Cyberpanel with LiteSpeed Enterprise.

  3. Exit.

  Please enter the number[1-3]: 1
We want to use OpenLiteSpeed, so press 1 and hit [Enter] to Install CyberPanel with OpenLiteSpeed:
Install Full service for CyberPanel? This will include PowerDNS, Postfix and Pure-FTPd.

Full installation [Y/n]: Y
Let’s install them by pressing Y and hitting [Enter] to install full service for CyberPanel. Moving onto the next step:
Full installation selected...

Press Enter key to continue with latest version or Enter specific version such as: 1.9.4 , 1.9.5 ...etc

Branch name set to v2.0.1

Please choose to use default admin password 1234567, randomly generate one (recommended) or specify the admin password?
Choose [d]fault, [r]andom or [s]et password: [d/r/s] s
Press s and hit [Enter]. You will now be prompted to provide your password manually:
Please enter your password:
your-stronge-password

Please confirm your password:
your-stronge-password
Provide your desired password and hit [Enter] to continue:
Do you wish to install Memcached extension and backend?
Please select [Y/n]: Y

Do you wish to install Redis extension and backend?
Please select [Y/n]: Y
Press Y and hit [Enter] to install the Memcached and Redis extensions:
Would you like to set up a WatchDog (beta) for Web service and Database service ?
The watchdog script will be automatically started up after installation and server reboot
If you want to kill the watchdog , run watchdog kill
Please type Yes or no (with capital Y, default Yes):
Yes
Once we have installed and configured CyberPanel, we will then see the following output:
###################################################################
                CyberPanel Successfully Installed

                Current Disk usage : 5/120GB (11%)

                Current RAM  usage : 512/8000MB (17.85%)

                Installation time  : 0 hrs 15 min 3 sec

                Visit: https:// your-server-ip:8090
                Panel username: admin
                Panel password: your-stronge-password
                WebAdmin console username: meilana
                WebAdmin console password: maria

             Run cyberpanel help to get FAQ info
             Run cyberpanel upgrade to upgrade it to latest version.
             Run cyberpanel utility to access some handy tools .

              Website : https://www.cyberpanel.net
              Forums  : https://forums.cyberpanel.net
              Wikipage: https://docs.cyberpanel.net

            Enjoy your accelerated Internet by
                CyberPanel & OpenLiteSpeed
#################################################################
Step 3. Accessing CyberPanel on CentOS.
Access CyberPanel by typing your IP address followed by 8090 in the browser, and you will see the panel login screen, Now enter your credentials and you will see the dashboard.
https://your-server-ip-address:8090

Congratulations! You have successfully installed CyberPanel. Thanks for using this tutorial for installing the CyberPanel on CentOS 8 systems. For additional help or useful information, we recommend you check the official CyberPanel website.