How To Install Eclipse IDE on Ubuntu 24.04 LTS

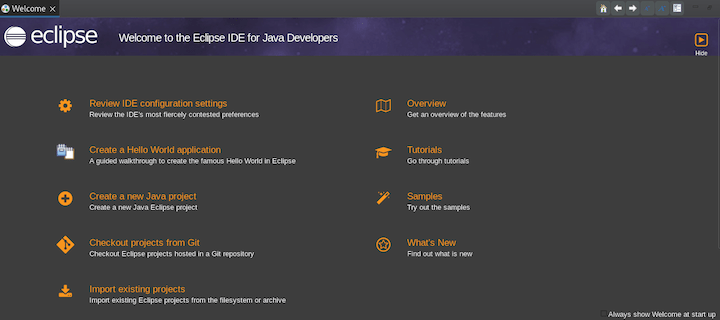
Eclipse IDE is a powerful integrated development environment (IDE) widely used by developers for building applications in various programming languages, including Java, C/C++, and PHP. Its versatility and extensive plugin ecosystem make it a popular choice among software engineers and hobbyists alike. This article provides a comprehensive, step-by-step guide on how to install Eclipse IDE on Ubuntu 24.04 LTS, ensuring a smooth setup process.
1. Prerequisites
1.1 System Requirements
Before installing Eclipse, it’s essential to ensure that your system meets the necessary requirements:
- Processor: 1 GHz or faster
- RAM: Minimum of 2 GB (4 GB recommended)
- Disk Space: At least 500 MB for Eclipse installation, additional space for projects
- Operating System: Ubuntu 24.04 LTS (64-bit)
1.2 Java Installation
Eclipse requires Java Development Kit (JDK) to function correctly. If you haven’t installed JDK yet, follow these steps:
sudo apt update
sudo apt install default-jdk
After installation, verify the Java installation by running:
java -version
You should see the installed version of Java displayed in the terminal.
2. Downloading Eclipse IDE
2.1 Official Eclipse Website
The official Eclipse website provides the latest versions of the IDE. To download Eclipse:
- Open your web browser and navigate to the Eclipse Downloads page.
- Select the appropriate package for your development needs (e.g., Eclipse IDE for Java Developers).
- Click on the download link to get the installer file.
2.2 Alternative Download Options
If you prefer a more straightforward approach, you can install Eclipse using Snap, which simplifies the installation process and ensures you always have the latest version.
sudo snap install eclipse --classic
3. Installation Methods
3.1 Installing Eclipse Using the Installer
3.1.1 Downloading the Installer
If you opted to download the installer from the official website, locate the downloaded file (usually in your Downloads folder). The file will be in .tar.gz format.
3.1.2 Extracting the Installer
To extract the downloaded file, open a terminal and navigate to your Downloads directory:
cd ~/Downloads
tar -xzf eclipse-inst-linux64.tar.gz
cd eclipse-installer
3.1.3 Running the Installer
Run the installer by executing:
./eclipse-inst
This command launches the Eclipse Installer GUI.
3.1.4 Choosing Installation Packages
The installer will present several options based on your development needs:
- Eclipse IDE for Java Developers
- Eclipse IDE for C/C++ Developers
- Eclipse IDE for PHP Developers
- Eclipse IDE for Java EE Developers
Select the package that best suits your requirements.
3.1.5 Completing Installation
You will need to accept the license agreements and select an installation directory (the default is usually fine). Once you’ve made your selections, click “Install” to begin the installation process.
3.2 Installing Eclipse Using Snap Package
3.2.1 Snap Installation Command
If you prefer using Snap, simply run this command in your terminal:
sudo snap install eclipse --classic
3.2.2 Verifying Snap Installation
You can verify that Eclipse has been installed successfully by launching it from your terminal or finding it in your applications menu:
eclipse

4. Configuring Eclipse IDE
4.1 Setting Up Workspace
The workspace is where all your projects will be stored and organized in Eclipse. Upon launching Eclipse for the first time, you will be prompted to select a workspace location:
- You can use the default location or choose a custom directory.
- A well-organized workspace helps manage multiple projects efficiently.
4.2 Installing Additional Plugins (Optional)
Eclipse supports a wide range of plugins that enhance its functionality:
- Navigating to Help > Eclipse Marketplace…
- You can search for plugins relevant to your development needs (e.g., Git integration, language support).
- Select and install desired plugins to improve your coding experience.
4.3 Configuring Preferences
You can customize various settings within Eclipse to suit your workflow better:
- Navigating to Edit > Preferences…
- You can adjust settings related to editors, formatting, and build configurations.
- This customization ensures a more personalized development environment.
5. Troubleshooting Common Issues
5.1 Installation Errors
If you encounter errors during installation, consider these common solutions:
- Error: “Java not found”: Ensure JDK is installed correctly and added to your PATH environment variable.
- Error: “Insufficient permissions”: Run commands with sudo if you face permission issues during installation.
- Error: “Installation failed”: Check internet connectivity if using Snap or ensure that all required dependencies are met.
5.2 Java Compatibility Issues
If you experience compatibility issues with Java versions, ensure that you’re using a compatible JDK version with Eclipse:
sudo update-alternatives --config java
sudo update-alternatives --config javac
This command allows you to select which version of Java should be used as default.
5.3 Performance Issues
If Eclipse runs slowly or becomes unresponsive, consider these tips:
- Avoid running multiple heavy applications simultaneously.
- Add more RAM if possible; increasing memory allocation can significantly improve performance.
- Caching settings can be adjusted in preferences under “General > Startup and Shutdown”. Disable unnecessary startup items.
Congratulations! You have successfully installed Eclipse. Thanks for using this tutorial for installing Eclipse IDE on Ubuntu 24.04 LTS system. For additional help or useful information, we recommend you check the official Eclipse website.