How To Install GlassFish on Ubuntu 24.04 LTS

GlassFish is a powerful, flexible, and standards-compliant application server that supports various Java technologies, including Jakarta EE (formerly Java EE), JavaServer Faces (JSF), and Enterprise JavaBeans (EJB). Its modular architecture and extensive features make it an excellent choice for developers looking to deploy scalable and high-performance Java applications.
In this tutorial, we’ll cover the step-by-step process of installing GlassFish 5 on Ubuntu 24.04 LTS, from system preparation to initial configuration and verification. Whether you’re a seasoned developer or new to Java application servers, this guide will help you get GlassFish up and running on your Ubuntu system.
Prerequisites
Before we begin the installation process, ensure that you have the following:
- A server running Ubuntu 24.04 LTS
- Root access or a user with sudo privileges
- Basic familiarity with the Linux command line
- A minimum of 4GB RAM and 10GB free disk space
- An active internet connection for downloading packages
System Preparation
Update System Packages
Start by updating your system’s package index and upgrading existing packages to ensure you have the latest versions:
sudo apt update
sudo apt upgrade -y
This step is crucial for maintaining system security and compatibility with new software installations.
Install Essential Dependencies
Install some essential packages that GlassFish may require:
sudo apt install wget unzip curl -y
Create Dedicated User
For security reasons, it’s best to run GlassFish under a dedicated user account. Create a new user named ‘glassfish’:
sudo useradd -m -d /opt/glassfish -s /bin/bash glassfish
This command creates a new user with a home directory at /opt/glassfish and sets the bash shell as the default.
Java Installation
GlassFish 5 requires Java Development Kit (JDK) to function. We’ll install OpenJDK, which is freely available and well-supported on Ubuntu.
Installing OpenJDK
Install the default JDK package:
sudo apt install default-jdk -y
Verifying Java Installation
After installation, verify that Java is correctly installed by checking its version:
java -version
You should see output similar to this:
openjdk version "11.0.11" 2021-04-20
OpenJDK Runtime Environment (build 11.0.11+9-Ubuntu-0ubuntu2.24.04)
OpenJDK 64-Bit Server VM (build 11.0.11+9-Ubuntu-0ubuntu2.24.04, mixed mode, sharing)
Setting JAVA_HOME Environment Variable
Set the JAVA_HOME environment variable to ensure GlassFish can locate your Java installation:
echo "export JAVA_HOME=$(readlink -f /usr/bin/java | sed "s:bin/java::")" | sudo tee -a /etc/profile.d/jdk.sh
source /etc/profile.d/jdk.sh
GlassFish Installation
Download GlassFish
Download the GlassFish 5 package:
wget https://download.eclipse.org/ee4j/glassfish/glassfish-5.1.0.zip
Extract the Package
Unzip the downloaded file to the /opt directory:
sudo unzip glassfish-5.1.0.zip -d /opt
Set Correct Permissions
Change the ownership of the GlassFish directory to the glassfish user:
sudo chown -R glassfish:glassfish /opt/glassfish5
Service Configuration
To manage GlassFish as a system service, we’ll create a systemd service file.
Creating Systemd Service
Create a new file named glassfish.service in the /etc/systemd/system/ directory:
sudo nano /etc/systemd/system/glassfish.service
Add the following content to the file:
[Unit]
Description=GlassFish Server v5.1.0
After=network.target

[Service]
Type=forking
User=glassfish
ExecStart=/opt/glassfish5/bin/asadmin start-domain
ExecStop=/opt/glassfish5/bin/asadmin stop-domain
ExecReload=/opt/glassfish5/bin/asadmin restart-domain

[Install]
WantedBy=multi-user.target
Enable Auto-start Functionality
Enable the GlassFish service to start automatically at boot:
sudo systemctl enable glassfish
Security Setup
Firewall Configuration
If you’re using UFW (Uncomplicated Firewall), allow traffic on the necessary ports:
sudo ufw allow 8080/tcp
sudo ufw allow 4848/tcp
sudo ufw reload
Port 8080 is for HTTP traffic, while 4848 is for the admin console.
Initial Configuration
Admin Password Setup
For security reasons, set up a password for the admin user:
sudo -u glassfish /opt/glassfish5/bin/asadmin change-admin-password
Follow the prompts to set a new password.
Enabling Secure Admin Access
Enable secure administration to access the admin console remotely:
sudo -u glassfish /opt/glassfish5/bin/asadmin enable-secure-admin
Verification and Testing
Starting GlassFish Service
Start the GlassFish service:
sudo systemctl start glassfish
Accessing Admin Console
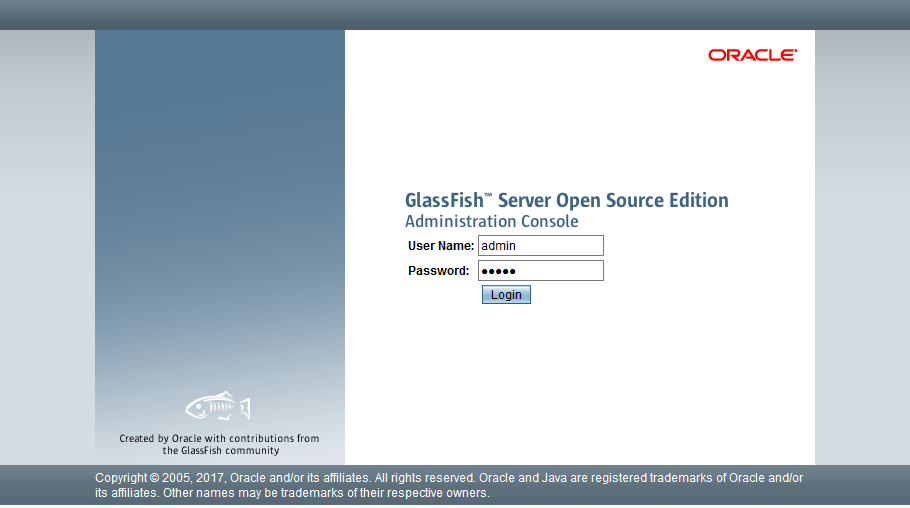
Access the GlassFish admin console by navigating to https://your_server_ip:4848 in your web browser. Log in with the username ‘admin’ and the password you set earlier.

Verifying Installation
To verify that GlassFish is running correctly, visit http://your_server_ip:8080. You should see the GlassFish welcome page.
Common Issues and Troubleshooting
Port Conflicts
If you encounter port conflicts, you can change the default ports in the admin console. Navigate to Configurations > server-config > Network Config > Network Listeners, and modify the port numbers as needed.
Permission Issues
If you face permission-related errors, ensure that the glassfish user has the necessary permissions:
sudo chown -R glassfish:glassfish /opt/glassfish5
sudo chmod -R 755 /opt/glassfish5
Java Version Compatibility
GlassFish 5 requires Java 8 or later. If you encounter Java-related errors, verify your Java version and update if necessary.
Service Startup Problems
If the GlassFish service fails to start, check the system logs for more information:
sudo journalctl -u glassfish
Congratulations! You have successfully installed GlassFish. Thanks for using this tutorial for installing the GlassFish on Ubuntu 24.04 LTS system. For additional help or useful information, we recommend you check the official GlassFish website.