How To Install JFrog Artifactory on Debian 12

In this tutorial, we will show you how to install JFrog Artifactory on Debian 12. In the world of DevOps and Continuous Integration/Continuous Deployment (CI/CD) pipelines, JFrog Artifactory has become an essential tool for managing and distributing software artifacts. Artifactory is a universal binary repository manager that supports a wide range of package formats and build tools, making it a versatile solution for organizations of all sizes.
This article assumes you have at least basic knowledge of Linux, know how to use the shell, and most importantly, you host your site on your own VPS. The installation is quite simple and assumes you are running in the root account, if not you may need to add ‘sudo‘ to the commands to get root privileges. I will show you the step-by-step installation of the JFrog Artifactory on Debian 12 (Bookworm).
Prerequisites
Before proceeding with the installation, make sure your Debian 12 system meets the following requirements:
- A server running one of the following operating systems: Debian 12 (Bookworm).
- It’s recommended that you use a fresh OS install to prevent any potential issues.
- SSH access to the server (or just open Terminal if you’re on a desktop).
- An active internet connection. You’ll need an internet connection to download the necessary packages and dependencies.
- A user account with sudo privileges to execute administrative commands.
Install JFrog Artifactory on Debian 12
Step 1. Update Your System Package.
Before proceeding with the installation, make sure to update your Debian 12 system to the latest stable version. Open a terminal and run the following commands:
sudo apt update
sudo apt upgrade
These commands will ensure that your system packages are up to date and that any necessary dependencies are installed.
Step 2. Installing JFrog Artifactory on Debian 12.
To begin the installation process, you need to download the JFrog Artifactory package suitable for your Debian 12 system. JFrog offers several versions of Artifactory, including OSS (Open Source), Pro, and Enterprise. For this guide, we will be using the OSS version, which is free and provides a robust set of features.
Visit the official JFrog Artifactory download page and select the appropriate package for your system. Alternatively, you can use the wget command to download the package directly from the command line:
wget https://releases.jfrog.io/artifactory/bintray-artifactory/org/artifactory/oss/jfrog-artifactory-oss/[VERSION]/jfrog-artifactory-oss-[VERSION]-linux.tar.gz
Replace [VERSION] with the desired version number of Artifactory. At the time of writing, the latest version is 7.49.4.
Once the download is complete, verify the integrity of the downloaded file by comparing its checksum with the one provided on the download page. This step ensures that the file has not been corrupted during the download process.
With the Artifactory package downloaded, it’s time to extract the archive and set up the installation directory. Use the following command to extract the tar.gz file:
tar -xvf jfrog-artifactory-oss-[VERSION]-linux.tar.gz
Next, create a dedicated directory for the Artifactory installation. We recommend using /opt/artifactory as the installation directory. Use the following commands to create the directory and move the extracted files:
sudo mkdir -p /opt/artifactory
sudo mv artifactory-oss-[VERSION]/* /opt/artifactory/
Now that the files are in place, it’s time to run the installation script. Navigate to the Artifactory installation directory and execute the installService.sh script:
cd /opt/artifactory/bin
sudo ./installService.sh
The installation script will guide you through the process of setting up Artifactory as a systemd service. It will prompt you for configuration options such as the Artifactory home directory and the user under which the service should run.
Step 3. Configuring JFrog Artifactory.
After successfully installing Artifactory, there are a few configuration steps to complete before you can start using the repository manager.
First, set the necessary environment variables for Artifactory. Open the /etc/opt/jfrog/artifactory/default file and uncomment the following lines:
export ARTIFACTORY_HOME=/var/opt/jfrog/artifactory
export ARTIFACTORY_USER=artifactory
Next, configure the system properties for Artifactory. Open the /opt/artifactory/etc/system.yaml file and review the settings. You can customize various aspects of Artifactory’s behavior, such as the port numbers, database settings, and storage locations. For now, we will leave the default settings in place.
To ensure that Artifactory starts automatically on system boot, you need to enable the systemd service. Run the following command:
sudo systemctl enable artifactory
To start Artifactory immediately, use the following command:
sudo systemctl start artifactory
After starting the Artifactory service, verify that it is running correctly by checking its status:
sudo systemctl status artifactory
If the service is running without any errors, you should see output similar to the following:
● artifactory.service - Artifactory
   Loaded: loaded (/etc/systemd/system/artifactory.service; enabled; vendor preset: enabled)
   Active: active (running) since Tue 2024-05-20 09:30:00 UTC; 5s ago
 Main PID: 1234 (java)
    Tasks: 50 (limit: 4915)
   Memory: 1.2G
   CGroup: /system.slice/artifactory.service
           └─1234 /usr/bin/java -Djava.util.logging.config.file=/var/opt/jfrog/artifactory/etc/jfl...
Step 4. Accessing JFrog Web UI.
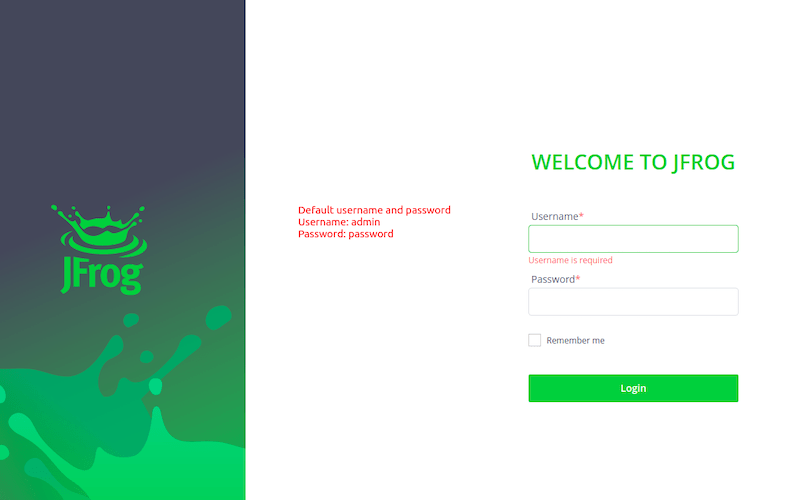
You can now access the Artifactory web interface by opening a web browser and navigating to http://your-server-ip:8082. The default username is admin, and the default password is password. Make sure to change the password immediately after logging in for the first time.

Congratulations! You have successfully installed JFrog. Thanks for using this tutorial to install the latest version of the JFrog Artifactory on Debian 12 Bookworm. For additional help or useful information, we recommend you check the official JFrog website.