How To Install Ntopng on Debian 12

In this tutorial, we will show you how to install Ntopng on Debian 12. In today’s digitally interconnected world, network monitoring has become an indispensable part of managing and securing your systems. Ntopng, a powerful open-source network monitoring tool, provides deep insights into your network traffic and helps you make informed decisions.
This article assumes you have at least basic knowledge of Linux, know how to use the shell, and most importantly, you host your site on your own VPS. The installation is quite simple and assumes you are running in the root account, if not you may need to add ‘sudo‘ to the commands to get root privileges. I will show you the step-by-step installation of the Ntopng network monitoring tool on a Debian 12 (Bookworm).
Prerequisites
- A server running one of the following operating systems: Debian 12 (Bookworm).
- It’s recommended that you use a fresh OS install to prevent any potential issues.
- SSH access to the server (or just open Terminal if you’re on a desktop).
- An active internet connection. You’ll need an internet connection to download the necessary packages and dependencies for Ntopng.
- A
non-root sudo useror access to theroot user. We recommend acting as anon-root sudo user, however, as you can harm your system if you’re not careful when acting as the root.
Install Ntopng on Debian 12 Bookworm
Step 1. Before we install any software, it’s important to make sure your system is up to date by running the following apt commands in the terminal:
sudo apt update
This command will refresh the repository, allowing you to install the latest versions of software packages.
Step 2. Installing Dependencies.
Ntopng requires several dependencies to compile and run properly. Install these dependencies by executing the following command:
sudo apt install build-essential libpcap-dev libpcre3-dev cmake git libssl-dev libtool autoconf automake g++ libjson-c-dev pkg-config libcurl4-openssl-dev
This command will fetch and install all the necessary libraries and tools required for building Ntopng from the source.
Step 3. Installing Ntopng on Debian 12.
Now that you have the dependencies in place, let’s proceed to download the latest Ntopng source code. You can obtain it from the official Ntopng GitHub repository:
git clone https://github.com/ntop/ntopng.git
Once the download is complete, navigate to the Ntopng source directory:
cd ntopng
Before you can install Ntopng, you need to configure and compile it. Follow these steps:
cmake .
Now, compile Ntopng by running the make command. This process may take a few minutes, depending on your system’s performance:
make
With the compilation successful, it’s time to install Ntopng on your Debian 12 system. Execute the following command:
sudo make install
Step 4. Configuring Ntopng.
Now that Ntopng is installed, you need to configure it to meet your specific requirements. Navigate to the /etc/ntopng directory, where the Ntopng configuration files are located:
cd /etc/ntopng
Edit the ntopng.conf file using your preferred text editor. Here, you can customize various settings such as the network interface to monitor, ports to listen on, and more:
sudo nano ntopng.conf
You can change the configuration options according to your requirements. Some of the important configuration options that you may want to change are:
-ioption specifies the network interface that Ntopng should listen to. You can change it to the interface that you want to monitor.-woption specifies the directory where Ntopng stores its data. You can change it to the directory of your choice.-Foption enables or disables the flow exporter module.
After making the changes, save the file and restart the Ntopng service using the following command:
sudo systemctl restart ntopng
Step 5. Configuring Firewall.
First, we need to open port 3000 for Ntopng to allow incoming traffic. Run the following command to open port 3000:
sudo ufw allow 3000/tcp
sudo ufw reload
Step 6. Accessing the Ntopng Web Interface.
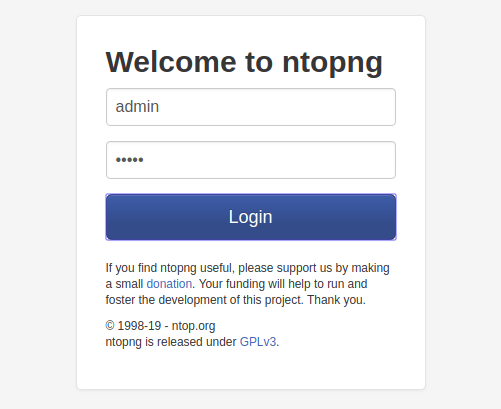
You can access the Ntopng web interface from your web browser by navigating to http://localhost:3000. Log in with the default credentials (Username: admin, Password: admin). Make sure to change the password for security reasons.

Congratulations! You have successfully installed Ntopng. Thanks for using this tutorial to install the latest version of the Ntopng network monitoring tool on Debian 12 Bookworm. For additional help or useful information, we recommend you check the official Ntopng website.