How To Install OnlyOffice on Ubuntu 24.04 LTS

In this tutorial, we will show you how to install OnlyOffice on Ubuntu 24.04 LTS. OnlyOffice is an open-source office suite that provides comprehensive tools for document editing, spreadsheets, and presentations. It is designed to integrate seamlessly with various cloud storage services and offers both on-premises and cloud-based deployment options.
This article assumes you have at least basic knowledge of Linux, know how to use the shell, and most importantly, you host your site on your own VPS. The installation is quite simple and assumes you are running in the root account, if not you may need to add ‘sudo‘ to the commands to get root privileges. I will show you the step-by-step installation of OnlyOffice on Ubuntu 24.04 (Noble Numbat). You can follow the same instructions for Ubuntu 22.04 and any other Debian-based distribution like Linux Mint, Elementary OS, Pop!_OS, and more as well.
Prerequisites
- A server running one of the following operating systems: Ubuntu and any other Debian-based distribution like Linux Mint.
- It’s recommended that you use a fresh OS install to prevent any potential issues.
- SSH access to the server (or just open Terminal if you’re on a desktop).
- An active internet connection. You’ll need an internet connection to download the necessary packages and dependencies.
- An Ubuntu 24.04 system with root access or a user with sudo privileges.
Install OnlyOffice on Ubuntu 24.04 LTS Noble Numbat
Step 1. Updating the Package Repository.
Keeping your system up-to-date is crucial for security and stability. Before installing OnlyOffice, update your package lists and upgrade any outdated packages. Open a terminal and run the following commands:
sudo apt update
This command will fetch the latest package information from the Ubuntu repositories, allowing you to install the most recent version of OnlyOffice and its dependencies. Updating the package repository is crucial to maintaining the security and stability of your system.
Step 2. Installing PostgreSQL.
Ubuntu 24.04 includes PostgreSQL in its default repositories, making the installation process straightforward. To install PostgreSQL, run the following command in your terminal:
sudo apt install postgresql postgresql-contrib
During the installation, you may be prompted to confirm the installation by pressing Y and then Enter. The package manager will then download and install the necessary files.
After the installation is complete, it’s essential to verify that PostgreSQL is running correctly. Use the following command to check the status of the PostgreSQL service:
sudo systemctl status postgresql
Next, create a PostgreSQL database named onlyoffice with your required password using the following command:
sudo -i -u postgres psql -c "CREATE DATABASE onlyoffice;"
sudo -i -u postgres psql -c "CREATE USER onlyoffice WITH password 'onlyoffice';"
sudo -i -u postgres psql -c "GRANT ALL privileges ON DATABASE onlyoffice TO onlyoffice;"
Step 3. Installing RabbitMQ Server.
By default, RabbitMQ is available on the Ubuntu base repository. Now run the following command below to install RabbitMQ to your Ubuntu system:
sudo apt install rabbitmq-server
Step 4. Installing OnlyOffice Ubuntu 22.04.
OnlyOffice offers several installation methods for Ubuntu 24.04, catering to different preferences and requirements. In this article, we’ll cover three popular methods: using the DEB package, Docker image, and Snap package.
- Installing OnlyOffice Using the DEB Package
The DEB package method is a straightforward approach to installing OnlyOffice on Ubuntu 24.04. Start by adding the GPG key to ensure the authenticity of the packages:
sudo apt-key adv --keyserver hkp://keyserver.ubuntu.com:80 --recv-keys CB2DE8E5
Next, add the OnlyOffice repository to your system’s sources list:
sudo echo "deb https://download.onlyoffice.com/repo/debian squeeze main" | sudo tee /etc/apt/sources.list.d/onlyoffice.list
Refresh the package manager cache to ensure you have the latest package information:
sudo apt update
OnlyOffice requires Microsoft Core Fonts to be installed. Run the following command to install them:
sudo apt install ttf-mscorefonts-installer
Finally, install the OnlyOffice Document Server package:
sudo apt install onlyoffice-documentserver
During the installation process, you’ll be prompted to enter a password for the OnlyOffice PostgreSQL user. Use the password you specified when configuring PostgreSQL.
- Installing OnlyOffice Using the Snap Package
Ubuntu 24.04 comes with built-in support for Snap packages, making it easy to install OnlyOffice using this method.
Run the following command to install the OnlyOffice Desktop Editors Snap package:
sudo snap install onlyoffice-desktopeditors
Once the installation is complete, you can launch OnlyOffice Desktop Editors from the Applications menu or by running the following command in the terminal:
onlyoffice-desktopeditors
While the Snap package method installs the OnlyOffice Desktop Editors, which are primarily designed for personal use, you can still integrate them with third-party platforms or your own web applications using the appropriate connectors or APIs.
- Installing OnlyOffice Using Docker
Docker provides a convenient way to install and run OnlyOffice on Ubuntu 24.04. If you haven’t already, install Docker on your Ubuntu system by following the Docker installation guide.
Run the following command to pull the ONLYOFFICE Docker image:
sudo docker pull onlyoffice/documentserver
Once the image is downloaded, run the Docker container with the following command:
sudo docker run -i -t -d -p 80:80 onlyoffice/documentserver
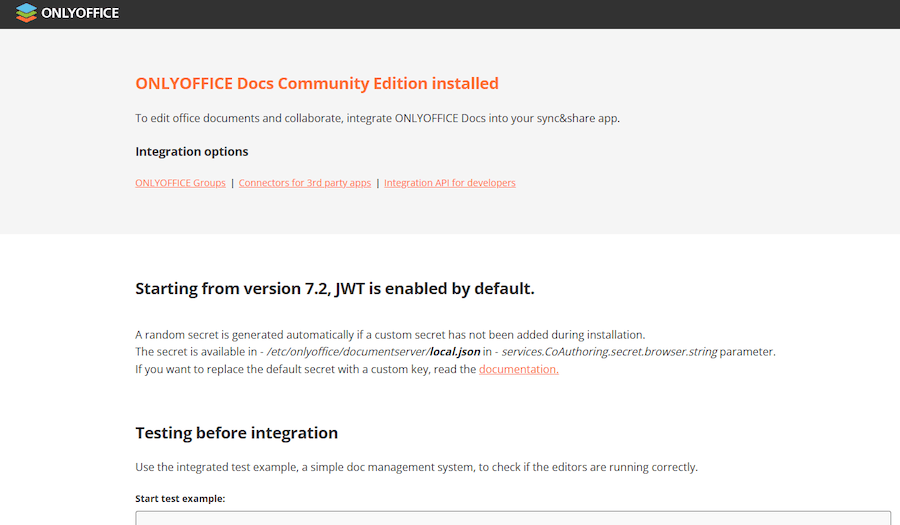
After the container is up and running, you can access the OnlyOffice Document Server by opening a web browser and navigating to http://your-server-ip.

Congratulations! You have successfully installed OnlyOffice. Thanks for using this tutorial for installing OnlyOffice on the Ubuntu 24.04 LTS system. For additional help or useful information, we recommend you check the OnlyOffice website.