Ubuntu 26.04 LTS “Resolute Raccoon” changed the Linux gaming landscape when it launched in April 2026. Many new users want to play their favorite games but don’t know the best way to install Steam on Ubuntu 26.04. This happens because three installation methods exist (deb, snap, Flatpak), but only one delivers the performance Valve recommends.
After 10 years managing Linux systems and gaming on Ubuntu, I’ve learned the wrong installation method causes frustrating performance issues and storage bloat. Ubuntu 26.04 brings NVIDIA Wayland performance improvements up to 12% better than previous versions, but only if you set it up correctly. This guide shows you exactly how to install Steam on Ubuntu 26.04 with proper GPU drivers and Proton configuration for Windows games.
You’ll learn not just what commands to run, but why each step matters. I’ll walk you through enabling multiverse repositories, adding 32-bit architecture support, installing NVIDIA or AMD drivers, and configuring Proton for maximum compatibility. By the end, you’ll have a gaming-ready Ubuntu 26.04 system that performs better than Windows for many titles.
Prerequisites
Before installing Steam on Ubuntu 26.04, make sure you have these requirements met:
- Operating System: Ubuntu 26.04 LTS “Resolute Raccoon” (released April 23, 2026) with GNOME 50
- System Architecture: 64-bit (x86_64) only, confirmed with
uname -mshowingx86_64 - Administrative Access: sudo privileges on your user account
- Internet Connection: Broadband minimum, fiber/gigabit recommended for game downloads
- Available Storage: At least 50GB free space on SSD for Steam and games
- GPU: Vulkan-capable graphics card (NVIDIA 30+, AMD RX 6000+, or Intel Arc)
- RAM: 4GB minimum, 16GB+ recommended for modern games
- User Account: Steam account (create free account at steamcommunity.com if needed)
Verify your system meets these prerequisites before proceeding. Skip ahead to the troubleshooting section if you encounter errors during installation.
Step 1: Update Your System Packages and Enable Multiverse Repository
Why System Updates Matter Before Installing Steam
Running sudo apt update and sudo apt upgrade before installing any new software is critical for preventing dependency conflicts. Ubuntu 26.04 ships with kernel 7.0 and fresh library versions, but cached package lists might be outdated. Without updating first, the package manager won’t know Steam exists in the repositories.
The multiverse repository contains software with licensing restrictions that Ubuntu disables by default for legal compliance. Steam lives in this repository, so you must enable it before the package manager can find and install the steam package.
Execute System Update Commands
Open your terminal using Ctrl+Alt+T and run these commands in order:
# Refresh package lists from all repositories
sudo apt update

# Upgrade existing packages to latest versions
sudo apt upgrade -y
What these commands do:
apt updatedownloads package index files from all enabled repositories without installing anythingapt upgrade -yinstalls newer versions of all installed packages, answering “yes” automatically to prompts- The
-yflag prevents the installer from asking for confirmation
Expected output:
Hit:1 http://id.archive.ubuntu.com/ubuntu noble InRelease
Get:2 http://id.archive.ubuntu.com/ubuntu noble-updates InRelease [126 kB]
Fetched 1,234 kB in 2s (567 kB/s)
Reading package lists... Done
Building dependency tree... Done
15 packages can be upgraded. Run 'apt list --upgradable' to see them.
Enable the Multiverse Repository
sudo add-apt-repository multiverse
Why this step is necessary:
The multiverse component contains proprietary software like Steam that has licensing restrictions. Ubuntu disables it by default to comply with open-source philosophy and legal requirements in some countries. Without enabling multiverse, running sudo apt install steam returns “package not found” error.
What happens after enabling:
Repository: 'Ubuntu 26.04 LTS - Multiverse'
Description: 'Ubuntu multiverse components'
Type: deb
URI: http://id.archive.ubuntu.com/ubuntu noble-multiverse
The repository gets added to /etc/apt/sources.list.d/ and you can now access Steam packages.
Refresh Package Lists Again
sudo apt update
Why repeat the update:
After adding a new repository, you must refresh package lists again. The package manager needs to download the index from multiverse so it knows Steam exists. Skipping this step causes installation failure even though you enabled the repository.
Step 2: Add 32-bit Architecture Support for Steam Runtime
Why 32-bit Libraries Are Mandatory
Even though Ubuntu 26.04 is a 64-bit operating system, Steam and many games require 32-bit libraries to function properly. The Steam runtime includes 32-bit components, and Wine/Proton needs 32-bit libraries to run Windows games through translation layers.
Without 32-bit support, Steam will fail to start with errors like “missing lib” or “cannot load library.” Modern games requiring DirectX translations through Proton absolutely depend on these 32-bit components working correctly.
Add i386 Architecture to Your System
# Enable 32-bit (i386) package architecture
sudo dpkg --add-architecture i386

# Update package lists to include i386 packages
sudo apt update
What these commands do:
dpkg --add-architecture i386tells the package manager to handle both amd64 (64-bit) and i386 (32-bit) packages simultaneously- This doesn’t install anything yet, it just enables the system to install 32-bit packages alongside 64-bit ones
- The second
apt updaterefreshes lists to include i386 versions of all packages
Expected output:
Architecture added: i386
Reading package lists... Done
Building dependency tree... Done
25 new packages can be installed.
Verify Architecture Was Added Successfully
dpkg --print-foreign-architectures
Expected output:
i386
If you see i386 listed, the architecture was added correctly. If the command returns nothing, repeat the dpkg --add-architecture i386 command and check for errors.
Step 3: Install Steam Using the Official Ubuntu Repository
Choose the Recommended Installation Method
The deb package installed through apt is Valve’s recommended method and delivers the best performance. This approach has native performance with no sandbox overhead, smallest storage footprint, and updates through regular system updates.
Snap and Flatpak versions exist but Valve doesn’t recommend them. Snap adds 1-3% FPS loss due to sandboxing and uses more storage through compressed squashfs. Flatpak is acceptable but still has slight overhead compared to native deb packages.
Install Steam Package
sudo apt install steam -y
Alternative command if steam package not found:
sudo apt install steam-installer -y
What happens during installation:
- APT downloads the steam package and all required dependencies automatically
- Required 32-bit libraries get installed including
libgl1-mesa-glx:i386and OpenGL components - Desktop launcher files get created in
/usr/share/applications/for GUI access - The package manager resolves and installs approximately 100+ dependencies
Expected output:
Reading package lists... Done
Building dependency tree... Done
The following NEW packages will be installed:
  steam steam-installer libgl1-mesa-glx:i386 ...
0 upgraded, 105 newly installed, 0 to remove and 15 not upgraded.
Need to get 234 MB of archives.
After this operation, 890 MB of additional disk space will be used.
Get:1 http://id.archive.ubuntu.com/ubuntu noble/multiverse amd64 steam amd64 1.0.0.78 [234 MB]
Fetched 234 MB in 35s (6,685 kB/s)
Selecting previously unselected package steam.
(Reading database ... 234567 files and directories currently installed.)
Preparing to unpack .../steam_1.0.0.78_amd64.deb ...
Unpacking steam (1.0.0.78) ...
Setting up steam (1.0.0.78) ...
Processing triggers for desktop-file-utils ...
Processing triggers for mime-support ...
Understand What Gets Installed
The installation adds several critical components:
- Steam client (
steampackage) – the main gaming launcher - 32-bit OpenGL libraries (
libgl1-mesa-glx:i386) – required for game rendering - Vulkan runtime libraries – needed for Proton to translate DirectX calls
- Wine dependencies – compatibility layer components for Windows games
- Desktop integration – menu shortcuts and file associations
Step 4: Launch Steam and Complete First-Time Setup
Start Steam for the First Time
You can launch Steam through the terminal or graphical interface:
# Terminal method
steam
Or use the GUI: Click Activities → Type “Steam” in search bar → Click the Steam icon
Why first launch is different from subsequent launches:
Steam automatically downloads the latest client files and runtime libraries on first startup. This update process happens before you see the login screen and may take several minutes depending on your internet connection. Steam also prompts you to install additional OpenGL and Vulkan components required for proper functioning.
Expected first launch behavior:
Installing breakpad exception handler for appid(steam)/version(1.0.0.78)
Installing breakpad exception handler for appid(steam)/version(1.0.0.78)
Installing breakpad exception handler for appid(steam)/version(1.0.0.78)
Running Steam on ubuntu 26.04 64-bit
STEAM_RUNTIME is enabled automatically
Pick汉语 or  English?
Accept the Steam Subscriber Agreement
When the Steam window appears:
- Click “I Agree” to accept the Steam Subscriber Agreement (mandatory for account creation)
- The agreement appears because Steam requires legal acceptance before account access
- You cannot proceed without accepting these terms
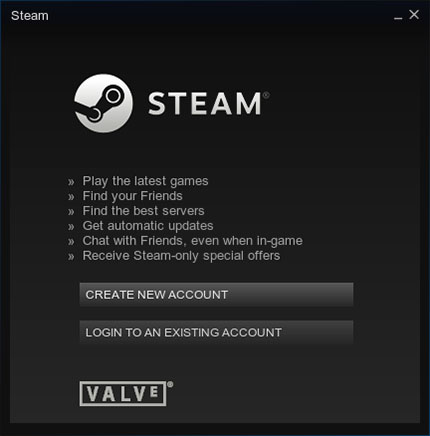
Log In or Create a Steam Account
Enter your existing Steam credentials or click “Create New Account” to register. Follow the on-screen instructions to complete account setup including email verification.
Enable Steam Guard for security:
- Go to Steam → Settings → Account → Manage Steam Guard
- Enable two-factor authentication (WHY: Required for trading and marketplace access)
- Verify your email address to complete setup
Steam Guard protects your account from unauthorized access and is mandatory for using the Steam Community Market or trading items.
Step 5: Install GPU Drivers for Optimal Gaming Performance
NVIDIA Users: Install Proprietary Drivers
Open-source Nouveau drivers provide 30-50% lower FPS compared to proprietary NVIDIA drivers. Your NVIDIA 40-series or 50-series GPU needs driver version 570 or higher for optimal performance on Ubuntu 26.04.
Check current driver status:
# Check if NVIDIA driver is already installed
nvidia-smi
Expected output if driver exists:
NVIDIA-SMI 575.57.08 Driver Version: 575.57.08 CUDA Version: 12.6
If you see “command not found” or the output shows “NVIDIA-SMI has failed,” you need to install proprietary drivers.
Install recommended proprietary driver:
# Automatically install the best driver for your GPU
sudo ubuntu-drivers autoinstall
Alternative: Install specific driver version for RTX 40/50 series:
# Driver 575+ required for newest NVIDIA cards
sudo apt install nvidia-driver-575 -y

# Reboot to load driver at kernel level
sudo reboot
Why reboot is mandatory:
NVIDIA drivers load at the kernel level and cannot be activated without restarting. The driver needs to initialize during boot sequence to take control of your GPU. Skipping this step means you’ll still be using Nouveau drivers even though the package installed successfully.
AMD Users: Install Mesa Drivers (Usually Already Installed)
AMD GPUs use open-source Mesa drivers that work out-of-the-box. Ubuntu 26.04 includes native ROCm support for AMD, so most AMD users don’t need third-party repositories.
Check your Mesa version:
glxinfo | grep "OpenGL version"
Expected output:
OpenGL version string: 4.6 Mesa 24.3.4
Install latest Mesa if performance is poor:
# Add Kisak Mesa PPA for newer drivers
sudo add-apt-repository ppa:kisak/kisak-mesa
sudo apt update
sudo apt install libgl1-mesa-dri -y
WHY this helps:
- Newer Mesa versions include performance optimizations for latest AMD GPUs
- RX 6000/7000 series benefit from Mesa 24.3+ features
- Better Vulkan support through Mesa improvements
Intel Users: Install Vulkan Drivers
Intel integrated graphics need additional Vulkan layers for Proton to work properly. Base Ubuntu installation includes basic drivers but not complete Vulkan support.
Install Intel Mesa and Vulkan drivers:
sudo apt install mesa-vulkan-drivers libgl1-mesa-dri -y
Verify Vulkan works correctly:
# Install Vulkan tools for testing
sudo apt install vulkan-tools -y

# Check Vulkan information
vulkaninfo --summary | head -20
Expected output snippet:
GPU id: 0 (Intel(R) Arc(TM) A770 Graphics)
apiVersion: 4202672 (1.3.240)
driverVersion: 24.3.4
vendorID: 8086 (Intel)
If vulkaninfo shows errors or returns nothing, your GPU doesn’t support Vulkan and cannot run Steam games through Proton.
Step 6: Enable Steam Play (Proton) for Windows Games
Understand What Proton Does
Proton is Valve’s compatibility layer combining Wine, Vulkan, and gaming optimizations. It translates Windows DirectX 11/12 calls to Linux Vulkan, making 90%+ of Windows Steam games playable on Linux. Proton is built into Steam, so you don’t need separate installation.
Check game compatibility at protondb.com before purchasing Windows-only titles.
Enable Steam Play for All Titles
Open Steam and follow these steps:
- Click “Steam” in the top-left corner → Select Settings
- Navigate to the Steam Play section in the left sidebar
- Check the box for “Enable Steam Play for supported titles”
- Crucially check “Enable Steam Play for all other titles”
Why checking “all other titles” matters:
Without this option checked, only games officially marked as Linux-compatible will install. Many excellent games are Windows-only but work perfectly through Proton. Enabling this option lets you install and play any Windows game on Linux.
- Select Proton version from the dropdown menu:
- Proton Experimental (recommended default for latest features)
- Proton 8.0 (most stable for everyday gaming)
- Proton GE (custom version for specific game fixes)
Install Proton GE for Specific Game Fixes
Some games require Proton GE (Glorious Eggroll) for custom patches and fixes. This community-maintained version includes additional media codecs and game-specific patches.
# Install ProtonUp-Qt to manage Proton versions
sudo apt install protonup-qt -y
Or download manually:
- Visit https://github.com/GloriousEggroll/proton-ge-custom/releases
- Download the latest
.tar.gzfile - Extract to
~/.steam/root/compatibilitytools.d/ - Restart Steam
Proton GE appears in the Proton dropdown menu after restarting Steam.
Configure Per-Game Proton Settings
For games with compatibility issues:
- Right-click the game in your Library → Properties
- Go to Compatibility tab
- Check “Force the use of a specific Steam Play compatibility tool”
- Select different Proton version from dropdown
Some games work better with older Proton versions, so experiment if a game won’t launch.
Troubleshooting Common Steam Installation Errors
Error 1: “Steam Package Not Found” After Enabling Multiverse
Problem: Running sudo apt install steam returns “Unable to locate package steam”
Cause: You didn’t run sudo apt update after enabling the multiverse repository
Solution:
# Refresh package lists after adding multiverse
sudo apt update

# Now install Steam
sudo apt install steam -y
Why this works: The package manager needs to download the index from multiverse before it knows Steam exists. Running update twice (once before and once after enabling multiverse) is mandatory.
Error 2: “Missing 32-bit Library” or Steam Won’t Start
Problem: Steam launches but immediately closes with error about missing libgl1:i386 or similar
Cause: You didn’t add i386 architecture before installing Steam
Solution:
# Add 32-bit architecture
sudo dpkg --add-architecture i386

# Update and install missing 32-bit libraries
sudo apt update
sudo apt install libgl1:i386 libx11-6:i386 -y

# Reinstall Steam to fix dependencies
sudo apt install --reinstall steam -y
Why this works: The --add-architecture command enables the system to install 32-bit packages. Reinstalling Steam forces apt to resolve all missing dependencies including 32-bit libraries.
Error 3: NVIDIA Games Show Black Screen or Low FPS
Problem: Games launch but display black screen or run at 10-20 FPS
Cause: Using open-source Nouveau drivers instead of proprietary NVIDIA drivers
Solution:
# Remove Nouveau if installed
sudo apt remove xserver-xorg-video-nouveau -y

# Install proprietary driver
sudo ubuntu-drivers autoinstall

# Verify installation
nvidia-smi

# Reboot
sudo reboot
Why this works: Nouveau drivers lack performance optimizations and proper Vulkan support. Proprietary drivers provide full GPU acceleration and correct Vulkan implementation needed for gaming.
Error 4: Vulkan Not Detected by Steam
Problem: Games fail to launch with “Vulkan not available” error
Cause: Vulkan runtime libraries not installed or GPU doesn’t support Vulkan
Solution:
# Install Vulkan tools and runtime
sudo apt install vulkan-tools vulkan-utils libvulkan1 -y

# Verify Vulkan works
vulkaninfo --summary | head -20

# Test with vkcube (should show rotating cube)
vkcube
Why this works: Proton translates DirectX to Vulkan, so Vulkan is mandatory for Windows games. The vulkaninfo command confirms your GPU supports Vulkan and drivers are installed correctly.
Error 5: Snap Version Causes Performance Issues
Problem: Games run 3-5% slower than expected, or Steam uses excessive disk space
Cause: You installed Steam via Snap instead of deb package
Solution:
# Remove Snap version
sudo snap remove steam

# Clean up Snap cache
sudo rm -rf ~/snap/steam

# Install deb version instead
sudo add-apt-repository multiverse
sudo apt update
sudo apt install steam -y
Why this works: Snap packages run in sandboxed containers with compression overhead. The native deb package has no sandbox overhead and uses less storage, delivering better gaming performance.
Configure Steam Library Folders and Storage Management
Add Secondary Game Library Location
If you have multiple drives or partitions, add additional library folders:
- Open Steam → Settings → Downloads → Steam Library Folders
- Click “+” button to add new folder
- Select folder on secondary drive (e.g.,
/mnt/games/SteamLibrary) - Click “Select” to confirm
Why multiple library folders help:
- Distribute games across multiple drives for better loading times
- Separate OS drive from game drive to prevent running out of space
- Keep expensive SSD for OS and games, use HDD for storage
Configure Download Limits and Scheduling
- Go to Steam → Settings → Downloads
- Set “Download Restrictions” for bandwidth limits
- Enable “Allow downloads during gameplay” if needed
- Configure automatic updates for off-peak hours
Why bandwidth limiting matters:
Large game downloads (100GB+) can saturate your connection and make the system unusable. Setting limits ensures you can still browse the web while games download in the background.
Verifying Your Steam Installation on Ubuntu 26.04
Confirm Steam Is Working Properly
Run these verification commands to ensure everything is configured correctly:
# Check Steam version
steam --version

# Verify Steam is in PATH
which steam

# Check installed libraries
dpkg -l | grep steam
Expected output:
Steam client version: 1716835200 (2026.04.27)
/usr/bin/steam
ii  steam                1.0.0.78            amd64  Valve's Steam digital software distribution system
ii  steam-installer      1.0.0.78            amd64  Steam installer and dependencies
Test Proton Compatibility
- Install a free Windows-only game (e.g., “Portal 2” or “Counter-Strike 2”)
- Right-click game → Properties → Compatibility
- Verify Proton version shows “Proton Experimental” or similar
- Launch the game and verify it runs without errors
Check Gaming Performance
Use these tools to monitor performance:
# Install monitoring tools
sudo apt install mangohud -y

# Launch game with performance overlay
mangohud steam
What to monitor:
- FPS (frames per second) – should match or exceed Windows performance
- GPU temperature – should stay below 85°C under load
- GPU utilization – should reach 90-100% during gaming
- RAM usage – monitor for memory leaks
[su_box title=”VPS Manage Service Offer” style=”bubbles” box_color=”#000000″ radius=”10″]If you don’t have time to do all of this stuff, or if this is not your area of expertise, we offer a service to do “VPS Manage Service Offer”, starting from $10 (Paypal payment). Please contact us to get the best deal![/su_box]

