How To Install WebStorm on Fedora 39

In this tutorial, we will show you how to install WebStorm on Fedora 39. WebStorm is a powerful Integrated Development Environment (IDE) designed by JetBrains specifically for JavaScript and its related technologies. It offers a plethora of features such as intelligent code completion, on-the-fly error detection, powerful navigation, and refactoring for JavaScript, TypeScript, stylesheet languages, and popular frameworks like Angular and React.
This article assumes you have at least basic knowledge of Linux, know how to use the shell, and most importantly, you host your site on your own VPS. The installation is quite simple and assumes you are running in the root account, if not you may need to add ‘sudo‘ to the commands to get root privileges. I will show you the step-by-step installation of WebStorm on a Fedora 39.
Prerequisites
Before diving into the installation process, let’s ensure that you have everything you need:
- A server running one of the following operating systems: Fedora 39.
- It’s recommended that you use a fresh OS install to prevent any potential issues.
- You will need access to the terminal to execute commands. Fedora 39 provides the Terminal application for this purpose. It can be found in your Applications menu.
- A network connection or internet access to download the WebStorm repository.
- A
non-root sudo useror access to theroot user. We recommend acting as anon-root sudo user, however, as you can harm your system if you’re not careful when acting as the root.
Install WebStorm on Fedora 39
Step 1. Before we dive into the installation process, it’s crucial to ensure that your system is up-to-date. You can update your Fedora system by running the following command in the terminal:
sudo dnf clean all
sudo dnf update
Step 2. Installing Snapd.
Snapd is the background service that allows you to install, manage, and update snap packages. If it’s not already present on your system, you can install it using the following command:
sudo dnf install snapd
Once the installation is complete, you need to enable the snapd socket. This will ensure that snapd starts automatically when your system boots. You can enable the snapd socket using the following command:
sudo systemctl enable --now snapd.socket
If you’re using a classic Fedora setup, you’ll need to create a symbolic link between /var/lib/snapd/snap and /snap. This is because some snaps expect the snap directory to be at /snap. You can create this symbolic link using the following command:
sudo ln -s /var/lib/snapd/snap /snap
Step 3. Install WebStorm on Fedora 39.
With snapd installed and configured, you’re now ready to install WebStorm. You can install the latest stable version of WebStorm using the following command:
sudo snap install webstorm --classic
The --classic option is used because WebStorm requires full access to the system, similar to a traditionally packaged application.
After the installation is complete, it’s a good practice to verify that it was successful. You can do this by checking the version of WebStorm that was installed. Run the following command in the terminal:
webstorm --version
This should display the version of WebStorm that you installed.
Step 4. Accessing WebStorm on Fedora.
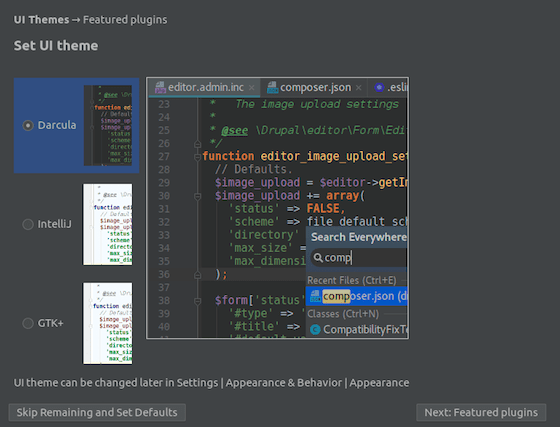
Now that WebStorm is installed, you can run it for the first time and perform the initial setup. This includes selecting the UI theme that you prefer and installing any plugins that you need. You can start WebStorm by running the following command:
webstorm

Congratulations! You have successfully installed WebStorm. Thanks for using this tutorial for installing WebStorm on your Fedora 39 system. For additional or useful information, we recommend you check the official WebStorm website.