In this tutorial, we will show you how to install Drupal on Ubuntu 14.04. For those of you who didn’t know, Drupal is an open-source and one of the most popular PHP-based Content Management System (CMS) platforms for building personal blogs or big corporate websites. It has thousands of templates and plugins that are mostly free to download and install. Due to the stability of the base, the adaptability of the platform, and its active community, Drupal remains a popular choice after more than a decade on the scene.
This article assumes you have at least basic knowledge of Linux, know how to use the shell, and most importantly, you host your site on your own VPS. The installation is quite simple. I will show you the step-by-step installation of Drupal on Ubuntu 14.04.
Prerequisites
- A server running one of the following operating systems: Ubuntu 14.04, and any other Debian-based distribution like Linux Mint.
- It’s recommended that you use a fresh OS install to prevent any potential issues.
- SSH access to the server (or just open Terminal if you’re on a desktop).
- A
non-root sudo useror access to theroot user. We recommend acting as anon-root sudo user, however, as you can harm your system if you’re not careful when acting as the root.
Install Drupal on Ubuntu 14.04
Step 1. First of all, make sure that all packages are up to date.
apt-get update
apt-get upgrade
Step 2. Install LAMP server and include some PHP extensions.
sudo apt-get install mysql-server mysql-client apache2 php5 php5-mysql php5-gd php5-curl libssh2-php
Start LAMP service, enable to start on boot:
service mysql start
service apache2 start
Step 3. Configuring MySQL for Drupal.
By default, MySQL is not hardened. You can secure MySQL using the mysql_secure_installation script. you should read and below each step carefully which will set a root password, remove anonymous users, disallow remote root login, and remove the test database and access to secure MySQL:
mysql_secure_installation
Next, we will need to log in to the MySQL console and create a database for Drupal. Run the following command:
mysql -u root -p
This will prompt you for a password, so enter your MySQL root password and hit Enter. Once you are logged in to your database server you need to create a database for Drupal installation:
mysql -u root -p
mysql> CREATE DATABASE drupaldb;
mysql> GRANT ALL PRIVILEGES ON drupaldb.* TO 'drupaluser'@'localhost' IDENTIFIED BY 'your-password' WITH GRANT OPTION;
mysql> FLUSH PRIVILEGES;
mysql> quit
Step 4. Install Drupal.
Download the latest stable version of Drupal, At the moment of writing this article it is version 7.37:
wget http://ftp.drupal.org/files/projects/drupal-7.37.tar.gz
tar xzvf drupal*
mv -v drupal*/* /var/www/html/
We will need to change some folders permissions:
chown -R www-data:www-data /var/www/html/
Step 5. Configuring Apache webserver.
Create a new virtual host directive in Apache. For example, create a new Apache configuration file ‘drupal.conf‘:
nano /etc/apache2/sites-available/drupal.conf
ln -s /etc/apache2/sites-available/drupal.conf /etc/apache2/sites-enabled/drupal.conf
Then, add the following lines:
<VirtualHost *:80>
   ServerAdmin admin@your-domain.com
   DocumentRoot /var/www/html/drupal/
   ServerName your-domain.com
   ServerAlias www.your-domain.com
      <Directory /var/www/html/drupal/>
         Options Indexes FollowSymLinks MultiViews
         AllowOverride All
     Order allow,deny
         allow from all
      </Directory>
   ErrorLog /var/log/apache2/your-domain.com-error_log
   CustomLog /var/log/apache2/your-domain.com-access_log common
</VirtualHost>
There are also a few tweaks recommended by the Drupal development team that can be implemented. To do that edit your PHP configuration file:
nano /etc/php5/apache2/php.ini
Set the “expose_php” and the “”allow_url_fopen”” directives to “Off”:
. . .
expose_php = Off
. . .
allow_url_fopen = Off
. . .
Restart the Apache service for the changes to take effect:
/etc/init.d/apache2 restart
Step 6. Accessing Drupal.
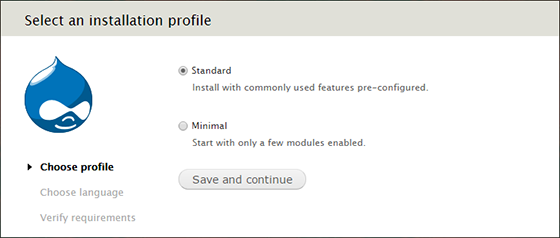
Drupal will be available on HTTP port 80 by default. Open your favorite browser and navigate to http://yourdomain.com or http://server-ip and complete the required steps to finish the installation. If you are using a firewall, please open port 80 to enable access to the control panel.

Congratulations! You have successfully installed Drupal. Thanks for using this tutorial for installing Drupal CMS on Ubuntu 14.04 system. For additional help or useful information, we recommend you check the official Drupal website.