
Video editing on Linux has a reputation problem. Ask around in any DevOps or sysadmin Slack channel and someone will inevitably say “just dual-boot into Windows for that.” That advice was fair a decade ago. It isn’t anymore, and OpenShot is one of the clearest proof points that free, open-source non-linear video editors can hold their own on a modern Ubuntu box.
If you’ve just rolled out Ubuntu 26.04 LTS, codenamed Resolute Raccoon, and you’re trying to get OpenShot running for the first time, you’ve landed in the right place. This isn’t a rehash of the same three commands copy-pasted across forty blogs. It’s a walkthrough written the way an experienced Linux admin would actually approach the task, accounting for package conflicts, GPU driver quirks, permission issues, and the kind of edge cases that only show up once you’ve broken a system trying to fix it.
OpenShot recently shipped version 4.0.1, a maintenance release that patched several regressions from the earlier Qt6 rewrite and, notably, introduced official Linux Snap support with automatic updates. That changes the installation calculus a bit, because now you genuinely have three solid, first-party paths into OpenShot on Ubuntu: the official PPA, the new Snap package, and the portable AppImage. Each has tradeoffs, and picking the wrong one for your use case can bite you later, especially on a server-class or headless-adjacent workstation where you’re managing dependencies carefully.
We’ll walk through all three methods, explain when each one makes sense, cover hardware acceleration and performance tuning for actual video rendering (which is CPU and disk I/O intensive in ways most desktop software isn’t), and finish with a troubleshooting section built around real errors people hit, not hypothetical ones. By the end, you’ll have OpenShot installed, configured sensibly, and running without the stutter and crash behavior that gives Linux video editing a bad name.
Why Ubuntu 26.04 Matters for OpenShot Users
Ubuntu 26.04 LTS moved to a newer kernel baseline and refreshed Mesa graphics stack compared to 24.04, which directly affects how OpenShot’s preview rendering and hardware-accelerated export perform. OpenShot leans on FFmpeg under the hood for encoding and decoding, and FFmpeg’s behavior is tightly coupled to the codec libraries and GPU drivers present on the system. A cleaner, more current base like Resolute Raccoon generally means fewer codec mismatches out of the box.
There’s also a practical angle here. Ubuntu 26.04 ships with Python 3.13 as the default interpreter, and OpenShot’s Qt6-based UI (introduced in the 3.5 series and refined through 4.0) depends on compatible PyQt bindings. If you’re coming from an older LTS release and hit weird import errors after installing OpenShot manually via pip or from source, this is almost always the root cause. Stick to the official packages and this problem mostly disappears, which is one more reason to avoid the temptation of building from source unless you specifically need a bleeding-edge feature.
Before You Install: System Requirements and Pre-Checks
Don’t skip this section just because it feels like boilerplate. Half the “OpenShot won’t open” tickets I’ve seen over the years trace back to insufficient RAM or an outdated GPU driver, not the software itself.
Minimum practical specs for OpenShot on Ubuntu 26.04:
- 4 GB RAM (8 GB or more strongly recommended if you’re working with 1080p or 4K footage)
- Dual-core CPU minimum; quad-core or better for smooth timeline scrubbing
- OpenGL 2.0 capable GPU (integrated graphics work, but expect stutter on complex projects)
- At least 2 GB free disk space for the application, plus generous scratch space for render caches and project files
Run a quick sanity check before touching the package manager:
lscpu | grep -E "Model name|CPU\(s\)"
free -h
df -h /
glxinfo -B 2>/dev/null | grep -i "OpenGL version"
If glxinfo isn’t installed, grab it fast:
sudo apt install mesa-utilsThis one command has saved me from chasing phantom rendering bugs more than once. If OpenGL reports version 1.x or comes back empty, fix your graphics drivers before you even open OpenShot. On systems with NVIDIA GPUs, that usually means installing the proprietary driver through ubuntu-drivers:
ubuntu-drivers devices
sudo ubuntu-drivers autoinstall
sudo reboot
Skipping this step and then complaining that OpenShot’s preview window is choppy is a bit like blaming your car’s fuel efficiency while driving on a flat tire.
Method 1: Installing OpenShot via the Official PPA (Recommended for Most Users)
The Personal Package Archive method is the closest thing to a “native” install experience on Ubuntu. It integrates with apt, respects your system’s update cycle, and gives you the python3-openshot library alongside the GUI, which matters if you ever want to script video processing tasks outside the graphical app.
Step 1: Update Your Package Index
sudo apt update && sudo apt upgrade -yNever skip the upgrade step on a fresh LTS install. Ubuntu 26.04 point releases (like 26.04.1) bundle security and stability fixes that PPA-installed software will implicitly depend on.
Step 2: Add the OpenShot PPA
sudo add-apt-repository ppa:openshot.developers/ppaYou’ll be prompted to confirm adding the third-party repository. Press Enter to continue. This command writes a .list file into /etc/apt/sources.list.d/ and imports the corresponding GPG signing key automatically on modern Ubuntu releases, which is a nice improvement over the manual apt-key dance we used to have to do.
Step 3: Refresh Package Lists and Install
sudo apt update
sudo apt install openshot-qt python3-openshot -y
This pulls in OpenShot along with its Python bindings and dependency chain, including the appropriate FFmpeg libraries. On a clean Ubuntu 26.04 system this typically completes in under a minute on decent bandwidth.
Step 4: Launch and Verify
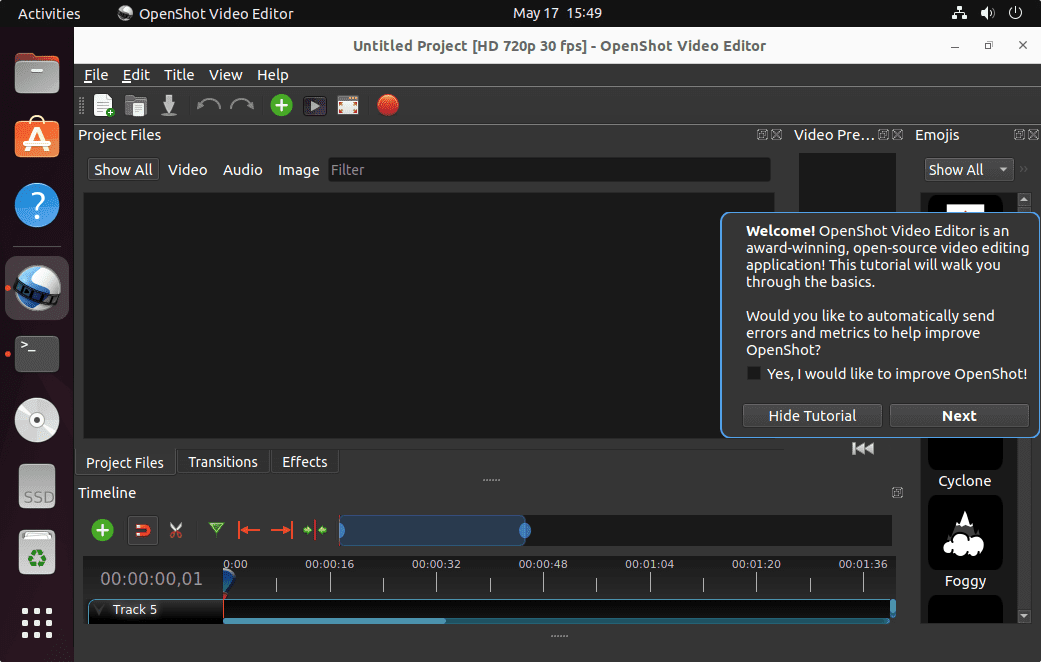
openshot-qtOr find it under your desktop’s Applications menu, listed simply as “OpenShot Video Editor.” First launch may take a few extra seconds while it initializes its profile and cache directories under ~/.openshot_qt/.
Why choose the PPA route? It’s the best fit if you want OpenShot to receive updates through your regular apt upgrade workflow, which matters a lot on multi-user workstations or systems where you’re already managing everything through configuration management tools like Ansible. It also avoids sandboxing overhead that Snap introduces.
Method 2: Installing OpenShot via Snap (New in the 4.0.1 Era)
With OpenShot 4.0.1, the project officially embraced Snap distribution, complete with automatic updates and desktop menu integration. If you’re already running a Snap-centric Ubuntu setup, this is now a fully supported first-party option rather than a community workaround.
sudo snap install openshot-qtThat’s genuinely the entire command. Snap handles sandboxing, dependency bundling, and update checks without any additional configuration.
A quick caveat worth knowing from experience: Snap-packaged applications run in a confined environment, which occasionally causes friction with file access outside your home directory or with certain hardware-accelerated codecs that expect direct kernel-level access. If you store your video assets on a separate mounted drive or NAS share, you may need to grant additional permissions:
snap connect openshot-qt:removable-mediaThis connects the Snap’s removable-media interface, letting it read and write to external and non-standard mount points. Without this, you’ll get permission-denied errors the moment you try to import footage from /media/ or /mnt/.
Why choose Snap? It’s ideal for users who want zero-touch updates and don’t mind the sandbox tradeoff. It’s also genuinely useful on systems where you want to isolate OpenShot’s dependencies from the rest of your package tree, which reduces the blast radius if something in its dependency chain ever gets flagged as vulnerable.
Method 3: Installing OpenShot via AppImage (Best for Portability and Testing)
The AppImage is the go-to option when you need OpenShot on a machine without root access, or when you specifically want to test a release candidate without touching your system’s package state. OpenShot’s daily builds, including release candidates like the recent v4.0.1-rc builds, are distributed this way before hitting stable channels.
Step 1: Download the AppImage
Grab the latest stable AppImage from the official OpenShot download page. From the terminal:
wget https://github.com/OpenShot/openshot-qt/releases/download/v4.0.1/OpenShot-v4.0.1-x86_64.AppImageAdjust the version string as needed; always verify the exact filename against the current release listing since build hashes change per release.
Step 2: Make It Executable
chmod +x OpenShot-v4.0.1-x86_64.AppImageStep 3: Run It
./OpenShot-v4.0.1-x86_64.AppImageNo installation, no system-wide changes, no dependency resolution headaches. This is exactly why AppImages are popular for testing pre-release software or running OpenShot on a machine you don’t fully control, like a shared lab workstation.
One thing that trips people up: AppImages need FUSE to mount themselves. Ubuntu 26.04 doesn’t always ship libfuse2 by default anymore following upstream changes to FUSE handling. If you get a “dlopen(): error loading libfuse.so.2” message, fix it with:
sudo apt install libfuse2t64The package name shifted from libfuse2 to libfuse2t64 in recent Ubuntu releases as part of the 64-bit time_t transition, so don’t be thrown off if the old package name comes back as “not found.”
Post-Installation Configuration and Hardware Acceleration
Getting OpenShot installed is only half the job. Configuring it properly for your hardware determines whether editing feels smooth or feels like wading through mud.
Enable Hardware-Accelerated Preview and Export
OpenShot supports hardware decoding and encoding through FFmpeg’s acceleration backends (VA-API on Intel/AMD, NVENC on NVIDIA). Enable it under Edit > Preferences > General, then toggle hardware decoding and encoding where your GPU supports it. On systems with integrated Intel graphics, confirm VA-API is functional first:
sudo apt install vainfo intel-media-va-driver-non-free
vainfo
If vainfo lists supported profiles without errors, you’re good to enable hardware acceleration inside OpenShot’s preferences panel. Skipping this on a 4K project is the difference between a render taking twenty minutes versus two hours, depending on your CPU.
Set a Sensible Cache and Preview Quality
Under Preferences, lower the “Preview Quality” setting if you’re editing on modest hardware. This has zero effect on your final export quality; it only affects the smoothness of the live timeline preview. This single tweak resolves the majority of “OpenShot is laggy” complaints I’ve seen from users running mid-range laptops.
Performance Tuning for Real Editing Workloads
Video editing is one of those workloads that stresses every subsystem simultaneously: CPU for encoding, RAM for caching frames, disk I/O for reading and writing large media files, and occasionally network if you’re pulling assets from shared storage. Treat it the way you’d treat tuning a database server, because the same principles apply.
CPU: OpenShot’s rendering pipeline benefits from multi-core CPUs, but FFmpeg’s encoding threads don’t scale linearly forever. On an 8-core machine, expect diminishing returns past 6 threads for most H.264 exports. Check thread usage during export with htop to confirm you’re not CPU-bound on a single core due to a misconfigured codec setting.
RAM: OpenShot caches preview frames aggressively. On systems with 8 GB or less, close memory-hungry browser tabs before starting a render; Chrome with fifteen tabs open plus OpenShot rendering 4K footage is a recipe for OOM-killer intervention. Check for memory pressure with:
vmstat 1 5If you see swap activity climbing during export, that’s your signal to add RAM or reduce your project’s preview resolution.
Disk I/O: This is the most underrated bottleneck. Editing directly off a spinning HDD, or worse, a network share with high latency, will cause stuttering regardless of CPU power. Move active project files to an SSD, even a modest SATA SSD, and you’ll notice an immediate difference in scrubbing responsiveness. For serious editing workstations, NVMe storage isn’t a luxury, it’s a baseline requirement once you’re working with anything beyond 1080p.
Network: Only relevant if your source footage lives on a NAS or remote mount. Editing directly from network storage over a congested Wi-Fi link is asking for dropped frames in preview and corrupted proxy generation. Copy footage locally first for anything beyond casual editing.
Troubleshooting Common OpenShot Installation Issues
“openshot-qt: command not found” After PPA Install
Usually means the shell’s PATH cache is stale, or the install silently failed due to a broken dependency. Run:
sudo apt install -f
which openshot-qt
If it still comes back empty, check the install log for dependency conflicts:
sudo apt install openshot-qt -y --dry-runApplication Crashes Immediately on Launch
This is almost always a graphics driver or OpenGL compatibility issue. Launch from terminal to see the actual error:
openshot-qt --debugLook for QOpenGLShaderProgram or libGL errors specifically. These point to missing or broken Mesa/OpenGL libraries, fixable with:
sudo apt install --reinstall libgl1 mesa-utilsPreview Window Is Black or Freezes
Common on systems with hybrid GPU setups (Intel plus NVIDIA laptops). Force OpenShot to run on the integrated GPU as a diagnostic step:
__NV_PRIME_RENDER_OFFLOAD=0 openshot-qtIf the preview works fine on integrated graphics but breaks on the discrete GPU, the issue lies in your NVIDIA driver configuration, not OpenShot itself. Update to the latest proprietary driver via ubuntu-drivers autoinstall and retest.
Export Fails with FFmpeg-Related Error
Check available codecs first:
ffmpeg -codecs | grep -i h264If your chosen export profile references a codec that isn’t compiled into your system’s FFmpeg build (rare with the PPA and Snap versions, more common with self-compiled setups), switch export presets to a standard H.264/AAC combination inside OpenShot’s export dialog rather than a custom profile.
Snap Version Can’t Access External Drives
Covered earlier, but worth repeating since it’s the single most common Snap-specific complaint:
snap connect openshot-qt:removable-media