
Video editing on Linux has a reputation problem. Ask any newcomer coming from Windows or macOS, and they’ll tell you the ecosystem feels fragmented — too many tools, inconsistent dependency chains, and documentation that assumes you already know what a PPA is. VidCutter cuts through that noise, quite literally. It’s a lightweight, FFmpeg-backed video cutter and joiner built with Qt, and it does exactly one job well: trimming and merging clips without transcoding, without bloated UI, and without eating your RAM alive.
If you’ve just rolled out Ubuntu 26.04 LTS on a workstation, a media server, or a hybrid content-production box, you’ve probably noticed that some of the older installation guides floating around the internet reference outdated PPAs or Snap channels that no longer resolve cleanly. That’s not unusual — Ubuntu’s package ecosystem shifts with every LTS cycle, and dependency chains for multimedia apps (Qt5/Qt6, PyQt bindings, FFmpeg libraries) tend to be the first casualties of a major version bump.
This guide walks through every legitimate installation path for VidCutter on Ubuntu 26.04 LTS: Snap, Flatpak, the community PPA, and manual AppImage deployment. It’s written from the perspective of someone who’s spent more late nights than they’d like to admit debugging missing qml-module-qtmultimedia errors on fresh installs. Along the way, we’ll cover why certain methods are more resilient than others, how to verify FFmpeg compatibility, permission and sandboxing considerations, and what to do when the installation “succeeds” but the app refuses to load a video file — a classic VidCutter gotcha that trips up even experienced admins.
Whether you’re managing a single desktop or rolling this out across a fleet of editing workstations via configuration management, the goal here is the same: a clean, repeatable, production-safe install.
Why VidCutter Still Matters in 2026
Most people reach for full-blown NLEs like Kdenlive or Shotcut when they just need to trim a five-minute clip down to ninety seconds. That’s overkill. VidCutter exists precisely for that gap — quick, lossless cuts and joins without re-encoding, powered directly by FFmpeg under the hood. Because it avoids transcoding whenever possible, it’s dramatically faster than heavier editors for simple trim-and-join workflows, and it doesn’t degrade video quality with every pass.
For sysadmins managing shared workstations or lightweight content-production environments, that efficiency translates directly into lower CPU load and less disk I/O during batch operations — something worth caring about if you’re running this on modest hardware or a VDI instance.
System Requirements and Pre-Installation Checklist
Before touching a package manager, confirm your environment is actually ready. This step gets skipped more often than it should, and it’s the source of half the “it won’t install” support threads you’ll find online.
Run a quick baseline check:
lsb_release -a
uname -r
df -h /
free -h
You want to confirm:
- Ubuntu 26.04 LTS is fully patched (
sudo apt update && sudo apt upgrade -y) - At least 500MB of free disk space for the app and dependencies
- A working desktop environment (GNOME, KDE Plasma, or XFCE — VidCutter doesn’t care which)
- FFmpeg available or installable, since VidCutter relies on it for the actual encode/decode work
If this is a headless server you’re planning to use with X11 forwarding or a remote desktop protocol like RDP/VNC, note that VidCutter is a GUI-only application — there’s no CLI mode. Plan your remote display setup accordingly before you get halfway through installation and realize the window never renders.
sudo apt update
sudo apt upgrade -y
sudo apt install -y ffmpeg
Installing FFmpeg explicitly beforehand isn’t strictly required for every install method, but it saves a dependency-resolution headache later, especially with the PPA route where package maintainers sometimes lag behind FFmpeg’s rolling updates.
Method 1: Installing VidCutter via Snap (Recommended for Most Users)
Snap is the path of least resistance on Ubuntu 26.04 LTS, and for good reason — Canonical maintains snapd as a first-class citizen on Ubuntu, it’s sandboxed by default, and updates happen automatically in the background without you lifting a finger.
Step-by-Step Snap Installation
First, confirm snapd is installed and running. Ubuntu ships with it out of the box on most images, but minimal server installs sometimes strip it out.
sudo apt install -y snapd
sudo systemctl enable --now snapd.socket
Give the snapd service a moment to initialize, then install VidCutter:
sudo snap install vidcutterVerify the installation:
snap list vidcutterYou should see version and revision output confirming the package landed correctly. Launch it either from your application menu or directly from terminal:
vidcutterWhy Snap Sandboxing Matters Here
Snap packages run in a confined environment with restricted filesystem access by default. This is a genuine security upside — if VidCutter (or a malicious fork masquerading as it) ever had a vulnerability, the blast radius is contained. The tradeoff is that VidCutter may not immediately see files outside your home directory, like external drives mounted at /media or /mnt, unless the relevant interface is connected.
If you’re trying to open a video from a mounted external drive and VidCutter’s file picker can’t see it, check connected interfaces:
snap connections vidcutterLook for removable-media in the list. If it’s not auto-connected, connect it manually:
sudo snap connect vidcutter:removable-mediaThis one command solves probably 80% of “VidCutter can’t find my files” complaints on forums.
Method 2: Installing via Flatpak
Flatpak is the second-most reliable option, and honestly, some admins prefer it over Snap for its slightly more transparent permission model via Flatseal and its cross-distro consistency — useful if you’re managing a mixed fleet of Ubuntu, Fedora, and Debian machines and want one installation workflow across all of them.
Setting Up Flatpak on Ubuntu 26.04 LTS
Ubuntu doesn’t ship Flatpak pre-installed, so you’ll need to add it manually:
sudo apt update
sudo apt install -y flatpak
Add the Flathub remote repository, which hosts the official VidCutter Flatpak build:
flatpak remote-add --if-not-exists flathub https://dl.flathub.org/repo/flathub.flatpakrepoA reboot or full session logout/login is genuinely worth doing here — Flatpak’s desktop integration (icons, MIME associations) doesn’t always register properly until the session restarts. Skipping this step is a common reason people report “Flatpak installed but nothing shows up in the app menu.”
Now install VidCutter:
flatpak install flathub com.ozmartians.VidCutter -yRun it with:
flatpak run com.ozmartians.VidCutterGranting Filesystem Access
Like Snap, Flatpak sandboxes applications. If you need broader filesystem access — say, for a network share mounted via NFS or SMB — use Flatseal (flatpak install flathub com.github.tchx84.Flatseal) to grant filesystem permissions visually, or do it via CLI:
flatpak override --user --filesystem=/mnt com.ozmartians.VidCutter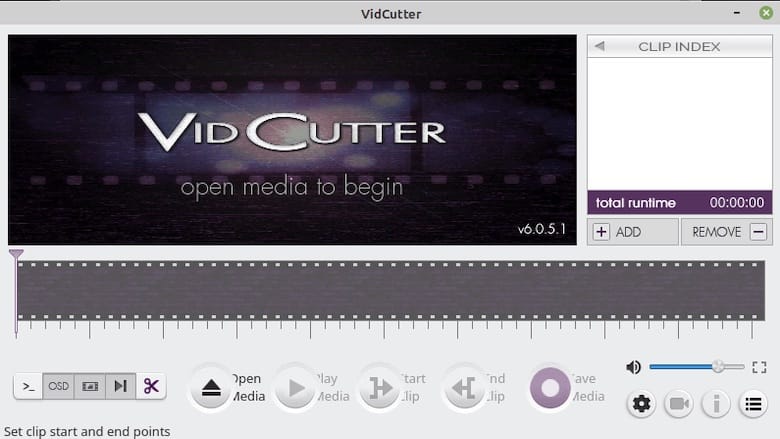
Method 3: Installing via the Official PPA
The PPA route (ppa:ozmartian/apps) is the traditional method and still works on many Ubuntu-based distributions, but it comes with a caveat worth stating plainly: PPA maintainers don’t always rebuild packages the moment a new LTS drops. On a release as new as 26.04, there’s a real possibility the PPA hasn’t published a compatible build yet, or it’s still targeting an older Qt ABI.
That said, it’s worth trying, since apt-based installs integrate more predictably with system-wide dependency management than sandboxed formats.
sudo add-apt-repository ppa:ozmartian/apps
sudo apt update
sudo apt install -y vidcutter
If add-apt-repository throws a GPG key error — a known friction point after distro upgrades where keyring formats change — you may need to import the key manually:
sudo apt install -y software-properties-common gnupg
sudo add-apt-repository ppa:ozmartian/apps
If apt reports unresolved dependencies or a 404 on the PPA’s package index for noble/newer codenames, that’s your signal the PPA hasn’t caught up with 26.04 yet. Don’t fight it — fall back to Snap or Flatpak instead. Chasing a stale PPA across multiple apt update cycles wastes more time than it saves.
Method 4: Manual AppImage Installation
For environments where you can’t or don’t want to install snapd or Flatpak — locked-down corporate images, minimal containers, or air-gapped systems — the AppImage is your best bet. It’s fully self-contained and requires no system-level package changes.
Download the latest AppImage release from the project’s official distribution point, then:
chmod +x VidCutter-*.AppImage
./VidCutter-*.AppImage
If it fails to launch with a FUSE-related error (common on newer kernels where FUSE2 isn’t installed by default), install the compatibility layer:
sudo apt install -y libfuse2t64On Ubuntu 26.04, the FUSE2 package naming shifted slightly compared to older releases due to the time_t transition affecting library naming conventions — if libfuse2 alone doesn’t resolve, check apt search fuse2 to find the exact package name shipped in your repos.
For a more permanent setup, move the AppImage to a standard binary location and create a desktop entry so it behaves like a native app:
mkdir -p ~/Applications
mv VidCutter-*.AppImage ~/Applications/vidcutter.AppImage
Then create ~/.local/share/applications/vidcutter.desktop:
[Desktop Entry]
Name=VidCutter
Exec=/home/yourusername/Applications/vidcutter.AppImage
Icon=vidcutter
Type=Application
Categories=AudioVideo;
Replace yourusername with your actual home directory path, and refresh the desktop database:
update-desktop-database ~/.local/share/applications/Troubleshooting Common Installation Issues
VidCutter Opens But Won’t Load Video Files
This is the single most reported VidCutter bug across every distro, not just Ubuntu 26.04. It usually stems from missing Qt multimedia bindings when installed via the PPA/apt route. Fix it with:
sudo apt install -y qml-module-qtmultimediaIf that package name doesn’t exist in the 26.04 repos (Qt6 migrations have renamed several multimedia modules), search for the current equivalent:
apt search qtmultimediaInstall whichever qt6-multimedia or libqt6multimedia* package matches your architecture, then restart VidCutter.
“Failed to Start Session Bus” or DBus Errors (Common in SSH/Remote Sessions)
If you’re running VidCutter through an SSH session with X11 forwarding, you’ll likely hit DBus session errors, since a full desktop session isn’t active. This isn’t really a VidCutter bug — it’s inherent to how GUI apps interact with the desktop bus. Workaround with a proper VNC or RDP session instead of raw X11 forwarding for anything beyond quick testing.
Snap Package Stuck in “Installing” State
Occasionally snapd’s background refresh daemon conflicts with a manual install triggered right after boot. Give it a minute, then check:
snap changes
sudo snap abort <change-id>
Then retry the install. This is more common on freshly provisioned cloud instances where snapd hasn’t finished its first-boot seeding.
FFmpeg Codec Errors on Specific File Formats
VidCutter depends entirely on the FFmpeg build it’s bundled with (Snap/Flatpak) or the system FFmpeg (PPA/AppImage in some configurations). If a specific codec — say, HEVC in an MKV container — fails to load, check your FFmpeg’s compiled codec list:
ffmpeg -codecs | grep hevcIf it’s missing, the Snap and Flatpak builds typically bundle a more complete FFmpeg than Ubuntu’s default apt repos, which sometimes ship a stripped-down build for licensing reasons. This is actually a strong argument in favor of the Snap/Flatpak methods over the PPA if you’re regularly working with a variety of proprietary or patent-encumbered codecs.
Best Practices and Performance Considerations
A few habits separate a smooth VidCutter deployment from a frustrating one, especially at scale.
- Prefer stream-copy operations over re-encoding. VidCutter’s core value is lossless cutting — when trimming at keyframe boundaries, it avoids re-encoding entirely, which is dramatically faster and easier on CPU. If you notice unexpectedly high CPU usage during a simple trim, check whether your cut points fall mid-GOP, forcing a partial re-encode.
- Watch disk I/O on large media files. Joining multiple large 4K clips involves significant read/write throughput. On spinning disks or network-mounted storage, this can become the actual bottleneck rather than CPU. An NVMe scratch directory for temporary output makes a measurable difference.
- Isolate sandboxed permissions deliberately. Don’t blanket-grant
--filesystem=hoston Flatpak just to make things “work.” Scope permissions to specific directories your workflow actually needs. - Keep FFmpeg updated independently. If you went the PPA or AppImage route and rely on system FFmpeg, keep it current via
aptsecurity updates — outdated FFmpeg builds have had real CVEs tied to malformed media file parsing. - Automate deployment for multiple machines. If you’re rolling this out to several editing workstations, wrap the Snap or Flatpak install command in an Ansible playbook or a simple shell script pushed via SSH, rather than doing it by hand on each box.
Security Considerations
Video editing tools that parse arbitrary, often untrusted media files are a legitimate attack surface — malformed container files have historically been used to trigger buffer overflows in poorly hardened media libraries. A few precautions worth baking into your standard operating procedure:
Keep the underlying FFmpeg libraries patched, regardless of install method. Sandboxed formats (Snap, Flatpak) mitigate the blast radius of a potential exploit by restricting filesystem and network access, which is a meaningful reason to favor them on shared or production-adjacent systems over a bare apt install with no confinement.
If VidCutter is running on a multi-user workstation, verify file permissions on shared media directories don’t allow arbitrary write access from unprivileged accounts:
ls -la /path/to/shared/media
chmod 750 /path/to/shared/media
And as always, don’t run GUI applications as root. If you find yourself typing sudo vidcutter to “fix” a permissions issue, stop — that’s masking a misconfigured directory ownership problem, not solving it.
Uninstalling VidCutter Cleanly
Should you need to remove it — testing a different tool, decommissioning a workstation, or just cleaning up — here’s the removal command for each method:
# Snap
sudo snap remove vidcutter

# Flatpak
flatpak uninstall com.ozmartians.VidCutter

# PPA/apt
sudo apt remove --purge vidcutter
sudo add-apt-repository --remove ppa:ozmartian/apps

# AppImage
rm ~/Applications/vidcutter.AppImage
rm ~/.local/share/applications/vidcutter.desktop