
When you’re managing production web servers in 2026, every millisecond counts. OpenLiteSpeed has quietly become the go-to choice for sysadmins who need Apache compatibility without the resource bloat, and Ubuntu 26.04 LTS (“Plucky Puffin”) brings rock-solid stability to the table. Together, they form a combination that handles traffic spikes gracefully while keeping your server’s CPU and RAM usage in check.
The reality is that most tutorials out there either skim over critical details or assume you’re working with outdated Ubuntu versions. This guide cuts through the noise. Whether you’re deploying a WordPress site for a client, setting up a high-traffic e-commerce platform, or simply migrating away from Apache after years of fighting with mod_php, you need instructions that work on the latest LTS release without requiring a PhD in Linux administration.
What makes this different? The steps here have been tested on fresh Ubuntu 26.04 installations, accounting for the latest package dependencies, PHP 8.4 availability, and the security defaults that Canonical has tightened in recent releases. You’ll learn not just how to get OpenLiteSpeed running, but how to configure it properly from day one—setting up the admin console, securing access, tuning PHP handlers, and avoiding the common pitfalls that leave beginners scratching their heads when their sites won’t load.
Expect to walk away with a production-ready web server, complete with LSPHP 8.4, proper firewall rules, and performance optimizations that matter. No fluff, no outdated commands, just the kind of guidance you’d get from a senior sysadmin who’s deployed hundreds of these servers across data centers in Jakarta, Singapore, and beyond. Ready to dive in? Let’s get your server humming.
Why OpenLiteSpeed on Ubuntu 26.04 LTS?
Performance That Scales
OpenLiteSpeed isn’t just another web server—it’s an event-driven architecture that handles thousands of concurrent connections without breaking a sweat. Unlike traditional Apache setups that spawn a new process per connection, OpenLiteSpeed uses a single-threaded, non-blocking model that keeps memory usage predictable even under heavy load.
On Ubuntu 26.04, this translates to tangible benefits: faster Time to First Byte (TTFB), better Core Web Vitals scores, and the ability to serve more visitors with the same hardware. Sites running WordPress with the LiteSpeed Cache plugin routinely see 2-3x improvements in page load times compared to Apache mod_php configurations.
Apache Compatibility Without the Overhead
Here’s where things get interesting for teams managing legacy applications. OpenLiteSpeed reads .htaccess files and supports standard Apache rewrite rules out of the box. That means you can migrate existing virtual hosts without rewriting your entire configuration—a massive time-saver when you’re dealing with dozens of client sites or complex CMS installations.
The catch? OpenLiteSpeed doesn’t support every Apache module. If your stack relies heavily on mod_security with custom rules, mod_perl, or specialized authentication modules, you’ll need to verify compatibility first. For most PHP-based applications (WordPress, Laravel, Magento), though, the transition is seamless.
Ubuntu 26.04 LTS: The Foundation
Canonical’s latest long-term support release brings kernel 6.8+, improved NVMe driver support, and updated OpenSSL libraries that play nicely with modern TLS 1.3 configurations. For OpenLiteSpeed, this means better HTTP/3 (QUIC) performance, faster disk I/O for cache operations, and security patches that roll out automatically for five years.
Running OpenLiteSpeed on Ubuntu 26.04 also simplifies dependency management. The official LiteSpeed repository provides pre-compiled LSPHP packages (7.4 through 8.4) that integrate cleanly with Ubuntu’s package ecosystem—no manual compilation, no conflicting library versions, no late-night debugging sessions.
When OpenLiteSpeed Makes Sense
Consider this stack if you’re:
- Deploying WordPress, Joomla, or Drupal sites that need caching without plugin complexity
- Running high-traffic e-commerce stores where TTFB directly impacts conversion rates
- Managing multi-site hosting environments and need predictable resource usage
- Migrating from Apache and want to preserve existing rewrite rules
- Building headless CMS backends that serve APIs with minimal latency
If your workflow involves heavy mod_python usage, custom Apache modules, or Windows-specific .NET applications, you’ll want to evaluate alternatives. For the vast majority of Linux-based web hosting scenarios, though, OpenLiteSpeed on Ubuntu 26.04 LTS hits the sweet spot between performance, compatibility, and maintainability.
Prerequisites and System Preparation
Hardware Requirements
Before touching a single command, verify your server meets the baseline specs. OpenLiteSpeed is lightweight, but cutting corners here leads to headaches downstream.
Minimum specifications:
- CPU: 64-bit Intel/AMD processor (x86_64), 1 core (2+ recommended for production)
- RAM: 512 MB (1 GB+ for PHP applications with caching)
- Storage: 10 GB free space (NVMe preferred for cache performance)
- Network: 1 Gbps connection with public IP address
For production WordPress sites handling 10k+ daily visitors, aim for 2 vCPUs, 2-4 GB RAM, and NVMe storage. The extra headroom pays dividends when cache warms up or during traffic spikes from marketing campaigns.
Network and Firewall Configuration
OpenLiteSpeed requires specific ports open for web traffic and administration. Before installation, configure your firewall to prevent lockouts or access issues.
Required ports:
- TCP 80: HTTP traffic (web visitors)
- TCP 443: HTTPS traffic (secure connections)
- UDP 443: HTTP/3 QUIC protocol (optional but recommended)
- TCP 7080: WebAdmin console (restrict to trusted IPs)
On Ubuntu 26.04 with UFW (Uncomplicated Firewall), run these commands:
sudo ufw allow 80/tcp
sudo ufw allow 443/tcp
sudo ufw allow 443/udp
sudo ufw allow from YOUR_TRUSTED_IP to any port 7080 proto tcp
sudo ufw enable
Replace YOUR_TRUSTED_IP with your workstation or office IP address. Never expose port 7080 to the entire internet—this is a common security misstep that leads to brute-force attacks on the admin console.
If you’re using cloud providers like AWS, DigitalOcean, or Linode, configure security groups or firewall rules at the platform level as well. UFW handles the OS-level rules, but cloud firewalls act as an additional layer.
System Updates and Dependencies
A fresh Ubuntu 26.04 installation is a good start, but it’s not production-ready until you’ve applied updates and installed essential tools.
Start by updating package lists and upgrading existing software:
sudo apt update
sudo apt upgrade -y
This ensures you’re running the latest kernel patches, security fixes, and library versions. On a new LTS release, this step can take 10-15 minutes depending on your connection speed. Don’t skip it—outdated OpenSSL or glibc versions can cause OpenLiteSpeed compilation or runtime issues.
Next, install utilities that make the installation process smoother:
sudo apt install -y wget curl net-tools ca-certificates gnupg2
These tools are standard in any sysadmin’s toolkit, but it’s worth confirming they’re present before proceeding. Missing dependencies cause repository setup failures that waste time troubleshooting.
DNS and Hostname Configuration
While not strictly required for OpenLiteSpeed itself, proper DNS and hostname setup prevents headaches with SSL certificates, email delivery, and application routing.
Verify your server’s hostname:
hostname -f
If this returns localhost or an unresolvable name, set a proper fully qualified domain name (FQDN):
sudo hostnamectl set-hostname server.yourdomain.com
Then add the hostname to /etc/hosts:
echo "127.0.0.1 server.yourdomain.com server" | sudo tee -a /etc/hosts
This ensures local applications and PHP scripts can resolve the hostname correctly. For production deployments, configure A records pointing to your server’s public IP in your DNS provider’s dashboard. Let DNS propagation complete (usually 5-30 minutes) before proceeding with SSL certificate requests.
Backup and Snapshot Strategy
One principle that separates seasoned admins from beginners: always have a rollback plan. Before installing OpenLiteSpeed—or making any significant system change—create a backup or snapshot.
On cloud platforms:
- AWS EC2: Create an AMI snapshot
- DigitalOcean: Take a droplet snapshot
- Linode: Create a disk image backup
- Vultr: Use the snapshot feature
On physical servers or VPS without snapshots:
sudo apt install -y rsync
sudo rsync -avx --exclude='/proc' --exclude='/sys' --exclude='/tmp' / /backup/pre-ols-backup/
This creates a file-level backup you can restore if something goes wrong. It’s not as clean as a full system snapshot, but it preserves configuration files, databases, and application data.
The five minutes spent creating a snapshot now can save hours of troubleshooting later. If the installation fails or you need to revert to Apache, you can restore in minutes instead of rebuilding from scratch.
Adding the OpenLiteSpeed Repository
Why Use the Official Repository?
You might be tempted to download OpenLiteSpeed binaries directly from GitHub and compile from source. While that approach works, it’s not the best path for production servers on Ubuntu 26.04. The official LiteSpeed repository provides:
- Pre-compiled binaries optimized for Ubuntu’s glibc and kernel versions
- Automatic dependency resolution (no manual library hunting)
- Seamless updates via
apt upgradewhen new versions release - GPG-signed packages that verify authenticity and prevent tampering
- Integration with Ubuntu’s package management for easy removal if needed
For agencies managing dozens of servers or sysadmins who value predictability, the repository approach is the clear winner.
Downloading and Executing the Repository Script
LiteSpeed provides a convenience script that handles repository configuration in one go. It adds the correct GPG key, creates the apt source list, and updates package indexes.
Run this command:
wget -O - https://repo.litespeed.sh | sudo bash
Let’s break down what happens here:
wget -O -downloads the script and outputs it to stdout (standard output)- The pipe (
|) sends that output directly tobash sudo bashexecutes the script with root privileges
This is a common pattern in Linux administration, but it does require trust in the source. The script is hosted on repo.litespeed.sh, LiteSpeed’s official repository domain. If you’re in a high-security environment and need to audit the script first, download it separately and review:
wget https://repo.litespeed.sh -O enable_lst_repo.sh
nano enable_lst_repo.sh
sudo bash enable_lst_repo.sh
After execution, you should see output confirming the repository was added successfully. The script creates /etc/apt/sources.list.d/lst_debian_repo.list with the appropriate repository URLs for your Ubuntu version.
Verifying Repository Configuration
Don’t assume the script worked correctly—verify it. Check that the repository file exists and contains the right entries:
cat /etc/apt/sources.list.d/lst_debian_repo.list
You should see lines similar to:
deb https://repo.litespeed.sh/debian/ plucky main
Note that the script uses “plucky” (Ubuntu 26.04’s codename) automatically. If you see “jammy” or “noble” instead, the script didn’t detect your Ubuntu version correctly. In that case, manually edit the file:
sudo nano /etc/apt/sources.list.d/lst_debian_repo.list
Replace the codename with plucky and save.
Next, verify the GPG key was imported:
apt-key list | grep -i litespeed
You should see a key with “LiteSpeed Technologies” in the description. If the key is missing, import it manually:
wget -O - https://repo.litespeed.sh/GPG-KEY-litespeed | sudo apt-key add -
Finally, update your package index to include the new repository:
sudo apt update
If this completes without errors, your system is ready to install OpenLiteSpeed. The repository should now appear in the list of available sources, and apt search openlitespeed should return the package.
Troubleshooting Repository Issues
Repository setup can fail for several reasons. Here are the most common problems and fixes:
Problem: “404 Not Found” errors during apt update
This usually means the repository URL doesn’t match your Ubuntu version. Check /etc/apt/sources.list.d/lst_debian_repo.list and ensure it uses plucky for Ubuntu 26.04. If you’re on a different release (24.04 = noble, 22.04 = jammy), adjust accordingly.
Problem: GPG key verification failed
If apt complains about unauthenticated packages, the GPG key import failed. Re-run the key import command above, ensuring your server can reach repo.litespeed.sh. Firewall rules or DNS issues can block key retrieval.
Problem: Repository not found after script execution
Sometimes the script doesn’t execute cleanly due to permission issues or network interruptions. Re-run the script:
wget -O - https://repo.litespeed.sh | sudo bash
sudo apt update
If it still fails, manually create the repository file:
echo "deb https://repo.litespeed.sh/debian/ plucky main" | sudo tee /etc/apt/sources.list.d/lst_debian_repo.list
wget -O - https://repo.litespeed.sh/GPG-KEY-litespeed | sudo apt-key add -
sudo apt update
With the repository configured and verified, you’re ready for the actual installation.
Installing OpenLiteSpeed Web Server
The Installation Command
With the repository in place, installing OpenLiteSpeed is straightforward:
sudo apt install -y openlitespeed
The -y flag automatically confirms the installation without prompting. apt will resolve dependencies, download the OpenLiteSpeed package (approximately 15-20 MB), and install it to the default location at /usr/local/lsws.
During installation, you’ll see output indicating:
- Package download progress
- Dependency installation (libcurl, OpenSSL, zlib)
- Creation of the
nobodyuser and group (default OpenLiteSpeed runtime user) - Setup of systemd service files
- Initial configuration file generation
The process typically completes in 2-5 minutes depending on your server’s network speed and disk I/O.
Verifying the Installation
Don’t assume the installation succeeded—verify it properly. First, check that the OpenLiteSpeed service is installed and recognized by systemd:
systemctl status lshttpd
You should see output indicating the service exists, though it may not be running yet. Look for lines like:
● lshttpd.service - The LiteSpeed HTTP Server
   Loaded: loaded (/etc/systemd/system/lshttpd.service; enabled; vendor preset: enabled)
   Active: inactive (dead)
If systemctl reports “unit not found,” the installation failed. Check /var/log/apt/terminal.log for error messages during package installation.
Next, verify the OpenLiteSpeed binary exists and is executable:
ls -la /usr/local/lsws/bin/lshttpd
This should return file details including permissions (should be -rwxr-xr-x or similar). If the file is missing, the installation didn’t complete properly.
Check that the default configuration directory was created:
ls -la /usr/local/lsws/conf/
You should see httpd_config.conf, mime.properties, and other configuration files. These are auto-generated during installation with sensible defaults.
Starting OpenLiteSpeed and Enabling Auto-Start
Start the web server:
sudo systemctl start lshttpd
Then verify it’s running:
systemctl status lshttpd
You should now see:
● lshttpd.service - The LiteSpeed HTTP Server
   Loaded: loaded (/etc/systemd/system/lshttpd.service; enabled; vendor preset: enabled)
   Active: active (running) since [timestamp]
The active (running) status confirms OpenLiteSpeed is operational. If you see failed or activating (auto-restart), check the error log:
sudo tail -20 /usr/local/lsws/logs/error.log
Common startup failures stem from port conflicts (another service already using port 80 or 7080) or permission issues with the /usr/local/lsws directory.
To ensure OpenLiteSpeed starts automatically on boot—critical for production servers—enable the systemd service:
sudo systemctl enable lshttpd
This creates a symlink in /etc/systemd/system/multi-user.target.wants/, ensuring the service launches during system initialization. Test this by rebooting your server:
sudo reboot
After reboot, verify OpenLiteSpeed is running without manual intervention:
systemctl status lshttpd
Testing the Default Installation
OpenLiteSpeed ships with a default “Example” virtual host that serves a basic test page. Verify it’s accessible by browsing to:
http://YOUR_SERVER_IP:8088
You should see a page titled “Congratulations! You have successfully installed OpenLiteSpeed HTTP Server!” If this loads, the core installation is working.
Note the default port is 8088, not 80. This prevents conflicts with Apache or Nginx if they’re still installed. For production use, you’ll typically change this to port 80 (covered in the configuration section below).
If the test page doesn’t load, troubleshoot systematically:
- Check firewall rules: Ensure port 8088 is allowed:
sudo ufw allow 8088/tcp
- Verify OpenLiteSpeed is listening:
sudo netstat -tlnp | grep lshttpd
Or on newer Ubuntu versions:
sudo ss -tlnp | grep lshttpd
- Check for port conflicts:
sudo lsof -i :8088
If another process is using port 8088, either stop that process or configure OpenLiteSpeed to use a different port.
Installing and Configuring LSPHP 8.4
Why LSPHP Instead of System PHP?
You might wonder why OpenLiteSpeed doesn’t use the standard php-fpm packages from Ubuntu’s repositories. The answer lies in performance and integration. LSPHP (LiteSpeed PHP) is a custom SAPI (Server API) module built specifically for OpenLiteSpeed’s architecture.
Key advantages:
- Direct socket communication: LSPHP communicates with OpenLiteSpeed via Unix domain sockets, eliminating TCP overhead
- Process persistence: PHP processes stay alive between requests, reducing startup latency
- Resource efficiency: Better memory management and lower CPU usage compared to php-fpm
- Tight integration: Native support for OpenLiteSpeed’s caching and rewrite engine
For production workloads, especially WordPress or Laravel applications, LSPHP delivers measurable performance improvements. The trade-off is that you’re tied to LiteSpeed’s PHP packages rather than Ubuntu’s, but version options are comprehensive (7.4 through 8.4 as of 2026).
Installing LSPHP 8.4
Ubuntu 26.04 ships with PHP 8.3 in its default repositories, but LiteSpeed’s repository provides PHP 8.4—the latest stable release with performance improvements and security enhancements. Install it with:
sudo apt install -y lsphp84 lsphp84-mysql lsphp84-curl lsphp84-gd lsphp84-mbstring lsphp84-xml lsphp84-zip lsphp84-opcache lsphp84-redis
This installs PHP 8.4 plus common extensions needed by most web applications:
- lsphp84-mysql: MySQL/MariaDB database connectivity
- lsphp84-curl: HTTP client functionality (API calls, remote requests)
- lsphp84-gd: Image processing (thumbnails, dynamic graphics)
- lsphp84-mbstring: Multi-byte string support (internationalization)
- lsphp84-xml: XML parsing (RSS feeds, sitemaps)
- lsphp84-zip: ZIP archive handling (plugin uploads, backups)
- lsphp84-opcache: PHP opcode caching (critical for performance)
- lsphp84-redis: Redis extension for object caching
Depending on your application’s requirements, you might need additional extensions. Search available packages with:
apt search lsphp84
Verifying LSPHP Installation
After installation, confirm LSPHP is properly installed:
ls -la /usr/local/lsws/lsphp84/bin/lsphp
This should return the binary file details. If the file is missing, the package installation failed—check /var/log/apt/terminal.log for errors.
Test the PHP version:
/usr/local/lsws/lsphp84/bin/lsphp -v
Expected output:
PHP 8.4.x (cli) (built: [date]) ...
If you see an error or wrong version, the installation didn’t complete correctly.
Configuring LSPHP in OpenLiteSpeed
OpenLiteSpeed needs to know about LSPHP 8.4 before it can use it. This configuration happens in the WebAdmin console, but you can also edit configuration files directly. For most admins, the WebAdmin approach is clearer and less error-prone.
First, access the WebAdmin console (covered in detail in the next section). Once logged in:
- Navigate to Server Configuration → External App
- Click the + (Add) button
- Select LiteSpeed SAPI App as the type
- Fill in the configuration:
| Field | Value |
|---|---|
| Name | lsphp84 |
| Address | uds://tmp/lshttpd/lsphp.sock |
| Max Connections | 100 (adjust based on traffic) |
| Initial Request Timeout | 60 |
| Retry Timeout | 0 |
| Command | $SERVER_ROOT/lsphp84/bin/lsphp |
- Click Save
The uds://tmp/lshttpd/lsphp.sock address tells OpenLiteSpeed to communicate with LSPHP via a Unix domain socket at that path. This is faster than TCP connections and is the recommended configuration for single-server setups.
Setting LSPHP 8.4 as Default Handler
After adding LSPHP 8.4 as an external app, configure it as the default script handler for PHP files:
- In WebAdmin, go to Server Configuration → Script Handler
- Click Edit on the existing
lsphphandler (or add a new one if it doesn’t exist) - Set Handler Name to
lsphp84 - Set Suffixes to
php - Click Save
This tells OpenLiteSpeed to route all .php requests through the LSPHP 8.4 interpreter.
Alternatively, you can configure this at the virtual host level if you need different PHP versions for different sites. For example, one virtual host might use LSPHP 8.4 while another uses LSPHP 8.1 for legacy application compatibility.
PHP Configuration Tuning
Out of the box, LSPHP’s php.ini has sensible defaults, but production workloads benefit from tuning. Edit the configuration file:
sudo nano /usr/local/lsws/lsphp84/etc/php/8.4/litespeed/php.ini
Key settings to review:
; Memory limit per PHP process
memory_limit = 256M

; Maximum execution time (seconds)
max_execution_time = 30

; File upload size limit
upload_max_filesize = 64M
post_max_size = 64M

; Timezone (set to your location)
date.timezone = Asia/Jakarta

; OPcache settings (critical for performance)
opcache.enable = 1
opcache.memory_consumption = 256
opcache.interned_strings_buffer = 16
opcache.max_accelerated_files = 100000
opcache.validate_timestamps = 0
opcache.revalidate_freq = 0
The OPcache settings are particularly important. By default, OPcache is enabled, but the memory allocation (often 128 MB) may be insufficient for large applications. For WordPress sites with many plugins or Magento installations, increase opcache.memory_consumption to 256-512 MB.
Setting opcache.validate_timestamps = 0 disables automatic file change detection, which improves performance but requires manual cache clearing when you deploy code changes. For development environments, keep it enabled (1); for production, disable it and use deployment scripts to clear OPcache.
After modifying php.ini, restart OpenLiteSpeed to apply changes:
sudo systemctl restart lshttpd
Testing PHP Functionality
Create a test PHP file to verify everything works:
sudo nano /usr/local/lsws/Example/html/phpinfo.php
Add this content:
<?php
phpinfo();
?>
Save and access via browser:
http://YOUR_SERVER_IP:8088/phpinfo.php
You should see the PHP information page showing version 8.4, loaded extensions, and configuration settings. If you see a blank page or 404 error, check OpenLiteSpeed’s error log:
sudo tail -20 /usr/local/lsws/logs/error.log
Common issues:
- Blank white page: PHP syntax error or missing extensions
- 404 Not Found: Virtual host configuration issue or file permissions
- 503 Service Unavailable: LSPHP process not starting (check socket permissions)
Once PHP is working, delete the test file for security:
sudo rm /usr/local/lsws/Example/html/phpinfo.php
Leaving phpinfo.php accessible publicly exposes server configuration details that attackers can exploit.
Configuring the WebAdmin Console
Understanding the WebAdmin Console
The WebAdmin Console is OpenLiteSpeed’s built-in management interface. It provides a web-based GUI for configuring virtual hosts, managing SSL certificates, monitoring real-time traffic, and tuning performance settings.
While you can configure everything via command-line editing of httpd_config.conf, the WebAdmin Console is far more intuitive—especially for complex virtual host setups or SSL configuration. Think of it as cPanel’s lightweight, server-focused cousin.
By default, the console listens on port 7080 over HTTPS. This is a non-standard port specifically to reduce automated attack surface, but it also means you must explicitly allow it through your firewall (as covered in the prerequisites section).
Setting Up Admin Credentials
OpenLiteSpeed generates a random admin password during installation, stored in /usr/local/lsws/adminpasswd. You can view it with:
sudo cat /usr/local/lsws/adminpasswd
However, it’s better to set your own credentials. Run the password setup script:
sudo /usr/local/lsws/admin/misc/admpass.sh
You’ll be prompted to:
- Enter the admin username (default is
admin, press Enter to keep it) - Enter a new password
- Confirm the password
Choose a strong password—at least 12 characters with mixed case, numbers, and symbols. This account has full control over your web server, so treat it like root access.
The script updates the authentication file at /usr/local/lsws/admin/conf/htpasswd. If you ever need to change the password later, re-run the same command.
Accessing the WebAdmin Console
Open your browser and navigate to:
https://YOUR_SERVER_IP:7080
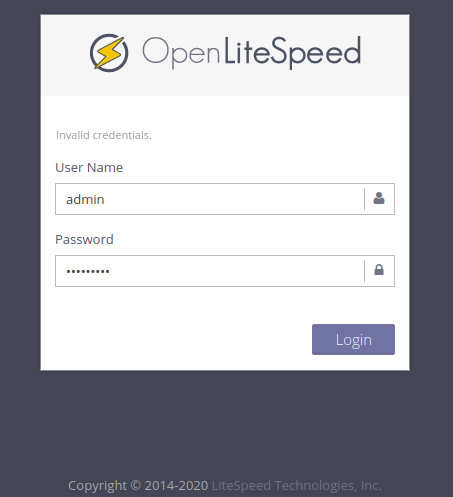
You’ll see a login screen. Enter the admin username and password you just configured.
Important: The connection uses HTTPS with a self-signed certificate by default. Your browser will show a security warning like “Your connection is not private” or “This site can’t be trusted.” This is expected for the first login.
To proceed:
- Chrome/Edge: Click “Advanced” → “Proceed to [IP] (unsafe)”
- Firefox: Click “Advanced” → “Accept the Risk and Continue”
- Safari: Click “Show Details” → “Visit this website”
Once logged in, you’ll see the OpenLiteSpeed dashboard showing:
- Server status (running/stopped)
- Real-time request statistics
- Active connections
- Cache hit/miss ratios
- License information (OpenLiteSpeed is free, so no license key needed)
Securing the WebAdmin Console
Leaving the WebAdmin Console exposed to the internet is a security risk. Even with a strong password, brute-force attacks are constant. Implement these protections:
1. Restrict Access by IP Address
In WebAdmin Console:
- Go to Server Configuration → Security
- Under Admin Access Control, click Edit
- Add your trusted IP addresses (one per line)
- Click Save
Format examples:
192.168.1.100
203.0.113.50
10.0.0.0/8
Only IPs in this list can access the WebAdmin Console. All others receive a 403 Forbidden error.
2. Change the Default Port
While 7080 is non-standard, determined attackers still scan for it. Change to an obscure port:
- Go to Server Configuration → Admin Settings
- Change Port from
7080to something like8443or9999 - Click Save
- Restart OpenLiteSpeed
Remember to update your firewall rules and bookmark the new URL.
3. Enable Two-Factor Authentication (if available)
Newer OpenLiteSpeed versions support 2FA for WebAdmin access. Check under Server Configuration → Security for TOTP (Google Authenticator) setup. This adds an extra layer beyond passwords.
4. Use HTTPS with a Valid Certificate
Replace the self-signed certificate with a proper SSL certificate from Let’s Encrypt or your preferred CA. This prevents man-in-the-middle attacks and eliminates browser warnings. Instructions for SSL setup are in a later section.
Essential WebAdmin Console Features
Once logged in, familiarize yourself with these key sections:
- Server Configuration: Global settings for PHP handlers, cache, security, and tuning
- Virtual Hosts: Create and manage website configurations (equivalent to Apache’s virtual hosts)
- Listeners: Define which ports and IP addresses OpenLiteSpeed listens on
- Real-Time Stats: Monitor live traffic, cache performance, and resource usage
- Logs: View and download error logs, access logs, and audit trails
Spend 10-15 minutes exploring each section. The interface is intuitive, and understanding the layout saves time when you need to make specific configuration changes.
Creating and Configuring Virtual Hosts
Understanding Virtual Hosts
A virtual host (vhost) is a configuration that tells OpenLiteSpeed how to serve a specific domain or subdomain. Each vhost defines:
- The domain name(s) it responds to
- The document root (where website files live)
- PHP version and settings
- SSL certificates
- Caching rules
- Security configurations
OpenLiteSpeed separates vhost configuration into two layers:
- Virtual Host level: Defines the vhost itself (domain, root, basic settings)
- Listener level: Binds vhosts to specific IP addresses and ports
This separation allows flexible configurations—multiple vhosts can share a listener, or each can have its own dedicated listener for SSL isolation.
Creating a New Virtual Host
In the WebAdmin Console:
- Navigate to Virtual Hosts
- Click + (Add)
- Enter a Virtual Host Name (e.g.,
mywebsite) - Click OK
This creates the basic vhost structure. Next, configure the essential settings:
Basic Settings:
- Virtual Host Root: Leave as default (
$SERVER_ROOT/conf/) - Config File: Auto-generated based on vhost name
- User/Group: Set to the user that owns your website files (often
www-dataor a specific user)
Document Root:
- Go to Virtual Host → General
- Set Document Root to your website’s directory, e.g.,
/home/username/mywebsite/public_html - Click Save
Ensure this directory exists and has appropriate permissions:
sudo mkdir -p /home/username/mywebsite/public_html
sudo chown -R nobody:nogroup /home/username/mywebsite/public_html
sudo chmod -R 755 /home/username/mywebsite/public_html
OpenLiteSpeed runs as the nobody user by default, so files must be readable by that user. For WordPress or other CMS applications, you might use a dedicated user for better security isolation.
Configuring Domain Names
Tell the vhost which domain(s) it should respond to:
- Go to Virtual Host → General
- Under Domains, add your domain(s), e.g.,
mywebsite.com, www.mywebsite.com - Click Save
Multiple domains can be comma-separated. This is useful for redirecting www to non-www or handling multiple domains that serve the same content.
For production deployments, ensure DNS A records point to your server’s IP address before configuring the vhost. DNS propagation can take 5-30 minutes, and testing the vhost won’t work until the domain resolves correctly.
Setting Up Listeners
Listeners define which network interfaces and ports OpenLiteSpeed listens on. For a typical HTTP/HTTPS setup:
- Navigate to Listeners
- You’ll see a default listener (often named
Default) on port 8088
To create a standard HTTP listener on port 80:
- Click + (Add)
- Enter Name:
HTTP - Set IP Address:
*(all interfaces) or specific IP - Set Port:
80 - Click Save
To create an HTTPS listener on port 443:
- Click + (Add)
- Enter Name:
HTTPS - Set IP Address:
*or specific IP - Set Port:
443 - Click Save
- Enable SSL by checking the box
- Configure SSL certificate details (covered in the SSL section)
Mapping Virtual Hosts to Listeners:
After creating listeners, associate your vhost with them:
- Go to Listeners → Click on your listener (e.g.,
HTTP) - Under Virtual Host Mappings, click + (Add)
- Set Virtual Host to your vhost name (e.g.,
mywebsite) - Set Domains to your domain(s)
- Click Save
This tells OpenLiteSpeed: “When a request comes in on port 80 for mywebsite.com, use the mywebsite virtual host configuration.”
Testing Your Virtual Host
After configuration, test that the vhost works:
- Create a simple
index.htmlin your document root:echo "<h1>Virtual Host Test - MyWebsite</h1>" | sudo tee /home/username/mywebsite/public_html/index.html
- Access via browser:
http://mywebsite.com
Or, if DNS isn’t configured yet, add a hosts file entry on your local machine:
YOUR_SERVER_IP mywebsite.com www.mywebsite.com
Then browse to http://mywebsite.com.
If you see your test page, the vhost is working. If you get a 403 Forbidden error, check file permissions. If you get a 404 Not Found, verify the document root path is correct.
Graceful Restart
After making configuration changes, apply them with a graceful restart:
- In WebAdmin Console, click the Actions icon (gear) in the top-right
- Click Graceful Restart
A graceful restart reloads configuration without dropping active connections—critical for production servers. Avoid “Stop” followed by “Start” unless you’re troubleshooting a critical issue.
SSL/TLS Configuration with Let’s Encrypt
Why HTTPS Matters
In 2026, HTTPS isn’t optional—it’s table stakes. Google uses it as a ranking signal, browsers mark non-HTTPS sites as “Not Secure,” and users increasingly distrust sites without the padlock icon. For e-commerce, SaaS applications, or any site handling user data, HTTPS is mandatory for compliance (PCI-DSS, GDPR).
OpenLiteSpeed supports standard SSL certificates, and Let’s Encrypt provides free, automated certificates that renew every 90 days. The combination means you get bank-grade encryption without ongoing costs.
Installing Certbot
Certbot is the official Let’s Encrypt client that automates certificate issuance and renewal. Install it on Ubuntu 26.04:
sudo apt install -y certbot python3-certbot-nginx
Wait—python3-certbot-nginx? Yes, even though we’re using OpenLiteSpeed, the Certbot plugin for Nginx is still useful for standalone mode certificate validation. The key is that Certbot generates the certificate files, and we manually configure OpenLiteSpeed to use them.
Generating a Certificate
Use Certbot in standalone mode (it temporarily binds to port 80 to prove domain ownership):
sudo certbot certonly --standalone -d mywebsite.com -d www.mywebsite.com
Replace mywebsite.com with your actual domain(s). Certbot will:
- Prompt for an email address (for renewal notifications)
- Ask you to agree to the Terms of Service
- Perform domain validation via HTTP challenge
- Generate certificates and store them in
/etc/letsencrypt/live/mywebsite.com/
After successful completion, you’ll see:
Congratulations! Your certificate and chain have been saved at:
  /etc/letsencrypt/live/mywebsite.com/fullchain.pem
Your key file has been saved at:
  /etc/letsencrypt/live/mywebsite.com/privkey.pem
These paths are what you’ll reference in OpenLiteSpeed’s SSL configuration.
Configuring SSL in OpenLiteSpeed
In the WebAdmin Console:
- Navigate to Listeners → Click on your HTTPS listener (e.g.,
HTTPS) - Go to the SSL tab
- Configure the following:
| Setting | Value |
|---|---|
| Enable SSL | Yes |
| Certificate File | /etc/letsencrypt/live/mywebsite.com/fullchain.pem |
| Certificate Key File | /etc/letsencrypt/live/mywebsite.com/privkey.pem |
| Certificate Chain | (Leave blank—fullchain.pem includes it) |
| Protocols | TLSv1.3 TLSv1.2 (disable older versions) |
| Ciphers | Use default or specify modern ciphers |
- Click Save
Modern Cipher Configuration:
For enhanced security, specify ciphers that prioritize ECDHE and AES-GCM:
ECDHE-ECDSA-AES128-GCM-SHA256:ECDHE-RSA-AES128-GCM-SHA256:ECDHE-ECDSA-AES256-GCM-SHA384:ECDHE-RSA-AES256-GCM-SHA384:ECDHE-ECDSA-CHACHA20-POLY1305:ECDHE-RSA-CHACHA20-POLY1305
This disables weak ciphers (RC4, 3DES, MD5) and enforces forward secrecy via ECDHE key exchange.
Enabling HTTP to HTTPS Redirect
Once SSL is configured, redirect all HTTP traffic to HTTPS:
-
- Go to Virtual Hosts → Select your vhost
- Navigate to Rewrite tab
- Enable Enable Rewrite (check the box)
- Set Auto Load from .htaccess to
Yes(if using .htaccess) - In the rewrite rules section, add:
RewriteEngine On RewriteCond %{HTTPS} off RewriteRule ^(.*)$ https://%{HTTP_HOST}%{REQUEST_URI} [L,R=301] - Click Save
This rule checks if the connection isn’t HTTPS, and if so, redirects to the HTTPS equivalent with a 301 (permanent) status code.
Alternatively, you can configure this at the listener level for global redirection across all vhosts.
Testing SSL Configuration
After saving, perform a graceful restart:
-
-
- Click Actions → Graceful Restart in WebAdmin Console
-
Then test:
-
-
- Browse to
http://mywebsite.com— should redirect tohttps://mywebsite.com - Check the padlock icon in your browser’s address bar
- Click the padlock to view certificate details (should show Let’s Encrypt, valid dates)
- Browse to
-
Use online tools to verify SSL configuration:
-
-
- SSL Labs: https://www.ssllabs.com/ssltest/
- Why No Padlock: https://www.whynopadlock.com/
-
Aim for an “A” or “A+” rating on SSL Labs. Common issues that lower scores:
-
-
- TLS 1.0 or 1.1 still enabled
- Weak ciphers in the configuration
- Missing HSTS header (optional but recommended)
-
Automating Certificate Renewal
Let’s Encrypt certificates expire after 90 days. Certbot can auto-renew them, but OpenLiteSpeed needs to reload the certificates.
Edit the Certbot renewal hook:
sudo nano /etc/letsencrypt/renewal-hooks/post/reload-lshttpd.sh
Add this content:
#!/bin/bash
systemctl reload lshttpd
Make it executable:
sudo chmod +x /etc/letsencrypt/renewal-hooks/post/reload-lshttpd.sh
This script runs after every successful renewal and gracefully reloads OpenLiteSpeed, ensuring the new certificate is loaded without downtime.
Test the renewal process manually:
sudo certbot renew --dry-run
If this succeeds, renewal is properly configured. Certbot runs this check twice daily via a systemd timer, so certificates renew automatically before expiration.
Performance Tuning and Optimization
Understanding OpenLiteSpeed’s Architecture
OpenLiteSpeed uses an event-driven model fundamentally different from Apache’s process-per-connection approach. A small number of worker processes handle thousands of concurrent connections efficiently, making it ideal for high-traffic sites on modest hardware.
The key tuning parameters control:
-
-
- How many concurrent connections the server accepts
- How long idle connections stay open (keep-alive)
- How PHP processes are managed
- How caching behaves
-
Getting these right means your server handles traffic spikes without crashing, serves pages faster, and uses fewer resources.
Tuning Worker and Connection Limits
In WebAdmin Console, navigate to Server Configuration → Tuning.
Max Connections:
This sets the maximum number of concurrent connections OpenLiteSpeed accepts. Default is often 2000, but adjust based on your server’s RAM:
-
-
- 1 GB RAM: 1000-2000 connections
- 2-4 GB RAM: 3000-5000 connections
- 8+ GB RAM: 5000-10000+ connections
-
Monitor actual usage under load (via Real-Time Stats) and increase gradually. If you see 503 errors during traffic spikes, max connections may be too low.
Connection Keep-Alive Timeout:
This controls how long OpenLiteSpeed keeps idle connections open. Default is 5 seconds—a reasonable starting point.
-
-
- Too low (< 2s): Clients may need to re-establish connections frequently, increasing latency
- Too high (> 10s): Idle connections consume resources unnecessarily
-
For API-heavy applications or mobile users on unstable networks, 3-5 seconds is a good balance.
Max Keep-Alive Requests:
Limits how many requests a single connection can make before being closed. Default is 100. For HTTP/2 multiplexing, increase to 500-1000.
PHP LSAPI Tuning
LSPHP’s performance depends on proper process pool configuration. In Server Configuration → External App, select your LSPHP handler (e.g., lsphp84) and adjust:
Max Connections:
Controls how many concurrent PHP requests can be processed. For WordPress sites:
-
-
- Low traffic (< 1k daily): 20-30 connections
- Medium traffic (1k-10k daily): 40-60 connections
- High traffic (10k+ daily): 80-150+ connections
-
Monitor PHP process usage in Real-Time Stats → PHP. If you consistently hit the max, increase it.
Process Soft/Hard Limit:
-
-
- Soft Limit: Number of PHP processes kept alive during normal operation (start with 10-20)
- Hard Limit: Maximum PHP processes during traffic spikes (set 2-3x soft limit)
-
For a 2 GB RAM server, 20 soft / 40 hard is a reasonable starting point. Each PHP process consumes ~30-50 MB, so 40 processes use ~1.2-2 GB RAM.
Memory Limits:
-
-
- Memory Soft Limit: 256-512 MB per PHP process
- Memory Hard Limit: 512-768 MB (prevents runaway scripts from crashing the server)
-
These limits trigger warnings or process termination if exceeded, protecting overall server stability.
Enabling and Configuring LSCache
LSCache is OpenLiteSpeed’s server-level caching engine. It stores rendered HTML pages in RAM or on disk, bypassing PHP entirely for anonymous visitors. For WordPress, this can reduce TTFB from 500ms to under 50ms.
Enable LSCache:
-
-
- Go to Server Configuration → Cache
- Set Enable Public Cache to
Yes - Set Cache Root to a fast storage location (e.g.,
/var/cache/lscache) - Set Cache Max File Size to
10M(adjust based on content) - Set Cache Max TTL to
3600(1 hour—adjust based on content freshness)
-
TTL Strategy:
-
-
- Homepage: 300-600 seconds (5-10 minutes)
- Blog posts: 600-1800 seconds (10-30 minutes)
- Static assets (CSS/JS/images): 30+ days (via expires headers)
- E-commerce product pages: 60-300 seconds (1-5 minutes)
-
For dynamic content (shopping carts, user dashboards), configure cache exclusion rules under Cache → Exclude List.
Compression and Static File Optimization
Enable Brotli compression (superior to gzip) for text-based assets:
-
-
- Go to Server Configuration → Tuning → Compression
- Set Enable Compression to
Yes - Set Compression Level to
4(balance between speed and compression ratio) - Ensure MIME types include
text/html,text/css,application/javascript,application/json
-
Brotli reduces file sizes 15-20% more than gzip, improving page load times especially on mobile networks.
For static assets (images, fonts, CSS, JS), configure long-term caching:
-
-
- Go to Virtual Host → General → Expires
- Enable Enable Expires
- Set Expires By Type rules:
image/*=A31536000
text/css=A2592000
application/javascript=A2592000
font/woff2=A31536000
-
These set cache headers telling browsers to cache images for 1 year, CSS/JS for 30 days, and fonts for 1 year. Combined with cache-busting filenames (e.g., style.v2.css), this dramatically reduces repeat visit load times.
Database Optimization for PHP Applications
Web server tuning only goes so far—database bottlenecks often cause slow TTFB. For MySQL/MariaDB:
Edit /etc/mysql/my.cnf or /etc/mysql/mariadb.conf.d/50-server.cnf:
[mysqld]
innodb_buffer_pool_size = 1G
innodb_log_file_size = 256M
innodb_flush_log_at_trx_commit = 2
query_cache_type = 0
max_connections = 200
slow_query_log = 1
long_query_time = 1
Key settings:
-
-
- innodb_buffer_pool_size: 50-70% of total RAM on dedicated DB servers
- innodb_flush_log_at_trx_commit = 2: Balances durability and performance (acceptable for most web apps)
- query_cache_type = 0: Disable MySQL’s query cache (deprecated in favor of application-level caching)
- slow_query_log: Identify queries taking >1 second for optimization
-
After changes, restart MySQL:
sudo systemctl restart mysql
Monitor slow query logs weekly and add indexes to frequently-queried columns. A well-indexed database query can be 100x faster than a full table scan.
Monitoring and Iterative Tuning
Performance tuning isn’t a one-time task—it’s iterative. Use these tools:
OpenLiteSpeed Real-Time Stats:
Accessible in WebAdmin Console, shows:
-
-
- Requests per second
- Cache hit/miss ratio
- Active connections
- PHP process usage
- Bandwidth consumption
-
System Monitoring:
# CPU and memory usage
htop

# Disk I/O
iostat -x 1

# Network connections
ss -tuna | wc -l

# OpenLiteSpeed logs
tail -f /usr/local/lsws/logs/error.log
tail -f /usr/local/lsws/logs/access.log
Core Web Vitals:
Use Google PageSpeed Insights or Chrome DevTools to measure:
-
-
- LCP (Largest Contentful Paint): Should be < 2.5s
- FID (First Input Delay): Should be < 100ms
- CLS (Cumulative Layout Shift): Should be < 0.1
-
If LCP is high, check server TTFB first. If TTFB is good but LCP is still slow, optimize images and render-blocking resources.
Security Hardening Best Practices
Securing File Permissions
Improper file permissions are a leading cause of server compromises. OpenLiteSpeed runs as nobody by default, but your website files should be owned by a specific user for better accountability.
Set ownership and permissions:
sudo chown -R username:nogroup /home/username/mywebsite/public_html
sudo chmod -R 755 /home/username/mywebsite/public_html
sudo find /home/username/mywebsite/public_html -type f -exec chmod 644 {} \;
sudo find /home/username/mywebsite/public_html -type d -exec chmod 755 {} \;
For WordPress specifically:
sudo chmod 644 wp-config.php
sudo chown -R www-data:www-data wp-content/uploads
Never set directories to 777—this is a common misconfiguration that allows attackers to upload malicious scripts.
Configuring Security Modules
OpenLiteSpeed includes built-in security features that block common attacks:
Connection Throttling:
Prevents single IPs from overwhelming your server:
-
-
- Go to Server Configuration → Security
- Set Connection Per IP to
50(adjust based on traffic patterns) - Set Bandwidth Throttling to limit excessive bandwidth usage per IP
-
DDoS Protection:
Enable basic DDoS mitigation:
-
-
- Go to Server Configuration → Security → DDoS Mitigation
- Enable Enable DDoS Mitigation
- Set Detection Period to
10seconds - Set Block Period to
300seconds (5 minutes)
-
This blocks IPs that exceed connection thresholds during the detection period.
ModSecurity Integration:
For advanced WAF (Web Application Firewall) protection, install ModSecurity with OWASP rules:
sudo apt install -y libmodsecurity3 modsecurity
Then configure in OpenLiteSpeed under Server Configuration → Modules. Note that ModSecurity adds CPU overhead—test performance impact before enabling in production.
Restricting Admin and Dangerous Paths
Block access to sensitive paths that attackers commonly probe:
In Virtual Host → Rewrite, add:
RewriteEngine On
RewriteRule ^(?:wp-admin|wp-login|admin|administrator) - [F,L]
RewriteRule ^(?:config|\.env|\.git) - [F,L]
This returns 403 Forbidden for requests to common admin paths, reducing attack surface.
For WordPress, also restrict xmlrpc.php (often used in brute-force attacks):
<Files xmlrpc.php>
  Order Deny,Allow
  Deny from all
</Files>
HSTS and Security Headers
HTTP Strict Transport Security (HSTS) forces browsers to use HTTPS, preventing downgrade attacks.
In Virtual Host → General → Add Default Headers, add:
Strict-Transport-Security: max-age=31536000; includeSubDomains; preload
X-Content-Type-Options: nosniff
X-Frame-Options: SAMEORIGIN
X-XSS-Protection: 1; mode=block
Content-Security-Policy: default-src 'self' https:; script-src 'self' 'unsafe-inline' 'unsafe-eval' https:; style-src 'self' 'unsafe-inline' https:
Header explanations:
-
-
- Strict-Transport-Security: Enforces HTTPS for 1 year, includes subdomains
- X-Content-Type-Options: Prevents MIME-type sniffing attacks
- X-Frame-Options: Blocks clickjacking via iframes
- X-XSS-Protection: Enables browser XSS filtering (legacy but still useful)
- Content-Security-Policy: Restricts resource loading to approved sources
-
Test headers with:
curl -I https://mywebsite.com
Verify all security headers appear in the response.
Regular Updates and Patching
Security is ongoing. Establish a routine:
Weekly:
sudo apt update && sudo apt upgrade -y
This updates OpenLiteSpeed, LSPHP, and system packages.
Monthly:
-
-
- Review
/usr/local/lsws/logs/error.logfor suspicious patterns - Check OWASP ModSecurity rules for updates
- Audit user accounts and remove unused SSH keys
- Review
-
Quarterly:
-
-
- Run security audits with tools like Lynis or OpenVAS
- Review and rotate passwords for admin accounts
- Test backup restoration procedures
-
Automate security updates where possible:
sudo apt install -y unattended-upgrades
sudo dpkg-reconfigure unattended-upgrades
Select “Yes” to enable automatic security updates. This ensures critical patches are applied without manual intervention.
Troubleshooting Common Issues
OpenLiteSpeed Won’t Start
Symptoms: systemctl status lshttpd shows “failed” or “activating (auto-restart)”
Diagnosis:
-
-
- Check error log:
sudo tail -50 /usr/local/lsws/logs/error.log
- Look for specific errors:
- “Address already in use”: Another service (Apache, Nginx) is using port 80 or 7080
- “Permission denied”: File/directory permissions issue
- “Cannot bind to port”: Firewall or SELinux blocking
- Check error log:
-
Solutions:
-
-
- Port conflict: Stop competing service:
sudo systemctl stop apache2
sudo systemctl disable apache2
Or change OpenLiteSpeed’s port in Listeners configuration.
- Permission issues: Ensure OpenLiteSpeed can read/write its directories:
sudo chown -R nobody:nogroup /usr/local/lsws
sudo chmod -R 755 /usr/local/lsws
- SELinux: If enabled ( uncommon on Ubuntu), check:
getenforce
If “Enforcing”, temporarily set to permissive for testing:
sudo setenforce 0
- Port conflict: Stop competing service:
-
503 Service Unavailable Errors
Symptoms: Visitors see “503 Service Unavailable” during traffic spikes
Diagnosis:
Check Real-Time Stats in WebAdmin Console. If “Max Connections” or “PHP process limit” is consistently hit, you’ve outgrown current limits.
Solutions:
-
-
- Increase Max Connections:
- Go to Server Configuration → Tuning
- Increase Max Connections by 500-1000 increments
- Graceful restart
- Increase LSPHP Max Connections:
- Go to Server Configuration → External App → Select LSPHP handler
- Increase Max Connections from default (e.g., 40 → 80)
- Increase Process Soft/Hard Limit proportionally
- Add more RAM: If PHP processes are memory-bound, no amount of tuning will help. Upgrade server resources.
- Increase Max Connections:
-
PHP Pages Show Blank White Screen
Symptoms: Accessing .php files returns blank page (no error message)
Diagnosis:
-
-
- Enable PHP error display temporarily:
Edit/usr/local/lsws/lsphp84/etc/php/8.4/litespeed/php.ini:display_errors = On error_reporting = E_ALL
- Check OpenLiteSpeed error log:
sudo tail -50 /usr/local/lsws/logs/error.log
- Common causes:
- Missing PHP extensions
- Syntax errors in PHP code
- File permission issues (PHP can’t read files)
- Enable PHP error display temporarily:
-
Solutions:
-
-
- Missing extensions: Install required LSPHP packages:
sudo apt install lsphp84-mysql lsphp84-gd lsphp84-curl
- Permission issues: Ensure OpenLiteSpeed user can read PHP files:
sudo chmod 644 /path/to/your/script.php
sudo chown nobody:nogroup /path/to/your/script.php
- Syntax errors: Review PHP error log or enable error display as above.
- Missing extensions: Install required LSPHP packages:
-
SSL Certificate Not Loading
Symptoms: Browser shows “Not Secure” warning or certificate errors
Diagnosis:
-
-
- Verify certificate files exist:
ls -la /etc/letsencrypt/live/mywebsite.com/
- Check OpenLiteSpeed SSL configuration in Listeners → SSL tab
- Test certificate validity:
sudo openssl x509 -in /etc/letsencrypt/live/mywebsite.com/fullchain.pem -text -noout
- Verify certificate files exist:
-
Solutions:
-
-
- Certificate expired: Renew with:
sudo certbot renew
sudo systemctl reload lshttpd
- Incorrect paths: In WebAdmin, verify Certificate File and Certificate Key File point to correct paths
- Mixed content: Site loads over HTTPS but includes HTTP resources (images, scripts). Fix by updating all URLs to HTTPS or using protocol-relative URLs (
//example.com/script.js)
- Certificate expired: Renew with:
-
High CPU Usage
Symptoms: Server CPU at 100%, slow response times
Diagnosis:
-
-
- Identify top processes:
htop
- Check OpenLiteSpeed’s Real-Time Stats for request patterns
- Look for:
- Runaway PHP scripts (infinite loops, heavy computations)
- Brute-force attacks (thousands of login attempts)
- Uncached dynamic content (every request hitting PHP)
- Identify top processes:
-
Solutions:
-
-
- Runaway scripts: Set lower Memory Hard Limit and Max Execution Time in PHP configuration
- Brute-force attacks: Enable Connection Throttling and DDoS Mitigation in Security settings
- Uncached content: Enable LSCache and configure appropriate TTLs. For WordPress, install the LiteSpeed Cache plugin.
-

