
Every few years, the same story repeats. A phone fills up, a cloud plan gets more expensive, and a folder named “DCIM_backup_final2” turns into 80,000 files nobody can search. Then someone decides to self-host their photo library. PhotoPrism is a common answer to that problem, and it is a good one. It is an AI-assisted, self-hosted photo manager that indexes JPEGs, RAW files, videos and sidecar metadata. It adds face recognition, place detection, and label-based search without sending your pictures to a third party.
Getting it running is easy. Getting it running well is a different matter. A default install on a small VPS can grind through a first index for days. It can also leave port 2342 exposed to the whole internet, and it can lose its database the first time someone runs docker compose down -v out of habit. Those are the failures that show up in real deployments.
Ubuntu 26.04 LTS, codenamed Resolute Raccoon, was released on 23 April 2026. Its 26.04.1 point release arrived on 27 August 2026, which is when most administrators treat an LTS as ready for production. Standard security maintenance runs until May 2031. That makes it a sensible base for a photo server you want to leave alone for years.
This guide covers the full path. It starts with host preparation and Docker, then moves through the compose stack, a reverse proxy with TLS, performance tuning, backups, and the errors you are most likely to hit.
What PhotoPrism Is and Why Docker Is the Right Way to Run It
PhotoPrism is a Go application with a Vue front end. It leans on TensorFlow for classification, FFmpeg for video transcoding, and darktable or RawTherapee for RAW conversion. Installing all of that natively on a host means managing a pile of codec libraries and version pinning. The maintainers ship a container image with everything pre-built, and that is the supported route. Their own documentation says it runs best with Docker on distributions such as Ubuntu and Debian, and with Podman on Red Hat-family systems like AlmaLinux and Rocky Linux.
So the plan is simple. Docker runs two containers, PhotoPrism and MariaDB. Nginx sits in front and handles TLS. Your photos live on the host filesystem, outside the container lifecycle, where you can back them up with ordinary tools.
Why MariaDB Instead of SQLite
PhotoPrism can fall back to SQLite if no database credentials are provided. For a single user with a few thousand photos, that works. For anything bigger, the documentation recommends MariaDB because it handles concurrency better. Indexing, thumbnail generation, and a browser session all write at once. SQLite serializes those writes, and you feel it as sluggish scrolling during an import. Start with MariaDB and skip a migration later.
Server Requirements and Sizing
Photo indexing is CPU and memory hungry in bursts, then nearly idle. Size for the burst.
| Library size | vCPU | RAM | Swap | Notes |
|---|---|---|---|---|
| Up to 20,000 files | 2 | 4 GB | 4 GB | Fine for a family archive |
| 20,000 to 100,000 files | 4 | 8 GB | 4 GB | Comfortable for face detection |
| 100,000+ files or heavy RAW | 6+ | 16 GB | 8 GB | Consider NVMe for cache |
The official guidance recommends at least 4 GB of RAM and swap space, and a 64-bit CPU. That matters because TensorFlow models and RAW conversion can spike memory use. A 2 GB VPS will start, and then the kernel’s OOM killer will end the indexer halfway through your first import.
Storage deserves more thought than CPU. Originals are the irreplaceable part. The cache and thumbnails are disposable and can be rebuilt. Put originals on reliable storage with redundancy, and put the storage folder (cache, thumbnails, sidecars) on the fastest disk you have.
Preparing Ubuntu 26.04 LTS
Start with a fresh, fully patched system. If this is a machine that was upgraded from 24.04, confirm the release first.
lsb_release -a
uname -r
You should see Ubuntu 26.04 and a kernel from the 7.x series. Now update everything and reboot if the kernel changed.
sudo apt update
sudo apt full-upgrade -y
sudo apt install -y curl ca-certificates gnupg ufw unattended-upgrades htop iotop ncdu
sudo systemctl reboot
Create a Dedicated Directory Layout
A predictable layout saves you hours later. Use /opt/photoprism for configuration and a separate path for data. If you have a second disk mounted at /srv/photos, use that for originals.
sudo mkdir -p /opt/photoprism
sudo mkdir -p /srv/photos/originals /srv/photos/import
sudo mkdir -p /srv/photoprism/storage /srv/photoprism/database
sudo chown -R $USER:$USER /opt/photoprism
Think about what each directory means before you populate it:
- originals holds your master files. PhotoPrism reads here and, unless configured otherwise, never rewrites your photos.
- import is a landing zone. Files placed there can be moved into originals and organized by date.
- storage holds the cache, thumbnails, sidecar YAML files and configuration.
- database holds the MariaDB data files.
Add Swap if the Host Has None
Many cloud images ship without swap. A modest swap file is cheap insurance against indexing spikes.
sudo fallocate -l 4G /swapfile
sudo chmod 600 /swapfile
sudo mkswap /swapfile
sudo swapon /swapfile
echo '/swapfile none swap sw 0 0' | sudo tee -a /etc/fstab
Lower the swappiness so the kernel prefers RAM and only uses swap under real pressure.
echo 'vm.swappiness=10' | sudo tee /etc/sysctl.d/99-photoprism.conf
sudo sysctl --system
Installing Docker Engine and the Compose Plugin
There are two sane options. The first is Docker’s own apt repository, which gives current Engine releases. The second is the docker.io package from Ubuntu’s archive, which is older but supported by Canonical’s repositories. PhotoPrism also publishes a helper script that installs the latest Docker version with the Compose plugin on Ubuntu in one step. Piping a remote script into bash is a habit worth questioning on a production host, so the manual route is shown here.
sudo install -m 0755 -d /etc/apt/keyrings
sudo curl -fsSL https://download.docker.com/linux/ubuntu/gpg -o /etc/apt/keyrings/docker.asc
sudo chmod a+r /etc/apt/keyrings/docker.asc

echo "deb [arch=$(dpkg --print-architecture) signed-by=/etc/apt/keyrings/docker.asc] https://download.docker.com/linux/ubuntu $(. /etc/os-release && echo "${UBUNTU_CODENAME:-$VERSION_CODENAME}") stable" | sudo tee /etc/apt/sources.list.d/docker.list > /dev/null

sudo apt update
sudo apt install -y docker-ce docker-ce-cli containerd.io docker-buildx-plugin docker-compose-plugin
If apt update complains that the repository has no Release file for resolute, Docker has not published packages for that codename yet. That can happen shortly after an LTS launch. In that case, remove the list file and install the distribution package instead:
sudo rm /etc/apt/sources.list.d/docker.list
sudo apt update
sudo apt install -y docker.io docker-compose-v2
Either way, verify the result.
sudo systemctl enable --now docker
docker --version
docker compose version
sudo docker run --rm hello-world
One note on the legacy command. The standalone docker-compose v1 binary was retired by Docker in mid-2023, and PhotoPrism no longer supports it. Use docker compose with a space. If old scripts still call the hyphenated version, the PhotoPrism docs show how to add a small shell wrapper.
Adding your user to the docker group saves typing sudo, but it is effectively root-equivalent access. On a shared server, keep using sudo.
Writing the Compose File
PhotoPrism publishes a reference compose.yaml that you can download directly:
cd /opt/photoprism
wget https://dl.photoprism.app/docker/compose.yaml
Their file includes a pre-configured MariaDB server. Rather than edit blindly, this guide uses a version adapted for a reverse-proxy setup with bind-mounted host paths. Compare it against the current upstream file before deploying, because environment variables occasionally change between releases.
First, create an environment file for secrets. Keeping passwords out of the compose file makes version control safer.
cd /opt/photoprism
umask 077
cat > .env <<'EOF'
PHOTOPRISM_ADMIN_USER=admin
PHOTOPRISM_ADMIN_PASSWORD=ChangeThisLongPassphrase2026
MARIADB_ROOT_PASSWORD=GenerateARandomRootPassword
MARIADB_PASSWORD=GenerateARandomDbPassword
PHOTOPRISM_SITE_URL=https://photos.example.com/
EOF
Generate real random values with openssl rand -base64 24. The official quickstart is blunt on this point: always change the admin password so the app starts with a secure initial one.
Now the compose file itself.
services:
  photoprism:
    image: photoprism/photoprism:latest
    container_name: photoprism
    restart: unless-stopped
    stop_grace_period: 15s
    depends_on:
      - mariadb
    security_opt:
      - seccomp:unconfined
      - apparmor:unconfined
    ports:
      - "127.0.0.1:2342:2342"
    environment:
      PHOTOPRISM_ADMIN_USER: ${PHOTOPRISM_ADMIN_USER}
      PHOTOPRISM_ADMIN_PASSWORD: ${PHOTOPRISM_ADMIN_PASSWORD}
      PHOTOPRISM_AUTH_MODE: "password"
      PHOTOPRISM_SITE_URL: ${PHOTOPRISM_SITE_URL}
      PHOTOPRISM_DISABLE_TLS: "true"
      PHOTOPRISM_DEFAULT_TLS: "false"
      PHOTOPRISM_ORIGINALS_LIMIT: 5000
      PHOTOPRISM_HTTP_COMPRESSION: "gzip"
      PHOTOPRISM_LOG_LEVEL: "info"
      PHOTOPRISM_READONLY: "false"
      PHOTOPRISM_DATABASE_DRIVER: "mysql"
      PHOTOPRISM_DATABASE_SERVER: "mariadb:3306"
      PHOTOPRISM_DATABASE_NAME: "photoprism"
      PHOTOPRISM_DATABASE_USER: "photoprism"
      PHOTOPRISM_DATABASE_PASSWORD: ${MARIADB_PASSWORD}
      PHOTOPRISM_WORKERS: 2
      PHOTOPRISM_INIT: "https tensorflow"
    working_dir: "/photoprism"
    volumes:
      - "/srv/photos/originals:/photoprism/originals"
      - "/srv/photos/import:/photoprism/import"
      - "/srv/photoprism/storage:/photoprism/storage"

  mariadb:
    image: mariadb:12.3
    container_name: photoprism-db
    restart: unless-stopped
    stop_grace_period: 15s
    security_opt:
      - seccomp:unconfined
      - apparmor:unconfined
    command: --innodb-buffer-pool-size=512M --transaction-isolation=READ-COMMITTED --character-set-server=utf8mb4 --collation-server=utf8mb4_unicode_ci --max-connections=512 --innodb-rollback-on-timeout=OFF --innodb-lock-wait-timeout=120
    volumes:
      - "/srv/photoprism/database:/var/lib/mysql"
    environment:
      MARIADB_AUTO_UPGRADE: "1"
      MARIADB_INITDB_SKIP_TZINFO: "1"
      MARIADB_DATABASE: "photoprism"
      MARIADB_USER: "photoprism"
      MARIADB_PASSWORD: ${MARIADB_PASSWORD}
      MARIADB_ROOT_PASSWORD: ${MARIADB_ROOT_PASSWORD}
Decisions Worth Understanding
A few lines in that file are there on purpose.
Binding to 127.0.0.1. Publishing "2342:2342" makes Docker open the port on every interface. Docker writes its own iptables rules, and those bypass UFW entirely. A lot of administrators discover this the hard way when a “firewalled” service turns out to be reachable from the internet. Binding to loopback means only Nginx on the same host can reach PhotoPrism.
Pinning the MariaDB version. The PhotoPrism troubleshooting docs recommend a version or subversion tag such as :11 or :11.8 rather than :latest, for the database image. Their example uses mariadb:12.3, which this file follows. An unpinned database image can jump a major version during a routine pull, and you get a startup failure when you are least prepared.
MARIADB_AUTO_UPGRADE. This must be set to a non-empty value if you want automatic schema updates when moving to a new major MariaDB version.
PHOTOPRISM_WORKERS. This controls how many indexing workers run in parallel. The default scales with CPU count, and on a small VPS that can saturate the machine. Setting it to 2 keeps the site responsive during the first index. Raise it later once the initial import is done.
Pinning PhotoPrism too. The latest tag is convenient but unpredictable. Many production setups use a dated tag such as photoprism/photoprism:YYMMDD. Check the available tags on Docker Hub and pin to one, then upgrade deliberately.
Starting the Stack
cd /opt/photoprism
docker compose config -q && echo "compose file OK"
docker compose pull
docker compose up -d
docker compose ps
docker compose logs -f photoprism
The config -q step catches YAML mistakes before they cost you a restart cycle. The first start takes a minute or two because the database initializes and PhotoPrism creates its schema. Watch the logs until you see the server listening on port 2342. The default address in the docs is http://localhost:2342/, and logs are viewable any time with docker compose logs -f.
Test it locally from the server:
curl -I http://127.0.0.1:2342/A 200 or a redirect means the application is alive.
Putting Nginx and HTTPS in Front
Exposing PhotoPrism directly on a port works for a lab. For anything reachable from outside your LAN, use a reverse proxy with a valid certificate. It gives you clean URLs, real TLS, compression control and a place to apply rate limits.
sudo apt install -y nginx certbot python3-certbot-nginxCreate the site configuration. The upstream needs WebSocket headers because the UI uses them for live updates.
# /etc/nginx/sites-available/photoprism.conf
server {
    listen 80;
    listen [::]:80;
    server_name photos.example.com;

    client_max_body_size 500M;

    location / {
        proxy_pass http://127.0.0.1:2342;
        proxy_set_header Host $host;
        proxy_set_header X-Real-IP $remote_addr;
        proxy_set_header X-Forwarded-For $proxy_add_x_forwarded_for;
        proxy_set_header X-Forwarded-Proto $scheme;

        proxy_http_version 1.1;
        proxy_set_header Upgrade $http_upgrade;
        proxy_set_header Connection "upgrade";

        proxy_buffering off;
        proxy_request_buffering off;
        proxy_read_timeout 600s;
        proxy_send_timeout 600s;
    }
}
Enable it and request a certificate.
sudo ln -s /etc/nginx/sites-available/photoprism.conf /etc/nginx/sites-enabled/
sudo nginx -t && sudo systemctl reload nginx
sudo certbot --nginx -d photos.example.com --redirect -m you@example.com --agree-tos
Why those settings? client_max_body_size defaults to 1 MB, which breaks any upload bigger than a thumbnail. proxy_request_buffering off streams uploads straight to the backend rather than writing them to Nginx’s temp directory first, which matters when you push a 4 GB video from a phone. The long read timeout stops Nginx from killing slow requests while PhotoPrism is busy converting a RAW file.
Make sure PHOTOPRISM_SITE_URL in your .env matches the public HTTPS address exactly, including the trailing slash. A mismatch causes broken share links and, sometimes, login redirect loops.
Confirm automatic certificate renewal works before you forget about it:
sudo certbot renew --dry-run
systemctl list-timers | grep certbot
Firewall and Host Hardening
With the container bound to loopback, the firewall only needs SSH and web ports.
sudo ufw default deny incoming
sudo ufw default allow outgoing
sudo ufw allow OpenSSH
sudo ufw allow 80/tcp
sudo ufw allow 443/tcp
sudo ufw enable
sudo ufw status verbose
Be careful with the order. Enable the SSH rule before turning UFW on, or you will lock yourself out of a remote server. Some tutorials suggest opening 2342 directly, which is fine on a trusted LAN. On a public host it is unnecessary once Nginx is in place.
Additional Hardening Steps
- Turn on unattended security updates with
sudo dpkg-reconfigure -plow unattended-upgrades. - Install
fail2banand enable thesshdjail to cut down on brute-force noise. - Use SSH keys only, and set
PasswordAuthentication noin/etc/ssh/sshd_config.d/. - Restrict
/opt/photoprism/.envto600permissions, since it holds database and admin credentials. - Do not publish MariaDB’s port 3306. The compose file above does not, and that is deliberate. Exposing it is only needed for troubleshooting from another machine.
- Add an Nginx
limit_reqzone on the login endpoint if the site faces the public internet.
If you only need access for yourself and family, consider skipping public exposure altogether. Putting the server behind WireGuard or Tailscale removes the whole category of internet-facing attacks.
First Login and Initial Indexing
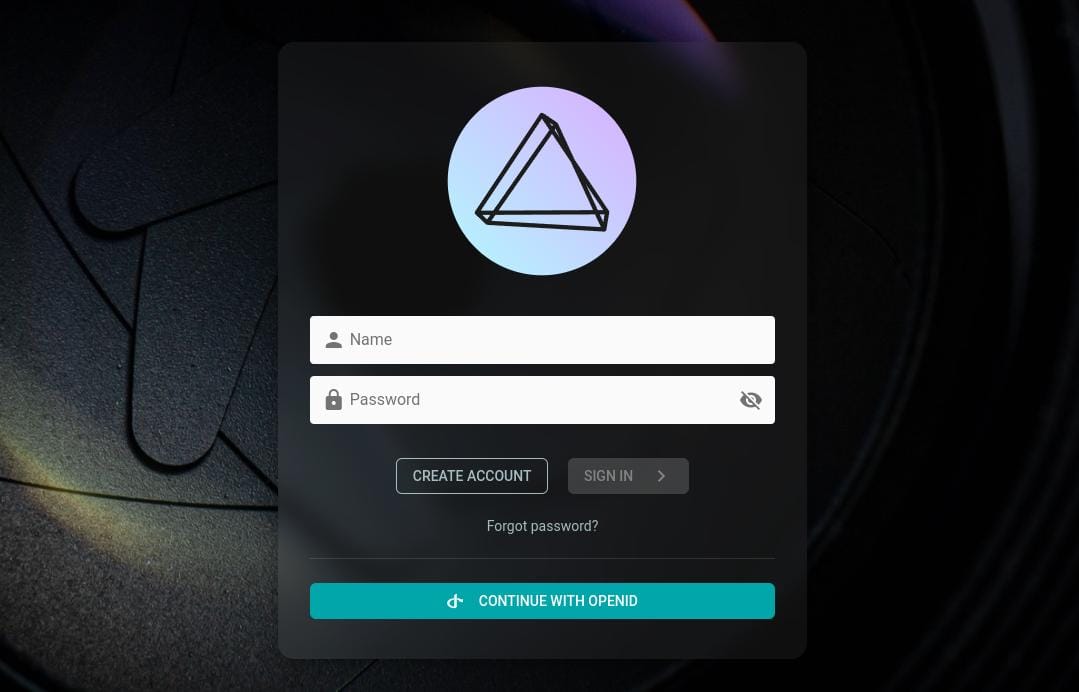
Open https://photos.example.com/ and sign in with the admin credentials from .env. Then go to Library, Originals, and start indexing. Before you copy 200 GB of photos into the originals folder, set permissions correctly.
sudo chown -R 1000:1000 /srv/photos /srv/photoprism/storagePhotoPrism runs as UID 1000 by default inside the container unless you override PHOTOPRISM_UID and PHOTOPRISM_GID. If the numbers do not line up with the host owner, you get permission errors on writes. For bind mounts, that mismatch is the number one cause of “it works, but nothing saves.”
Copy a few hundred test photos first. Check that thumbnails render, that places resolve, and that RAW files open. Then bring in the rest. Large libraries index in the background, and the UI remains usable while it works.
Watching a Large Import
Open a second terminal during the first big run.
docker stats photoprism photoprism-db
iostat -xz 5
sudo iotop -oPa
If CPU sits at 100 percent for hours, that is normal for the first pass. If load climbs but memory remains stable and disk wait stays low, the system is doing what it should. If docker stats shows memory climbing toward the container limit, lower PHOTOPRISM_WORKERS and let the job finish at a slower pace.
Performance Tuning That Actually Matters
Most tuning advice online is cargo cult. These are the changes that make a measurable difference.
CPU
Match PHOTOPRISM_WORKERS to your real core count minus one or two. Face detection and classification use TensorFlow, which is CPU-bound without a GPU. On modest hardware, you can disable features you do not need through the settings UI to save cycles. Turning off face recognition, for example, trims indexing time noticeably on a large library.
RAM and MariaDB
The innodb-buffer-pool-size flag in the compose file is set to 512M, which is conservative. On a server with 8 GB or more, raise it to 1G or 2G so the working set of the index stays in memory. Check the effect with:
docker compose exec mariadb mariadb -uroot -p -e "SHOW GLOBAL STATUS LIKE 'Innodb_buffer_pool_read%';"A high ratio of reads to read_requests means the pool is too small.
Disk I/O
Put /srv/photoprism/storage on SSD or NVMe. Thumbnail generation produces a flood of small writes and reads, and spinning disks suffer. Originals can sit on slower, larger storage because they are mostly read once during indexing.
For ext4 volumes, mounting with noatime removes needless metadata writes. In /etc/fstab, add it to the options for your photo disk:
UUID=xxxx-xxxx /srv/photos ext4 defaults,noatime 0 2Avoid network filesystems for the database directory. NFS and SMB with MariaDB invite lock problems and corruption. Keep the database on local disk, and mount NFS only for originals if you have to.
Network
Enable compression at the application level, which the compose file already does with PHOTOPRISM_HTTP_COMPRESSION: "gzip". Thumbnails are already compressed images, so do not waste Nginx CPU recompressing JPEGs. Gzip text assets only, and let the browser cache static files.
Thumbnail Size and Quality
Settings under Library, Index and Customize allow you to cap the thumbnail resolution. A cap around 2048 pixels covers the vast majority of screens and cuts cache storage substantially compared with 7680. Cache size is one of the things that quietly eats a disk. Check it with ncdu /srv/photoprism/storage.
Backups You Can Actually Restore
A photo server without backups is a slow way to lose memories. Two things need protection: the originals and the database. The cache can be rebuilt.
For the database, use a logical dump on a schedule.
#!/bin/bash
# /usr/local/bin/photoprism-dbdump.sh
set -euo pipefail
cd /opt/photoprism
source .env
STAMP=$(date +%F_%H%M)
mkdir -p /srv/backups/db
docker compose exec -T mariadb mariadb-dump -uroot -p"${MARIADB_ROOT_PASSWORD}" --single-transaction photoprism | gzip > /srv/backups/db/photoprism_${STAMP}.sql.gz
find /srv/backups/db -type f -mtime +14 -delete
Make it executable and schedule it:
sudo chmod +x /usr/local/bin/photoprism-dbdump.sh
echo '30 3 * * * root /usr/local/bin/photoprism-dbdump.sh' | sudo tee /etc/cron.d/photoprism-db
For originals, use restic or borg to an off-site target. Follow the 3-2-1 idea: three copies, two media types, one off-site. Sidecar YAML files in the storage folder hold your edits, labels and favorites, so include the sidecar directory in the backup set too. Then test a restore on a scratch machine at least once. A backup you have never restored is a hope, not a plan.
Upgrading Safely
Upgrades are mostly painless if you do them in the right order. Dump the database first, then pull and recreate.
/usr/local/bin/photoprism-dbdump.sh
cd /opt/photoprism
docker compose pull
docker compose down
docker compose up -d
docker image prune -f
Read the release notes before a major version jump. If a schema migration fails to apply automatically, PhotoPrism ships CLI commands to list and run migrations manually:
docker compose exec photoprism photoprism migrations ls
docker compose exec photoprism photoprism migrations run -f
Both commands are documented in the MariaDB troubleshooting section.
Troubleshooting Common Errors
The Container Restarts in a Loop
Check the logs first.
docker compose logs --tail=100 photoprism
docker compose logs --tail=100 mariadb
The usual cause is the application starting before MariaDB is ready, or bad credentials. Confirm that PHOTOPRISM_DATABASE_PASSWORD matches MARIADB_PASSWORD exactly. One catch: MariaDB only reads those variables on its first initialization. If you changed the password after the data directory was created, the new value is ignored. Either change the password inside MariaDB with an ALTER USER statement, or wipe the database directory if the install is brand new.
“Access Denied” or Connection Refused for the Database
Verify the host and port. Inside the compose network the server name is mariadb and the port is 3306. The PhotoPrism docs advise setting database name, server, user and password explicitly through the PHOTOPRISM_DATABASE_* variables to avoid this class of problem. To connect from the host, you must publish port 3306, and that should be a temporary measure on a loopback address only.
Permission Denied When Writing to Storage or Originals
Compare UIDs.
ls -ln /srv/photos /srv/photoprism
docker compose exec photoprism id
Fix with chown -R 1000:1000 or set PHOTOPRISM_UID and PHOTOPRISM_GID to match your host user. Remember that SELinux is not the culprit on Ubuntu, but on AlmaLinux or Rocky it can be. There you would add the :Z suffix to the bind mounts or label the directories with chcon.
Uploads Fail or Time Out Behind Nginx
Look for 413 Request Entity Too Large in /var/log/nginx/error.log. That is the client_max_body_size limit. A 504 or 502 on big files points to timeouts, so raise proxy_read_timeout. Reload Nginx after each change and test with a single large video.
Indexing Is Painfully Slow or Stops
Look for the OOM killer.
sudo dmesg -T | grep -i -E "killed process|out of memory"
free -h
If it fired, reduce workers, add swap, or increase RAM. Also check that your originals are not on a slow network share. Slow metadata reads over SMB will bottleneck the indexer long before the CPU does.
Docker Bypasses the Firewall
If a scan shows port 2342 open to the world, you published it on all interfaces. Change the compose mapping to 127.0.0.1:2342:2342 and run docker compose up -d again. Confirm with ss -tlnp | grep 2342.
“docker-compose: command not found”
That is the retired v1 binary. Use docker compose. The Compose plugin is available on Ubuntu and Debian via sudo apt install docker-compose-plugin, as PhotoPrism’s Docker troubleshooting page notes.
Browser Shows Mixed Content or Redirect Loops
Check that PHOTOPRISM_SITE_URL uses HTTPS, that Nginx sends X-Forwarded-Proto, and that PHOTOPRISM_DISABLE_TLS is true because TLS terminates at Nginx. If you leave PhotoPrism’s own TLS on while Nginx also does TLS, you get confusing loops.
